Quick answer
To stitch the Mysterious Guest Black Cat PDF Pattern, you'll transfer the design to fabric using carbon transfer papers or transfer pens, then follow the included instructions to embroider the cat outline and details.
Why this pattern is perfect for cat lovers
The Mysterious Guest design was inspired by the designer's own black cat, Cleo, so it captures the playful yet elegant personality of a dark feline. The PDF includes extra tips on recreating specific embroidered effects, making it a great project for embroiderers who want to add texture and character to their work.
What you need before you start
Gather your fabric, embroidery hoop, needles, and floss in colors that match the design. You'll also need either Sublime Stitching Carbon Transfer Papers or Transfer Pens to trace the pattern onto your fabric. The PDF itself provides full instructions, so you don't need prior embroidery experience.
Step-by-step stitching guide
- 1. Print and prepare the pattern: Print the Mysterious Guest PDF at full size. Make sure your printer settings are set to 'Actual Size' so the pattern dimensions are correct. Common mistake: Printing with 'Fit to Page' can distort the design. Always check the scale before cutting.
- 2. Transfer the design to fabric: Place carbon transfer paper (ink side down) between the printed pattern and your fabric. Trace over the lines with a stylus or pen. Alternatively, use a transfer pen to trace the design onto paper, then iron it onto the fabric. Checkpoint: Test a small corner first to confirm the transfer is dark enough. If using transfer pens, let the ink dry completely before ironing.
- 3. Hoop the fabric securely: Place the fabric in an embroidery hoop, tightening the screw until the fabric is taut but not stretched. Center the transferred design within the hoop. Common mistake: Over-tightening can distort the fabric and make stitches uneven. Adjust until the fabric is smooth but not drum-tight.
- 4. Stitch the outline using backstitch: Use a backstitch to outline the cat's shape. This creates a clean, continuous line. For the tail and whiskers, use a single strand of floss for finer detail. Checkpoint: Keep stitch length consistent (about 2-3 mm) for a professional look. If the line curves, shorten your stitches slightly.
- 5. Fill in the body with satin stitch: Work satin stitches close together to fill the cat's body. Use two strands of floss for a solid coverage. Follow the direction of the fur for a natural look. Common mistake: Gaps between stitches can appear if you don't lay each stitch snugly against the previous one. Use a needle to gently push threads together if needed.
- 6. Add details like eyes and nose: Use French knots or small straight stitches for the eyes and nose. Refer to the pattern's extra tips for recreating the embroidered effects that give the cat its 'mysterious' expression. Checkpoint: Place the eyes symmetrically. If the fabric shifts, use a water-soluble marker to mark the positions before stitching.
- 7. Finish and display your work: Remove the fabric from the hoop, trim excess fabric, and press from the back with a warm iron. Mount in a frame or sew onto a garment or bag. Common mistake: Washing the embroidery before pressing can cause the transfer lines to set. Always press first and wash only if necessary.
Product details
-
Mysterious Guest Black Cat PDF Pattern: The PDF includes transfer instructions, a reversed design, and extra tips on recreating embroidered effects. You get everything needed to transfer and stitch the design accurately, even if you're new to embroidery.
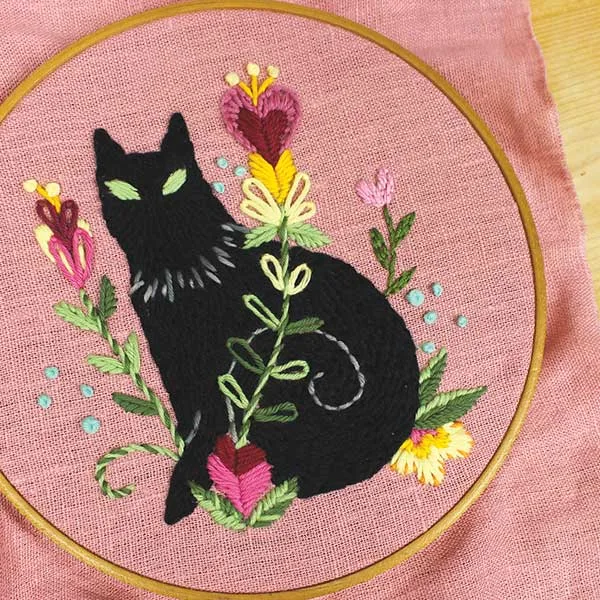
Mysterious Guest Black Cat PDF Pattern