Quick answer
The BERNINA #95C Binder Foot lets you apply single-fold or double-fold binding in one pass, saving time and ensuring even folds. Follow these steps to attach it and sew binding like a pro.
Why use a binder foot instead of hand pinning?
Hand pinning binding takes time and can result in uneven edges. The #95C Binder Foot feeds binding tape through a built-in folder that wraps it evenly around the fabric edge as you sew. This eliminates the need for pins and gives a clean, professional finish on quilts, garments, and home decor projects.
The foot works with both single-fold and double-fold binding, so you can use it for different projects without switching feet. Just adjust the binding width to match your tape.
Step-by-step guide
- Attach the foot and prepare the machine: Remove your standard presser foot and attach the #95C Binder Foot. Set your machine to a straight stitch (length 2.5–3 mm) and lower the presser foot. Make sure the needle is centered. Common mistake: forgetting to center the needle, which can cause the needle to hit the foot.
- Prepare your binding tape: Cut your binding tape to the required length, adding a few inches for overlap. If using single-fold binding, press it in half lengthwise. For double-fold, press both edges toward the center. The tape should be slightly wider than the foot's folder to feed smoothly. Checkpoint: ensure the binding width matches the foot's folder capacity—usually up to 1 inch (25 mm).
- Feed the binding into the folder: With the presser foot raised, insert the end of the binding tape into the folder from the back, pushing it through until it emerges under the foot. Lower the foot and pull the tape gently to the rear. Common mistake: forcing the tape if it snags—trim the end at a slight angle to ease insertion.
- Position your fabric and start sewing: Place your fabric edge under the foot, aligning it with the binding. Lower the needle into the fabric at the starting point. Begin sewing slowly, guiding the fabric so the binding wraps evenly around the edge. The foot's groove keeps the tape aligned. Checkpoint: sew a test scrap first to check tension and alignment before working on your project.
- Finish the binding ends: When you reach the starting point, overlap the binding ends by about 1 inch (2.5 cm). Trim the excess, fold the overlap, and sew over it to secure. Backstitch or tie off threads. Common mistake: overlapping too little, causing the binding to pull apart—always overlap at least 1 inch.
Product facts
-
#95C BERNINA Binder Foot: The BERNINA #95C Binder Foot has a built-in folder that feeds binding tape evenly around fabric edges. This means you can apply binding in one pass without hand pinning, saving time and reducing frustration.
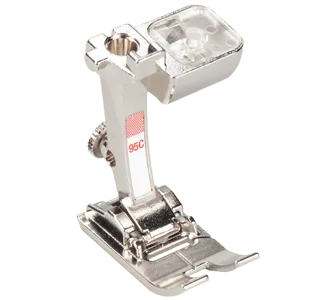
#95C BERNINA Binder Foot