There's something deeply satisfying about pulling a tray of perfectly shaped cookies from the oven. Whether you're baking for a holiday party, a child's birthday, or simply to enjoy a creative afternoon, cookie cutters are the key to consistent, professional-looking results. But anyone who has tried knows that getting clean, crisp edges isn't always easy. Dough can stick, shapes can warp, and edges can blur. This guide will walk you through every step of using cookie cutters effectively, from choosing the right dough to baking with confidence.
With a few simple techniques and the right tools, you can achieve bakery-quality cookies at home. We'll cover dough preparation, flouring, cutting methods, and even how to handle intricate designs. By the end, you'll be ready to tackle any cookie cutter project with ease.
Choose the Right Dough for Cookie Cutters
Not all cookie doughs are created equal when it comes to cut-out shapes. The best dough for cookie cutters is one that holds its shape during baking without spreading too much. A classic sugar cookie or shortbread recipe works wonderfully because they have a higher fat-to-flour ratio and often include a bit of cornstarch or powdered sugar to reduce spread. Avoid doughs that are too soft or sticky, as they will cling to the cutter and lose definition.
Chilling the dough is non-negotiable. After mixing, wrap the dough in plastic and refrigerate for at least 30 minutes, or up to overnight. This firms up the butter, making the dough easier to roll and cut. If you're short on time, you can even freeze the dough for 15 minutes. For best results, roll the dough between two sheets of parchment paper before chilling — this prevents sticking and saves cleanup.
- Use a recipe specifically designed for cut-out cookies, such as a rolled sugar cookie or gingerbread.
- Chill dough thoroughly before rolling and cutting to minimize spreading.
- If dough becomes too soft while cutting, pop it back in the fridge for 10 minutes.
Prepare Your Work Surface and Tools
A clean, lightly floured surface is essential for successful cookie cutting. Too much flour can dry out the dough, so use a light dusting. Alternatively, you can roll the dough between two sheets of parchment paper or use a non-stick mat. The 5 Colour-Coded Fleximats are an excellent choice for this task — they provide a non-slip, easy-to-clean surface that helps prevent dough from sticking and makes transferring cut shapes a breeze.
Your cookie cutters should be clean and dry before use. If they are metal, a quick dip in flour can help release the dough. For plastic cutters, a light spray of non-stick cooking spray works well. Have a thin metal spatula or offset spatula ready to lift cut shapes onto the baking sheet. This prevents distortion and keeps edges sharp.
- Dust work surface and cutters lightly with flour, but avoid over-flouring.
- Use a non-stick mat or parchment paper for easy rolling and transfer.
- Keep a thin spatula handy to lift delicate shapes without breaking them.
Master the Cutting Technique
When pressing the cutter into the dough, use a firm, straight-down motion. Do not twist or wiggle the cutter, as this can seal the edges and prevent the cookie from rising evenly. Instead, press firmly and lift straight up. If the dough sticks, gently tap the cutter against the counter or use a small knife to loosen the edges. For intricate shapes, like those from the Design-A-Dog Icing Face Cutters Set, you may need to press a bit harder and use a toothpick to gently release the dough from small crevices.
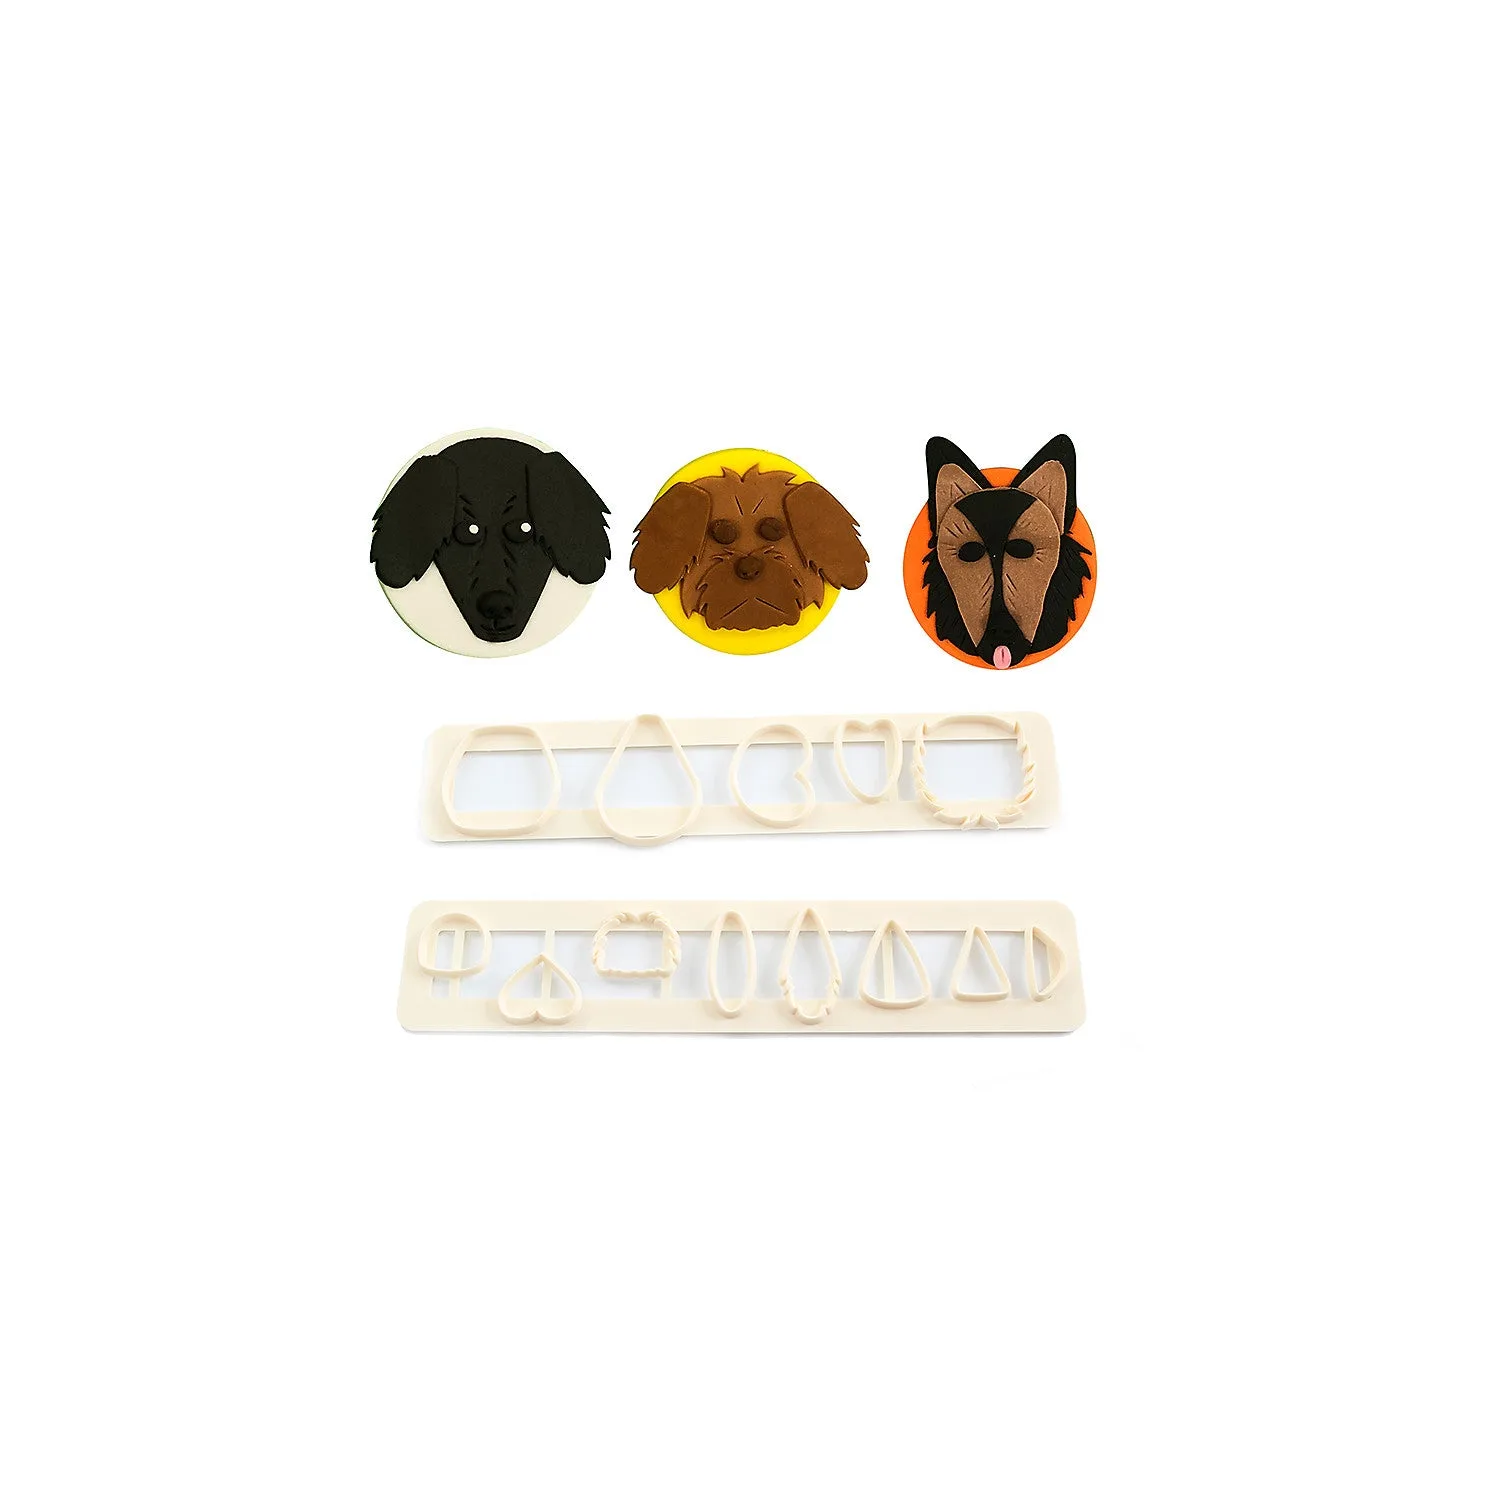
Design-A-Dog Icing Face Cutters Set
Place cut shapes at least 1 inch apart on the baking sheet to allow for slight spreading. Reroll scraps only once or twice, as overworking the dough can make it tough. If the dough becomes too warm, chill it again before continuing. For uniform thickness, use rolling guide rings or dowels of the same height — this ensures even baking.
- Press straight down — do not twist the cutter.
- Use a toothpick or small knife to release dough from intricate cutters.
- Space cookies evenly on the baking sheet and avoid overworking scraps.
Bake for Perfect Shape Retention
Baking temperature and time are critical for maintaining crisp edges. Preheat your oven fully and use an oven thermometer to ensure accuracy. Bake cookies on the middle rack, and consider using a light-colored baking sheet to prevent over-browning. If your cookies tend to spread, try chilling the cut shapes on the baking sheet for 10 minutes before baking. This step is especially helpful for cookies made with butter-rich dough.
Watch the cookies closely during the last few minutes of baking. They are done when the edges are just beginning to turn golden, but the centers remain pale. Overbaking can cause edges to darken and shapes to lose definition. Let the cookies cool on the baking sheet for 2-3 minutes before transferring to a wire rack. This allows them to set without breaking.
- Chill cut cookies on the baking sheet for 10 minutes before baking to reduce spread.
- Bake on the middle rack using a light-colored pan for even heat.
- Remove cookies when edges are lightly golden; centers should still be pale.
Decorate and Store Your Shaped Cookies
Once your cookies are completely cool, it's time to decorate. Royal icing, glaze, or simple sprinkles work beautifully. For themed occasions, consider using sugarcraft toppers like the 6 Easter Egg Sugarcraft Cake Toppers to add a festive touch without extra piping. These toppers can be pressed into freshly iced cookies for an instant, professional finish. If you prefer a natural look, dried fruit pieces such as Dried Orange Slices 40g can be chopped and added to the dough or used as a topping for a subtle citrus flavor.
Store decorated cookies in an airtight container at room temperature, separating layers with parchment paper. Most cut-out cookies will stay fresh for up to a week. If you need to keep them longer, freeze undecorated cookies for up to three months — just thaw at room temperature before icing. For gift-giving, arrange cookies in a decorative tin or box, and they'll be a hit every time.
- Decorate with royal icing, sprinkles, or sugarcraft toppers for themed designs.
- Store in an airtight container with parchment between layers.
- Freeze undecorated cookies for up to three months for later use.
With these tips and techniques, you'll be able to use cookie cutters like a pro, creating beautifully shaped cookies that impress every time. Whether you're making simple rounds or intricate animal faces, the key is preparation, patience, and the right tools. Ready to start baking? Explore our range of cookie cutters and baking essentials, including the versatile Design-A-Dog Icing Face Cutters Set, to bring your creative cookie ideas to life.