Quick Answer
To use a fold-flat apple slicer and corer, place the slicer over the apple's core, press down firmly, and twist slightly to separate slices. For the best results, choose a fold-flat design like the Dreamfarm Flapple, which stores flat and is easy to clean. This guide will walk you through each step to get perfect apple slices every time.
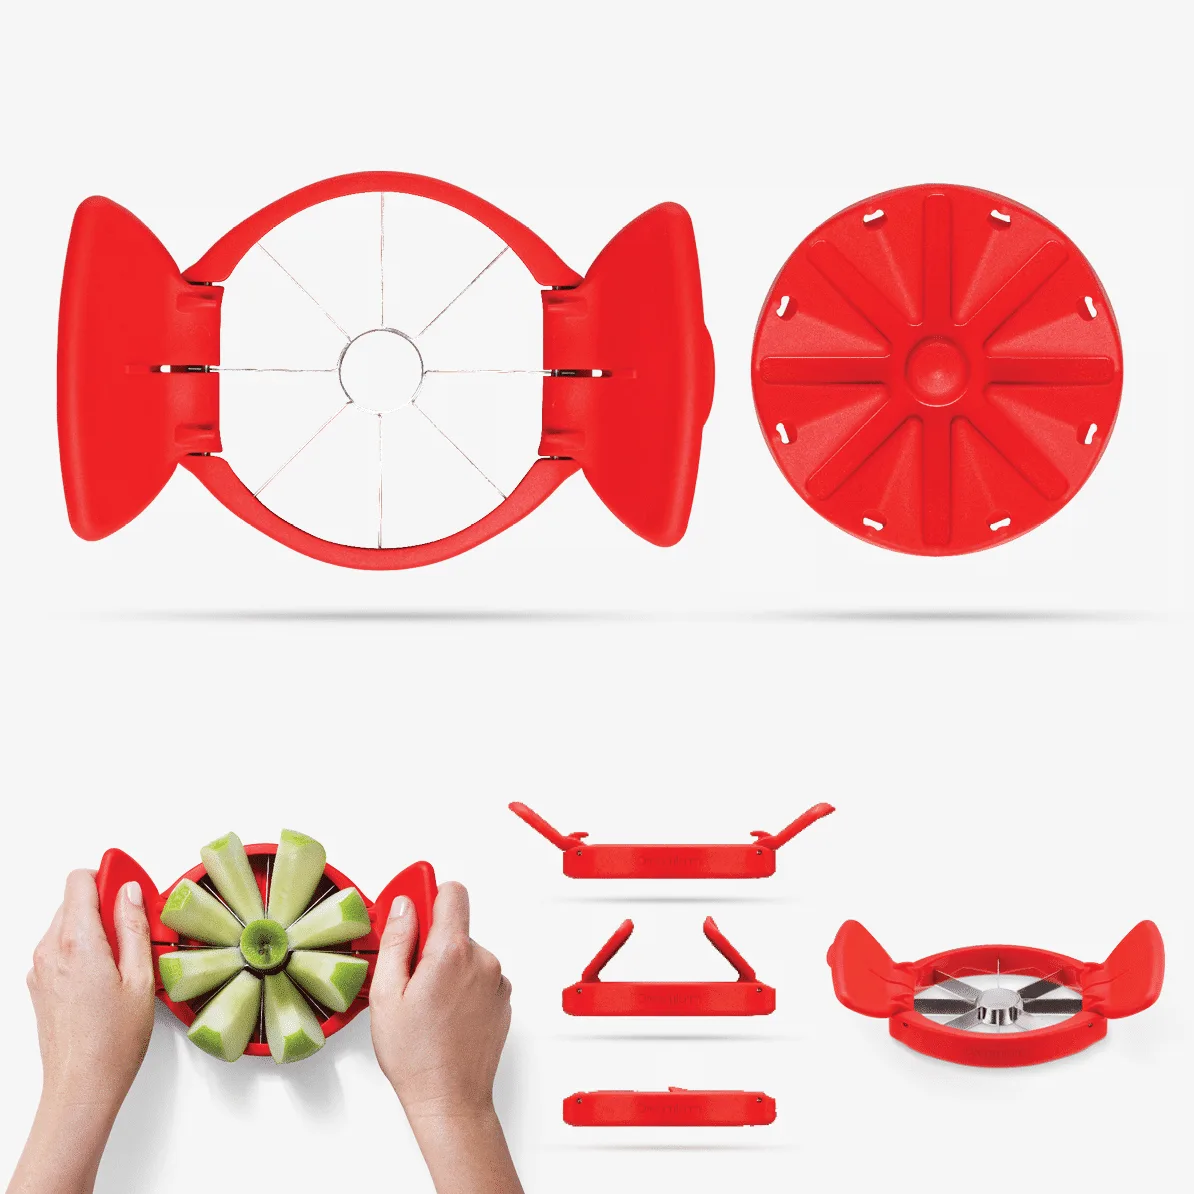
Flapple
Slicing and coring apples can be a tedious task, especially when you need uniform slices for baking, snacking, or salads. A fold-flat apple slicer and corer simplifies this process, allowing you to core and slice in one swift motion. Whether you're preparing a quick snack or a pie, mastering this tool saves time and ensures consistency.
In this guide, we'll explain how to use a fold-flat apple slicer and corer effectively, share common mistakes to avoid, and highlight key features to look for. We'll also introduce you to some Dreamfarm tools that can complement your apple prep routine.
Why Choose a Fold-Flat Apple Slicer?
Fold-flat apple slicers are designed with convenience in mind. Unlike traditional slicers that take up drawer space, these tools fold flat for compact storage. They also feature sharp stainless steel blades that easily cut through apples, producing evenly sized slices while removing the core in one motion.
When selecting an apple slicer, consider the blade quality, ease of cleaning, and whether it can handle different apple sizes. A good slicer should be sturdy enough to press through firm apples without bending, and it should be dishwasher safe for easy cleanup.
- Look for a slicer with a comfortable grip to reduce hand strain.
- Ensure the blades are sharp and rust-resistant for long-lasting performance.
- Check if the slicer folds flat for space-saving storage.
Step-by-Step Guide to Using an Apple Slicer and Corer
Using a fold-flat apple slicer is straightforward, but a few tips can help you achieve perfect results. Start by washing the apple thoroughly. Place the slicer on a stable cutting board with the core aligned with the center of the slicer. Press down firmly and steadily to cut through the apple. The slicer will separate the apple into wedges while removing the core.
For larger apples, you may need to apply more pressure. If the apple is too large for the slicer, consider cutting it in half first or using a smaller apple. After slicing, lift the slicer away, and the apple wedges will be ready to use.
- Always use a cutting board to protect your countertops.
- If the apple is slippery, pat it dry with a towel before slicing.
- For even slices, ensure the apple is centered under the slicer.
Common Mistakes to Avoid
One common mistake is pressing down with uneven force, which can cause the apple to shift and produce uneven slices. Another is using a dull slicer, which can crush the apple instead of cutting cleanly. To avoid these issues, always use a sharp slicer and apply steady, even pressure.
Additionally, some users try to slice apples that are too large for the slicer, leading to breakage. If the apple doesn't fit, either choose a smaller apple or cut it in half. Finally, remember to clean your slicer immediately after use to prevent staining and maintain sharpness.
- Avoid rocking the slicer back and forth; press straight down.
- Don't force the slicer through the apple; let the blade do the work.
- Clean and dry the slicer after each use to prevent rust.
Step-by-Step: Using a Fold-Flat Apple Slicer and Corer
- Step 1: Prepare the Apple: Wash the apple thoroughly and pat it dry. Place it on a stable cutting board. A dry apple is less likely to slip during slicing.
- Step 2: Position the Slicer: Hold the slicer by its handles and center it over the apple, aligning the core with the center hole. Proper alignment ensures even wedges and complete coring.
- Step 3: Press Down Firmly: Apply even, steady pressure straight down to cut through the apple. Avoid rocking or twisting. If you feel resistance, adjust the apple's position rather than forcing.
- Step 4: Lift and Separate: Lift the slicer away. The apple will be separated into wedges with the core removed. If any core remains, use a paring knife to remove it.
- Step 5: Clean and Store: Rinse the slicer under warm water or place it in the dishwasher if safe. Dry and fold flat for storage. Immediate cleaning prevents residue from drying and keeps blades sharp.
Product Facts: Apple Slicers and Complementary Tools
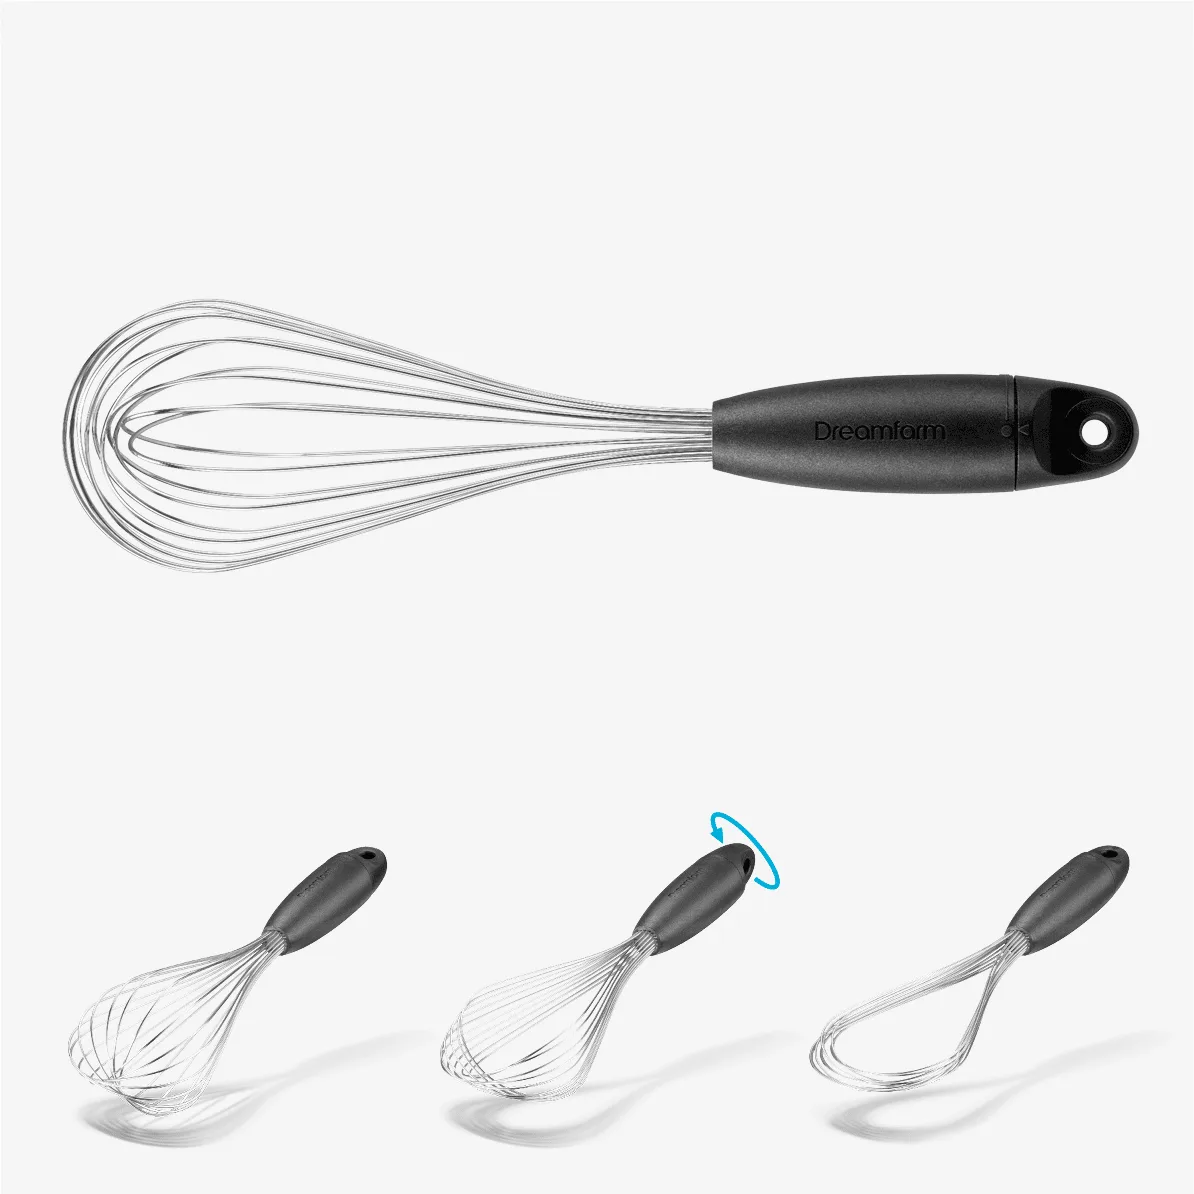
- Flisk: Flisk is a balloon whisk that twists to create three whisks from one. A half turn of Flisk’s ergonomic handle twists the 10 large, high-vibration wires into 3 distinct forms – a large balloon whisk for whipping, a sauce whisk for shallow liquids and gravy, and a flat whisk for deglazing. Best of all, Flisk’s wires completely flatten for space-saving storage and easy cleaning in the dishwasher. While not an apple slicer, Flisk's fold-flat design and versatility make it a great companion for apple-based recipes like applesauce or baking, where whisking is needed. Its space-saving feature aligns with the fold-flat philosophy.
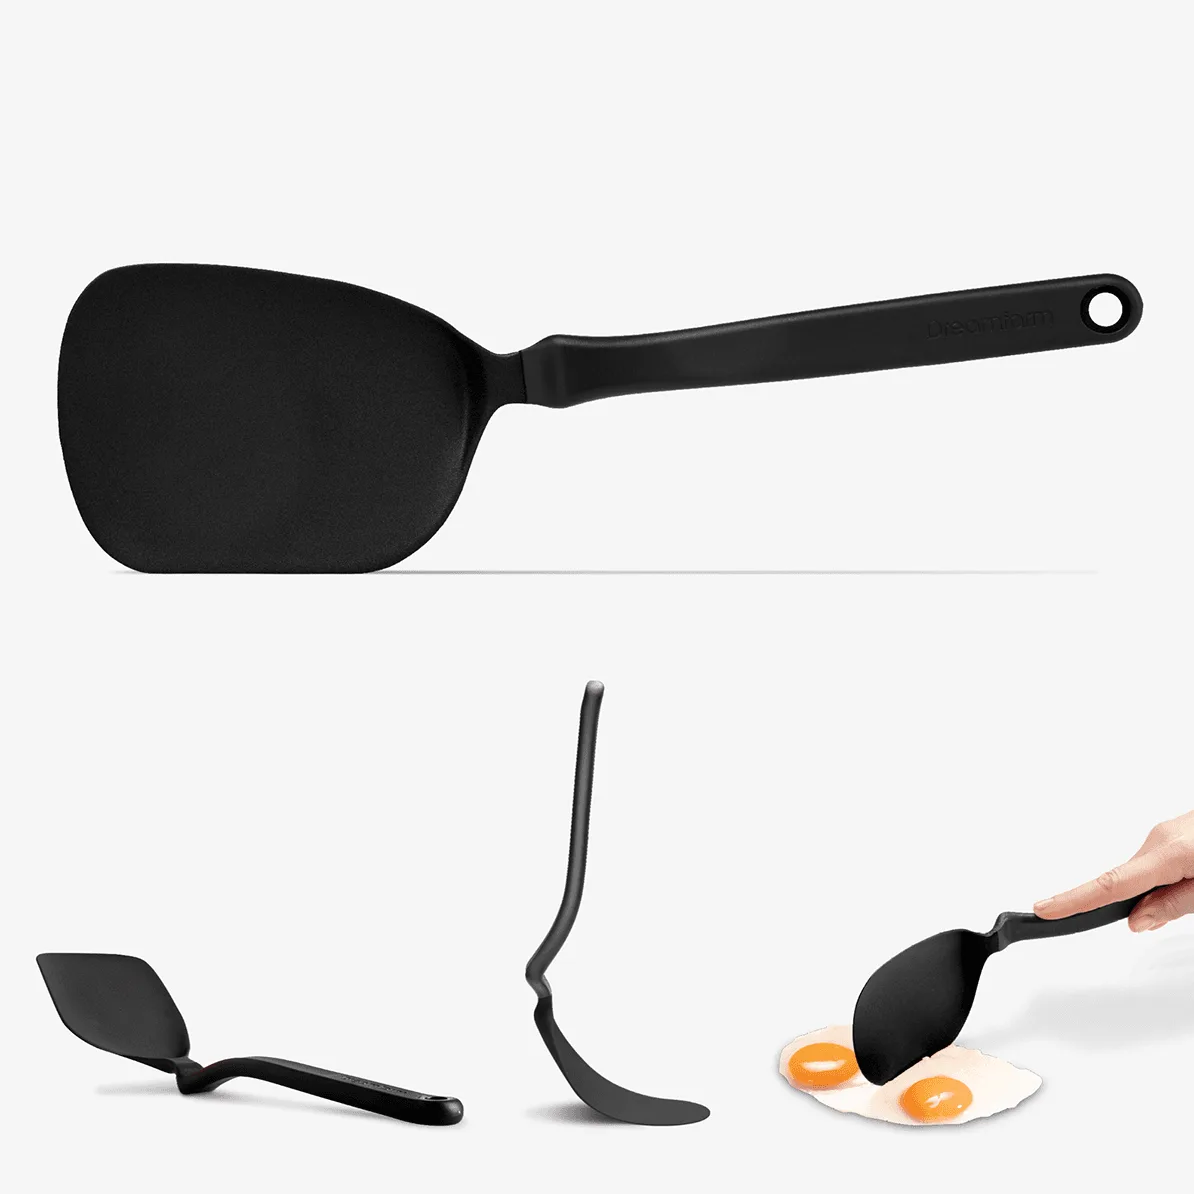
- Chopula: The Chopula is a versatile kitchen tool that combines the flexibility needed for flipping with the strength required for chopping. Designed to handle a range of cooking tasks, it offers a practical solution for everyday meal preparation. Thin and flexible for easy flipping of delicate foods like eggs or pancakes. Strong enough to chop through ingredients directly in the pan. Multi-functional design reduces the need for multiple tools. After slicing apples, you might need to chop them further for recipes. The Chopula's strength and flexibility make it ideal for chopping apples directly in a pan or on a cutting board, reducing the need for additional tools.
Mastering a fold-flat apple slicer and corer makes apple prep quick and enjoyable. Whether you're baking a pie or packing a lunch, you'll get perfect slices every time. For more kitchen tools that simplify your cooking, explore Dreamfarm's range of innovative gadgets, such as the Flisk whisk or the Chopula spatula, to enhance your culinary experience.