Quick answer
Treat cards like small prints: pick a theme, back each one so it sits flat, protect it from light and dust, then hang it in a grid or a loose gallery arrangement. A 4.25 x 5.5 inch A2 card is roughly the size of a small photo print, so it holds a wall on its own once it is mounted and framed.
Greeting cards are already illustrated, lettered, and color-matched. That is most of the work of wall art, done before you open the envelope. The only real problem is that paper is flimsy, and a wall is not.
This guide walks through the whole process in order, from choosing which cards deserve wall space to hanging them so they stay flat and fade slowly. It works whether you have three cards or thirty.
Pick a theme before you pick a wall
A greeting card display falls apart when the cards have nothing in common. Sort your stack into groups first: one holiday, one color family, one artist, or one relationship. A set of holiday cards reads as a collection; a birthday card next to a Valentine's card next to a thank-you note reads as clutter.
If you are building around a single holiday, seasonal cards are the easiest starting point because they already share a palette and a mood. Keep the theme narrow enough that a stranger could name it in one glance.
- Checkpoint: if you cannot describe the theme in five words, cut the group down until you can.
Choose the size and layout of your arrangement
Measure your wall space and decide on a footprint before you buy anything. A simple grid of same-size cards looks intentional and is the most forgiving layout. A loose gallery arrangement suits mixed sizes but needs more planning.
Most folded cards are 4.25 x 5.5 inches, so a three-by-three grid takes up roughly 13 x 17 inches before spacing. Add two inches between cards and you are closer to 17 x 21 inches. Mark that rectangle on the wall with painter's tape and live with it for a day.
Common mistake: buying frames before you know the count. Buy frames after the layout is taped and the card count is final.
- Checkpoint: stand back at the distance you normally view the wall from. If the taped rectangle looks small, add a row rather than enlarging the cards.
Open the cards and check the inside
A blank interior is an advantage here. Cards with a blank inside show only the illustration when displayed, and you keep the personal message private. If a card has writing you want to keep visible, plan for it to face out or scan it first.
Decide now whether this display is permanent or seasonal. Permanent displays should use cards you are willing to retire from the card box. Seasonal displays can go back in the box after the holiday.
- Checkpoint: photograph or scan any handwritten message before the card goes on the wall, so the sentiment is not lost if the card is damaged.
Back and protect each card
Paper warps. Back each card with a piece of acid-free cardstock cut slightly smaller than the card, then mount the pair in a frame with a mat or in a rigid sleeve. This keeps the card flat and stops it from curling at the corners.
Light is the bigger long-term risk. Direct sun fades ink, and the gold glitter accents on some cards will dull faster than flat ink. Hang away from direct sun, or accept that the display is temporary and rotate it.
Common mistake: taping cards directly to the wall. Tape leaves residue and pulls up the printed surface when removed.
- Checkpoint: press a backed card against a flat surface. If a corner lifts, add another backing layer before framing.
Hang the arrangement in order
Work from the center outward. Hang the middle card first, level it, then build the grid around it. This keeps the whole arrangement from drifting off-center, which is the most common failure in a DIY card display.
Use removable adhesive strips or small nails depending on the weight of your frames. For a lightweight sleeve display, adhesive strips are enough. For glass frames, use hardware rated for the weight.
Common mistake: hanging the top-left card first. By the time you reach the right edge, the row is visibly sloped.
- Checkpoint: use a level on every row, not just the first one.
Rotate the display instead of letting it go stale
A card wall is not permanent. Set a rotation rhythm, such as swapping the whole arrangement each season or each holiday. Store the off-duty cards flat, in a box, away from heat and light.
Rotation also solves the fading problem. Cards that spend three months on the wall and nine months in a box will outlast cards that stay up year-round.
- Checkpoint: date the back of each card lightly in pencil so you know how long it has been displayed.
The card wall process, in order
- Sort into one theme: Group cards by holiday, color family, or artist until the set reads as a collection rather than a pile. Checkpoint: name the theme in five words or fewer.
- Tape the footprint on the wall: Measure the grid or gallery rectangle, mark it with painter's tape, and check it from your normal viewing distance. Checkpoint: finalize the card count before buying frames.
- Back each card: Mount every card on acid-free cardstock cut slightly smaller, so it sits flat and the corners stop curling. Checkpoint: no corner should lift when pressed flat.
- Frame or sleeve for protection: Use frames with mats or rigid sleeves, and hang away from direct sun to slow ink and glitter fading. Checkpoint: no tape directly on the card surface.
- Hang from the center out: Level and hang the middle card first, then build the rows around it with a level on every row. Checkpoint: re-level after each row, not just the first.
- Rotate on a schedule: Swap the arrangement each season or holiday and store the rest flat, away from heat and light. Checkpoint: pencil the display date on the back of each card.
Cards that work well as wall art
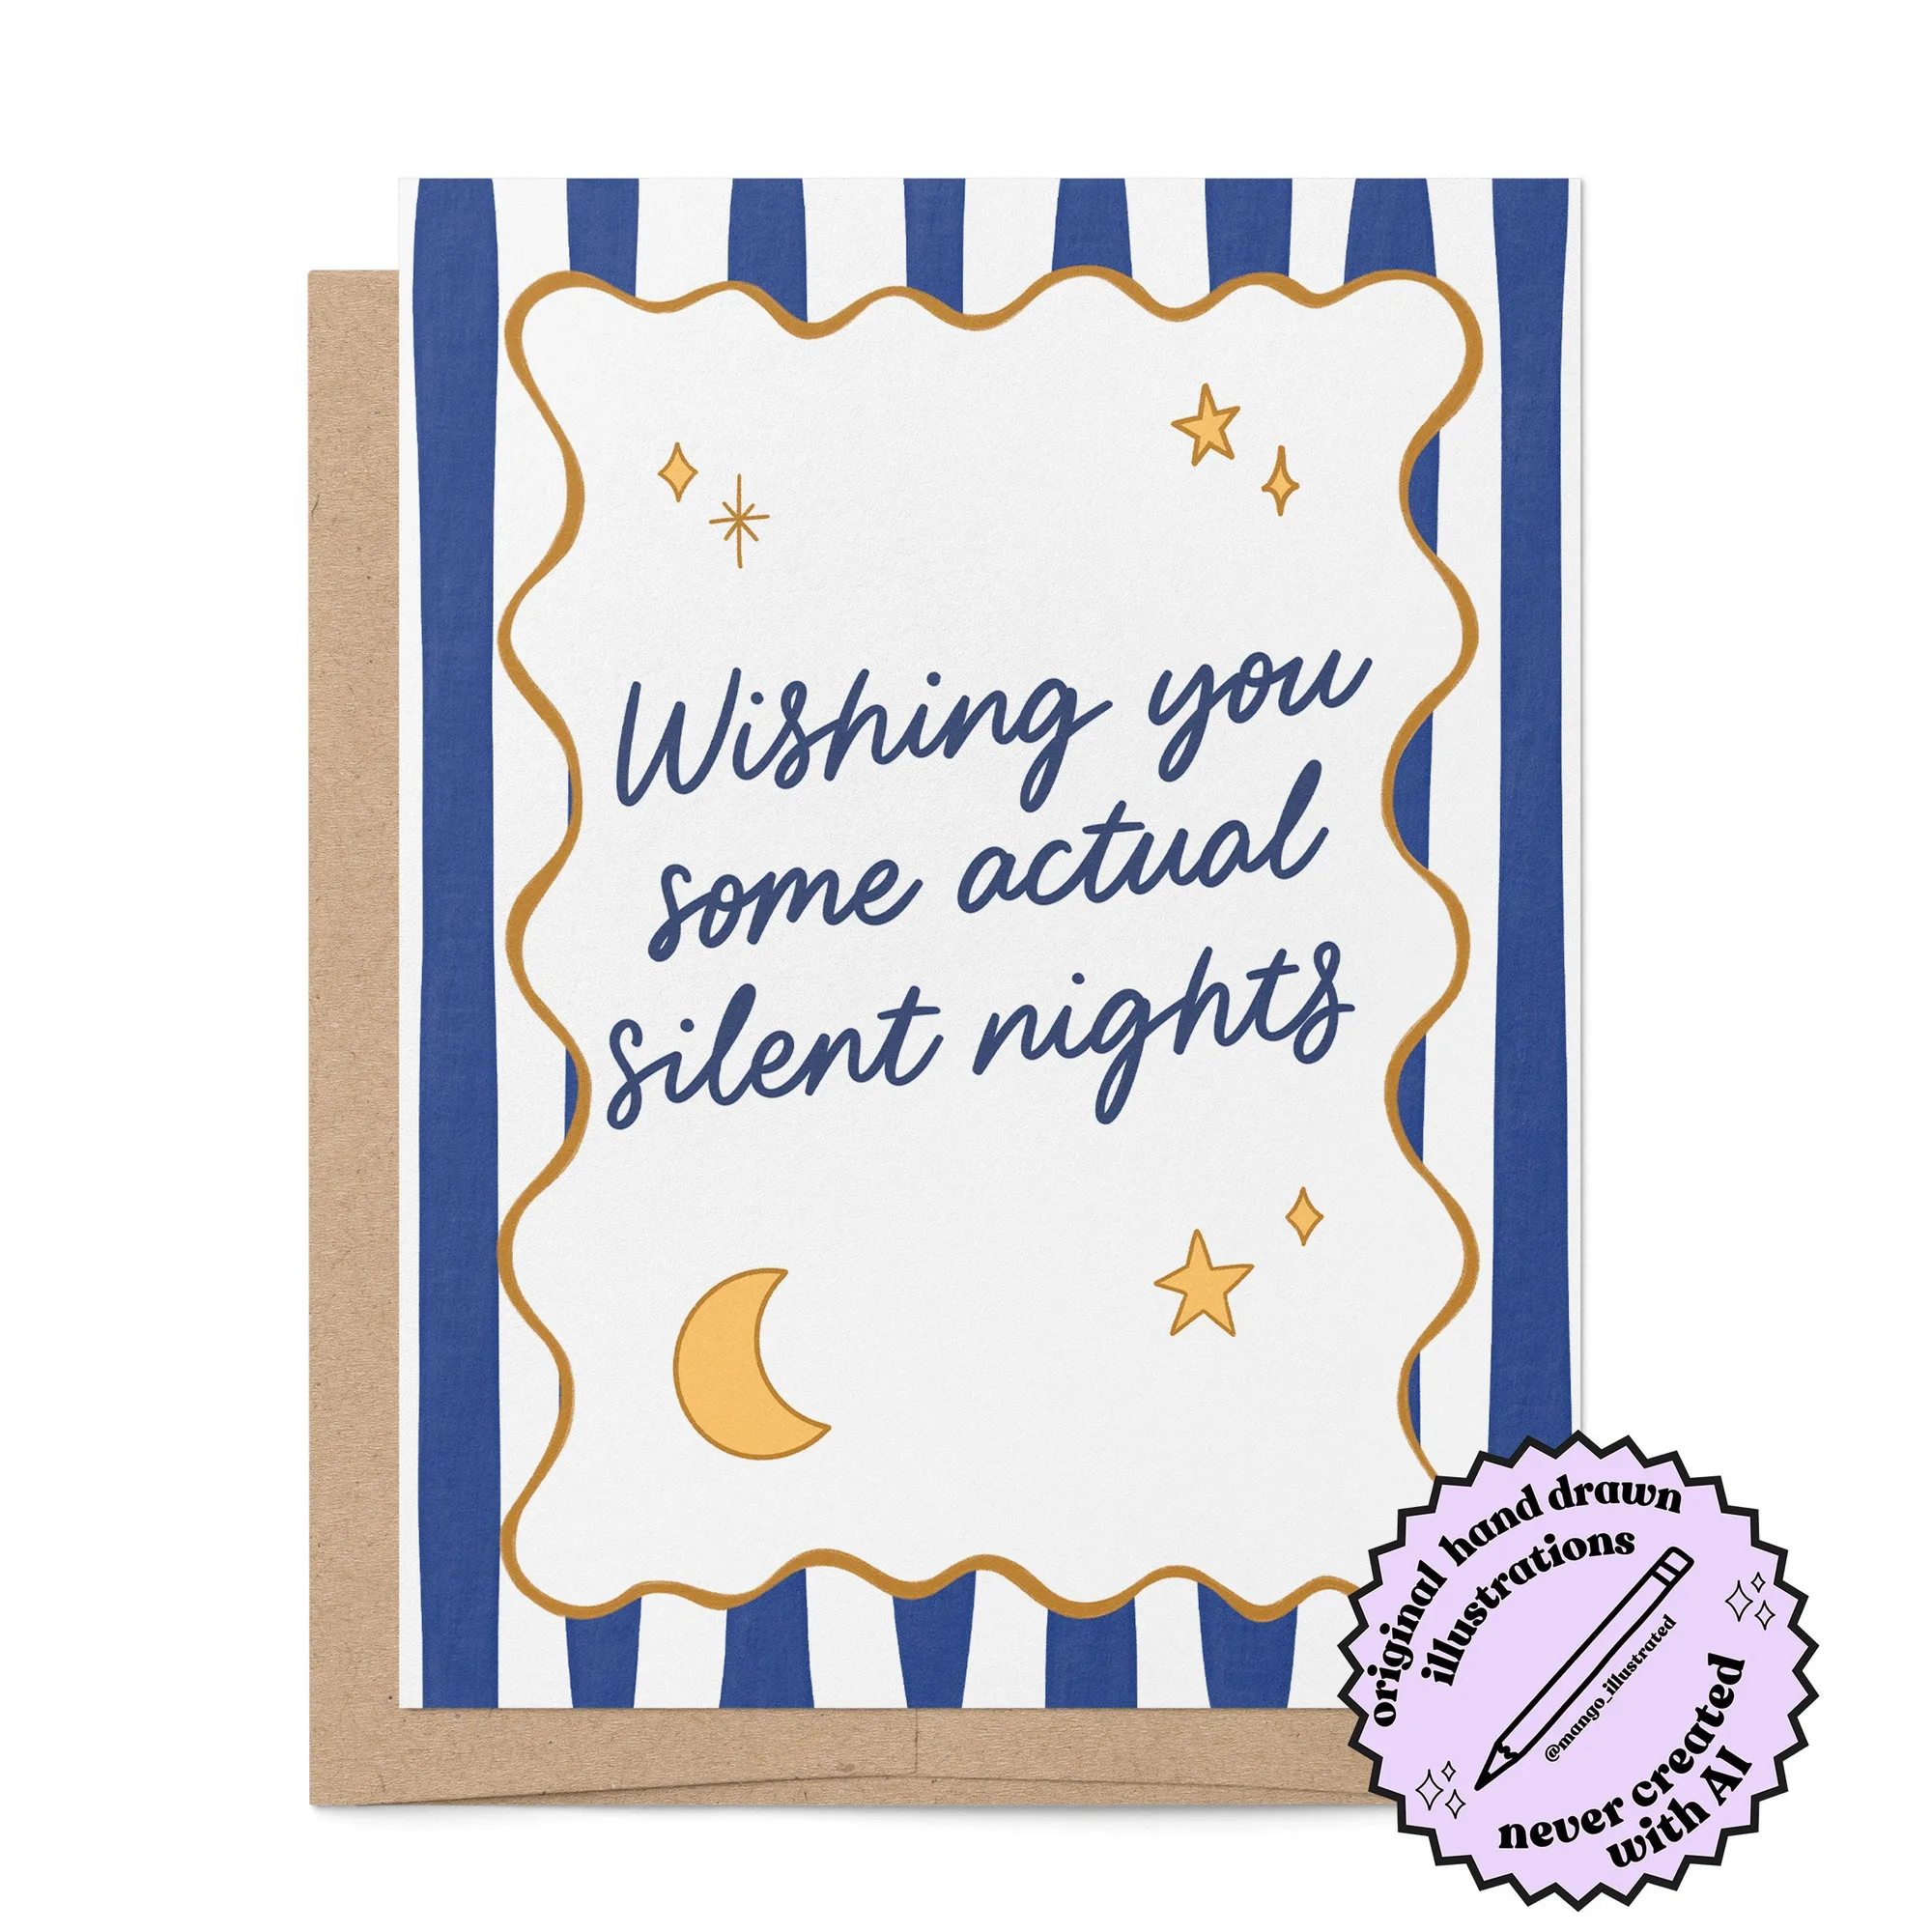
- Silent Nights Holiday Card: Navy stripes, wavy gold accents, and the hand lettered greeting "wishing you some actual silent nights." A2 size, folded to 4.25 x 5.5 inches, blank inside, with an A2 kraft envelope. The navy-and-gold palette is narrow enough to build a whole holiday grid around, and the blank inside means the wall shows only the illustration.
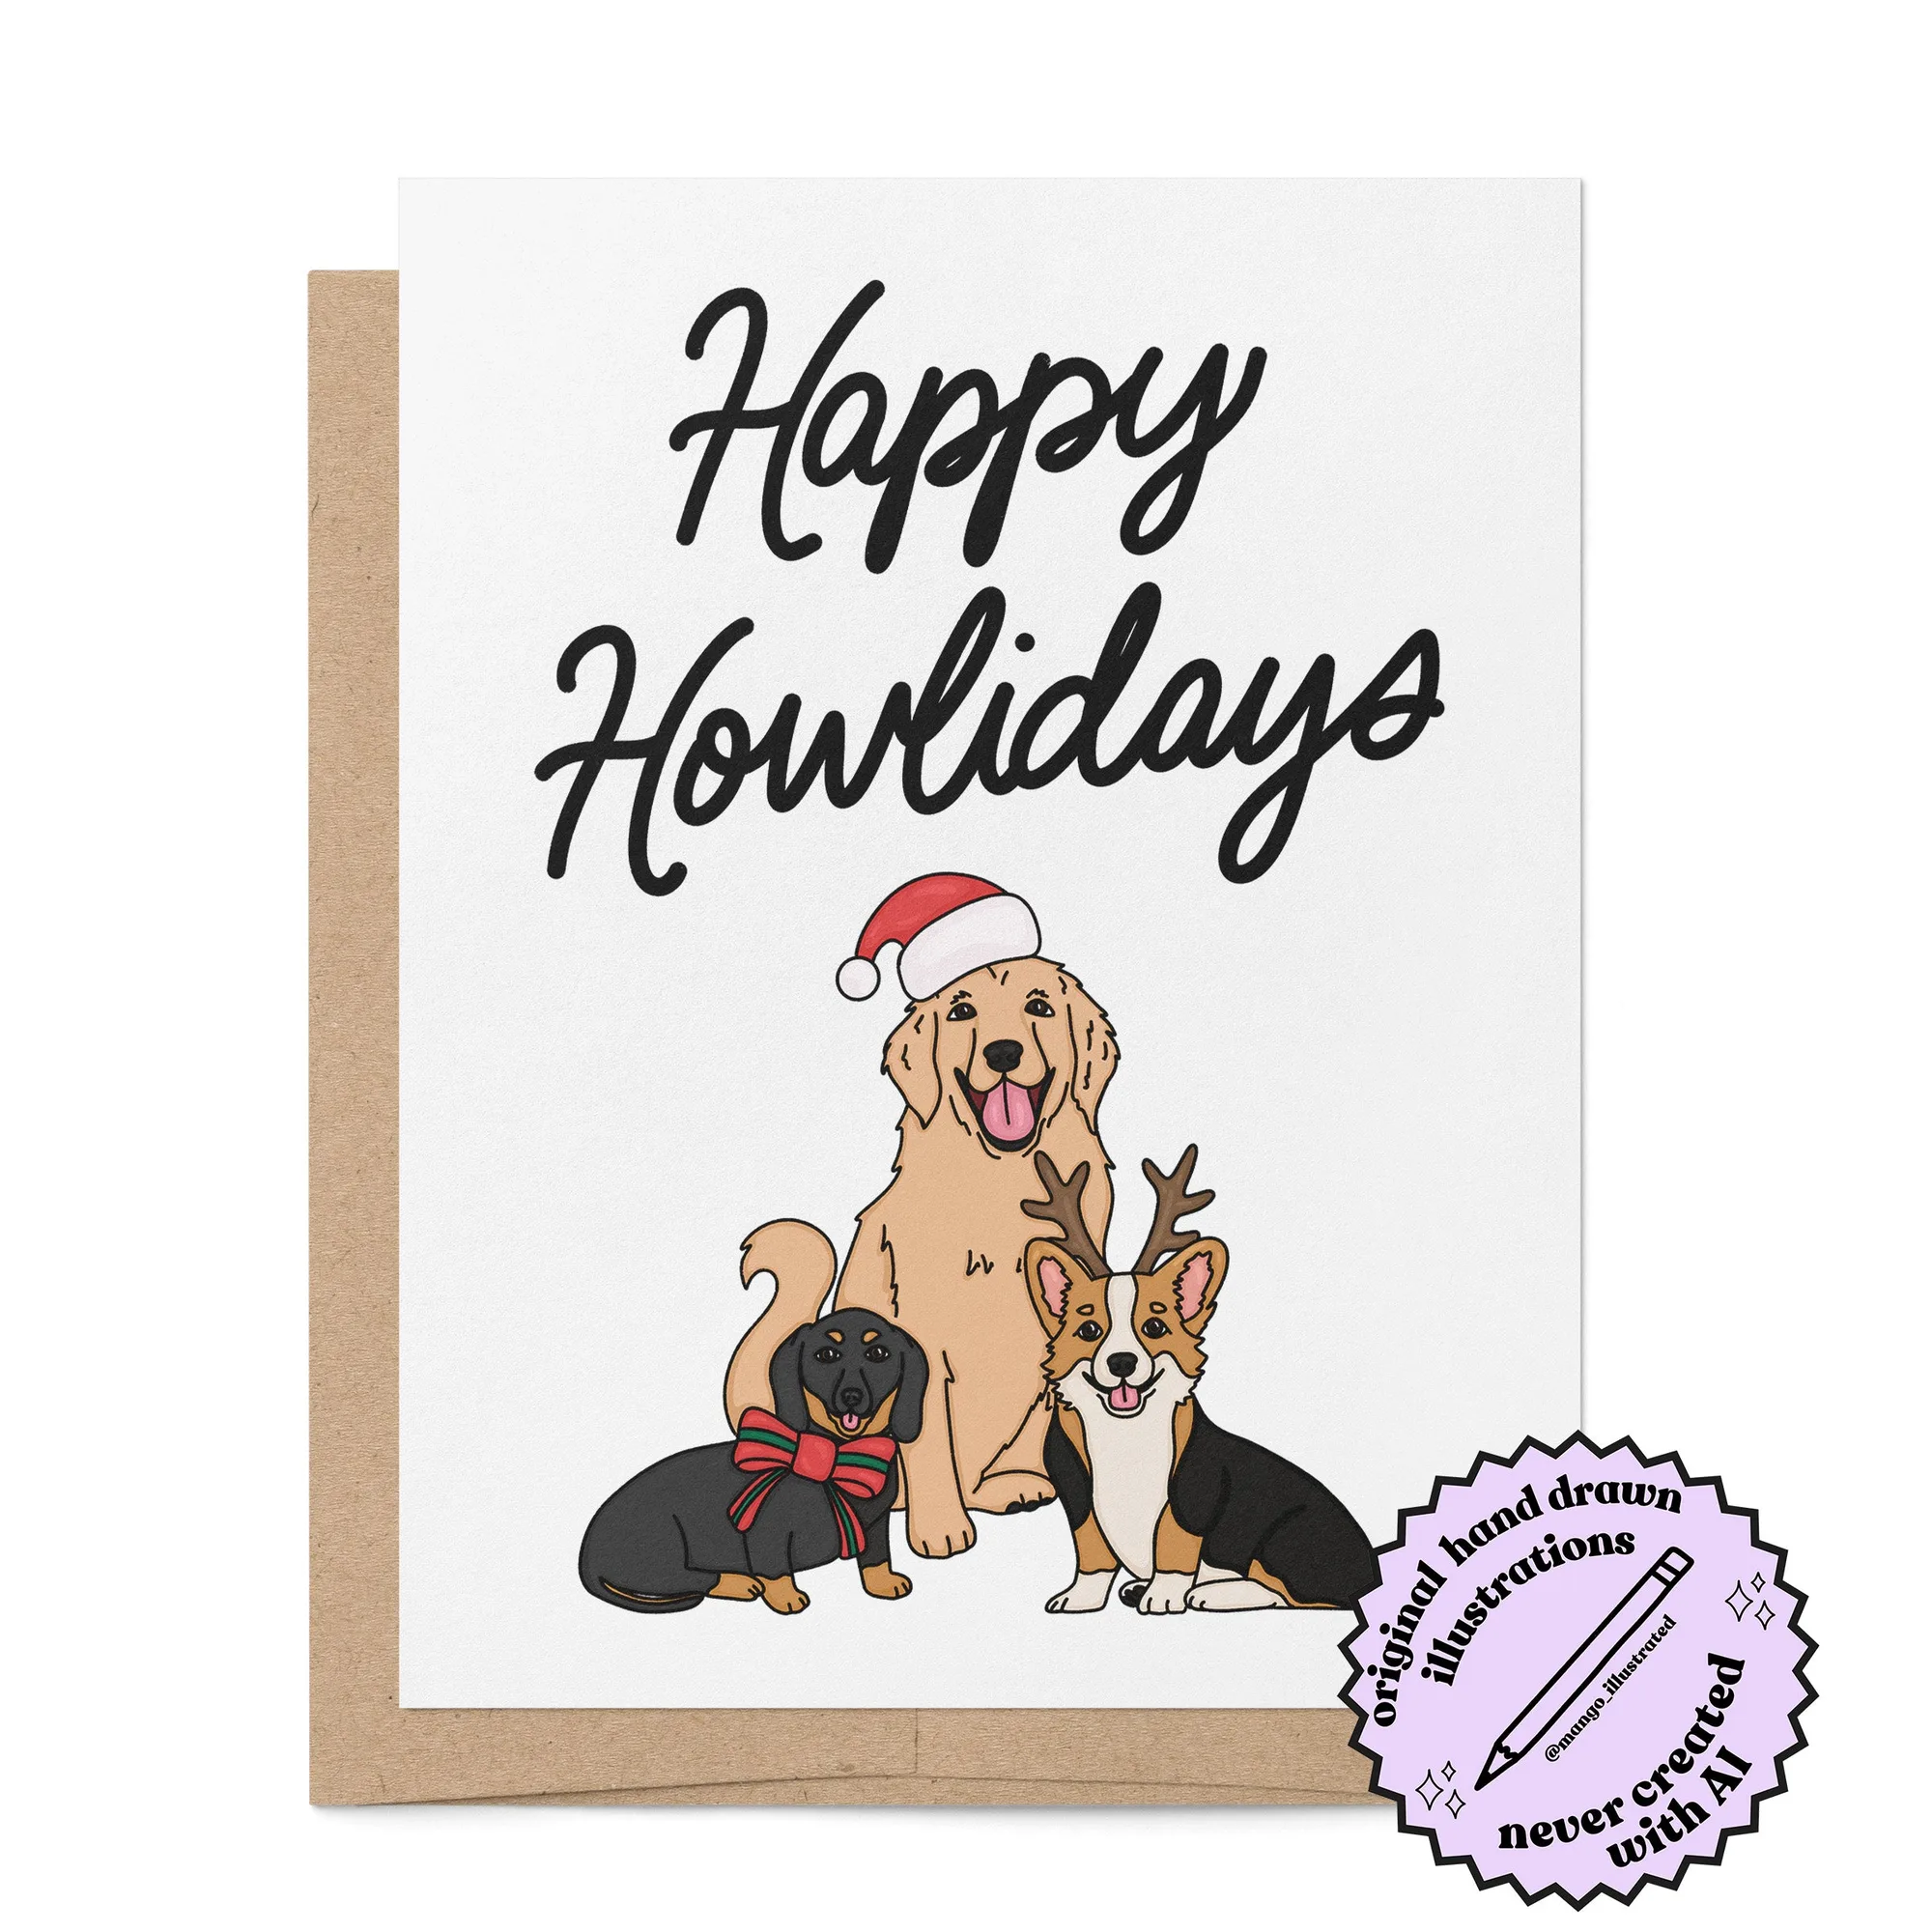
- Happy Howlidays card: Three dogs fully dressed for the occasion, under the hand lettered greeting "happy howlidays." A2 size, folded to 4.25 x 5.5 inches, blank inside, with an A2 kraft envelope. A single strong illustration at this size holds a small wall on its own, which makes it a good center card for a grid.
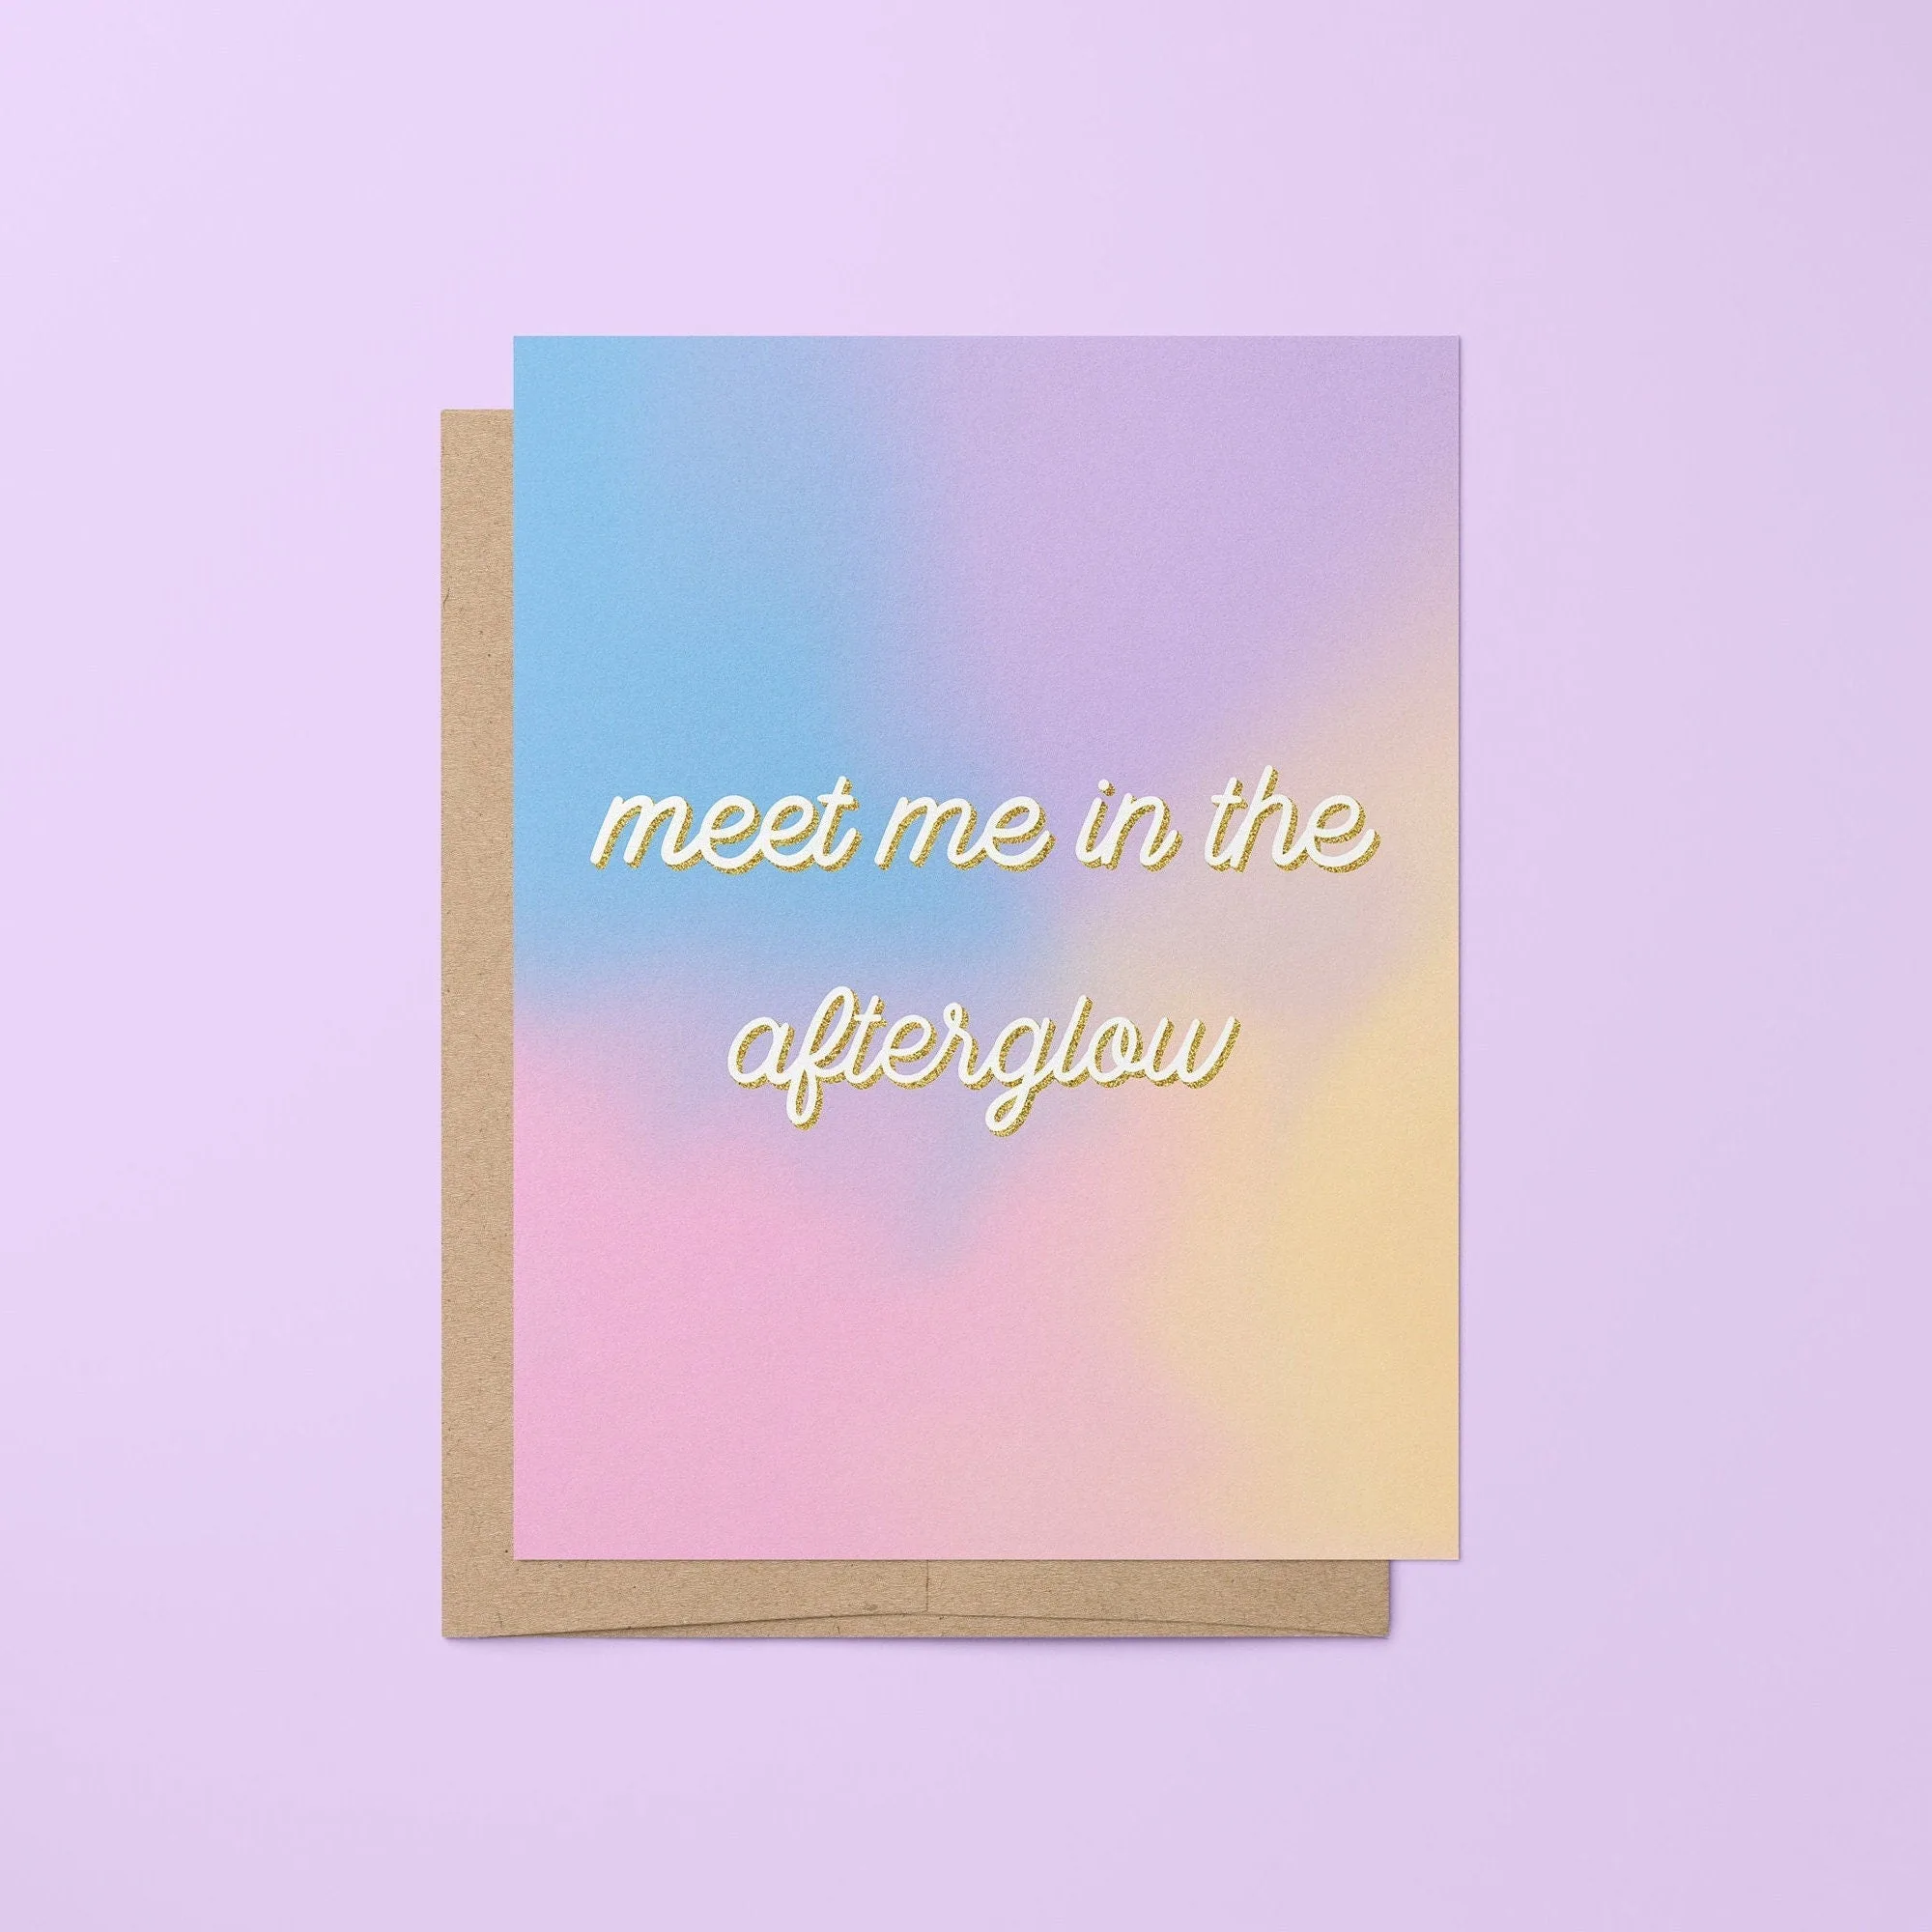
- Meet Me In the Afterglow greeting card: Script lettering with a gold glitter drop shadow against a cotton candy sky. Folded size 4.25 x 5.5 inches, blank inside, with an A2 kraft envelope. The glitter accent is the reason to keep this card out of direct sun; it will dull faster than flat ink.
A card wall is cheap to start and easy to change, which is exactly why it works. Sort, back, protect, hang from the center, and rotate. The cards you already kept are the art; the method just keeps them flat and visible.