Why a 5 mm Stamping Set for Metal Marking?
When you need names, dates, or words to be read clearly on a cuff, bangle, or pendant, a 5 mm character height is the practical choice. Smaller punches can lose legibility on larger pieces, while a 5 mm punch set produces bold marks that stand out. The 37-piece set covers A–Z, 0–9, and an ampersand, so most inscriptions are already on your bench.
The Letter & Number Stamping Set at a Glance
-
Letter & Number Stamping Set — 37 Piece 5 mm Metal Punches, A–Z, 0–9, Ampersand & Cases: The set includes 26 letters (A–Z), 10 numbers (0–9), and one ampersand (&), each producing a clear 5 mm character height. You can mark names, dates, and symbols without buying separate sets — a complete kit for personalising jewellery or tags.
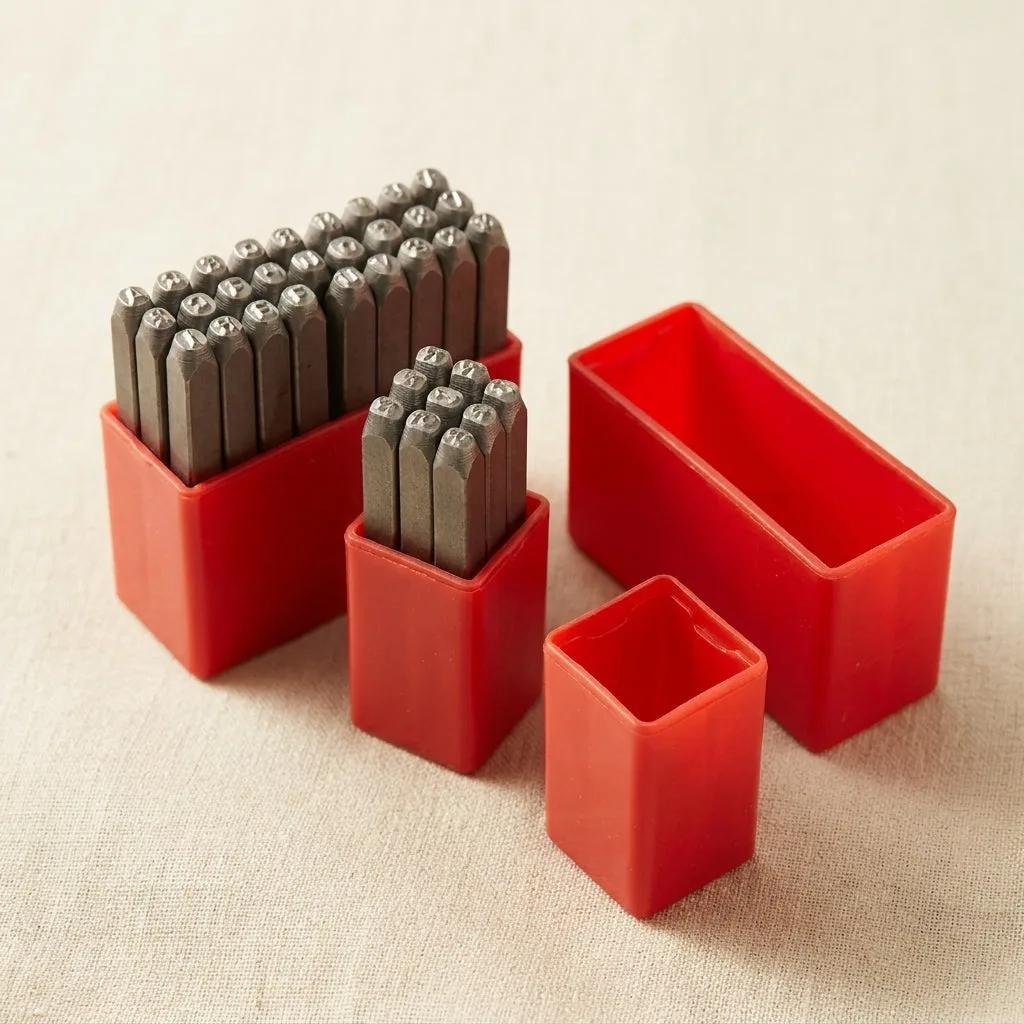
Letter & Number Stamping Set — 37 Piece 5 mm Metal Punches, A–Z, 0–9, Ampersand & Cases
-
Letter & Number Stamping Set — 37 Piece 5 mm Metal Punches, A–Z, 0–9, Ampersand & Cases: Each punch is made from hardened steel and designed to create deep, lasting impressions in non-ferrous metals such as copper and aluminium. Hardened steel withstands repeated hammer strikes and delivers crisp marks on softer metals, which take the impression best.
-
Letter & Number Stamping Set — 37 Piece 5 mm Metal Punches, A–Z, 0–9, Ampersand & Cases: The square-section shanks sit stable between the fingers as you line up and strike, and the two red plastic cases keep all 37 punches in order. Stable shanks reduce wobble during striking, and organised storage saves bench time between commissions.
How to Use Your Metal Stamping Set
The following steps describe a typical bench routine for using a letter and number punch set. Always wear safety glasses and work on a solid, stable surface.
- Prepare the metal surface: Clean the metal and ensure it is flat or gently curved. Softer metals like copper, aluminium, or sterling silver take the impression best. If the metal is hardened, annealing may be needed — check your metal supplier's guidance.
- Mark the alignment: Use a scribe or pencil to lightly mark where the first character should sit. For straight lines, a ruler or tape guide helps keep the row level.
- Position the punch: Hold the punch vertically with the square shank between thumb and forefinger. Place the character face exactly on your alignment mark. The square shank helps prevent rolling.
- Strike the punch: Use a chasing hammer or ball-peen hammer. One firm, square strike is usually enough. Multiple light taps can cause the punch to shift. Strike once and check the depth.
- Move to the next character: Repeat for each letter or number, leaving a consistent gap (about one character width) between impressions. Work from left to right or top to bottom.
- Clean and store: After use, wipe the punches clean. Return each punch to its designated slot in the red plastic case to keep the set organised and protect the faces.
Metal Compatibility and Care
The stamping set is designed for non-ferrous metals such as copper, aluminium, and sterling silver. Harder metals like steel or stainless steel may not produce clear impressions and could damage the punch faces. For best results, test on a scrap piece of the same metal before marking your final piece.
Store the punches in the supplied cases when not in use. Avoid dropping them, as the hardened steel can chip. If a punch face becomes dull, it may need light dressing with a fine stone — but this is rarely needed with normal use on soft metals.