Quick Answer
To use an oscillating steam engine kit, start by organizing and inspecting the parts, then machine the components to fit, assemble the engine, and test it with compressed air, not steam.
Why Build an Oscillating Steam Engine?
An oscillating steam engine is a classic beginner machining project because it demonstrates core lathe and mill skills without requiring complex castings or precision fits. The kit includes all materials and hardware, so you can focus on machining and assembly rather than sourcing parts.
This engine is designed for small lathes like Sherline or larger, and a drill press is sufficient for most operations. A small mill makes certain steps easier, but it's not essential. You will need a source of compressed air, such as an air compressor, to run the finished engine.
Trade-offs: Lathe vs. Mill and Air vs. Steam
While a lathe and drill press can build this engine, adding a small mill simplifies drilling accurate holes in the cylinder and port face. If you only have a lathe, you'll need to use a drill press with a cross vise or careful layout to achieve the required alignment.
The engine is designed to run on compressed air, not steam. Using air is safer and more convenient for testing and display. If you later want to run on steam, you'll need to adapt the engine and take additional safety precautions.
Step-by-Step Build and Run Guide
- Inspect and organize the kit: Lay out all parts and hardware, compare them to the instructions, and identify each component. Check for any missing or damaged items before starting. A quick inventory saves time and prevents mid-build surprises.
- Machine the cylinder and piston: Using your lathe, turn the cylinder and piston to the specified dimensions. Ensure the bore is smooth and the piston fits with a slight sliding fit, not too tight or loose. Test the fit frequently; a piston that sticks will cause poor operation.
- Drill and ream the port holes: Drill the steam ports in the cylinder and the port face. Use a drill press with a square or a mill for accuracy. Ream or deburr the holes to ensure smooth airflow. Clean edges prevent binding and improve sealing.
- Assemble the frame and bearings: Mount the bearings and frame on the base, ensuring alignment. Use the hardware provided and check that the crankshaft rotates freely without binding. Lubricate moving parts lightly before assembly to avoid galling.
- Install the piston and connecting rod: Connect the piston to the crankshaft via the connecting rod. Rotate the flywheel by hand to check that the motion is smooth and the piston travels full stroke. If it binds, disassemble and deburr the mating surfaces.
- Test with compressed air: Connect a compressed air line to the engine's inlet. Start with low pressure and gradually increase until the engine runs smoothly. Adjust the air supply to control speed. Always use a regulator; never exceed the recommended pressure.
Kit Contents and What to Expect
-
Oscillating Steam Engine Material Kit: This kit includes all the materials and hardware required to make the oscillating steam engine. You don't need to source separate parts, so you can start machining immediately and avoid compatibility issues.
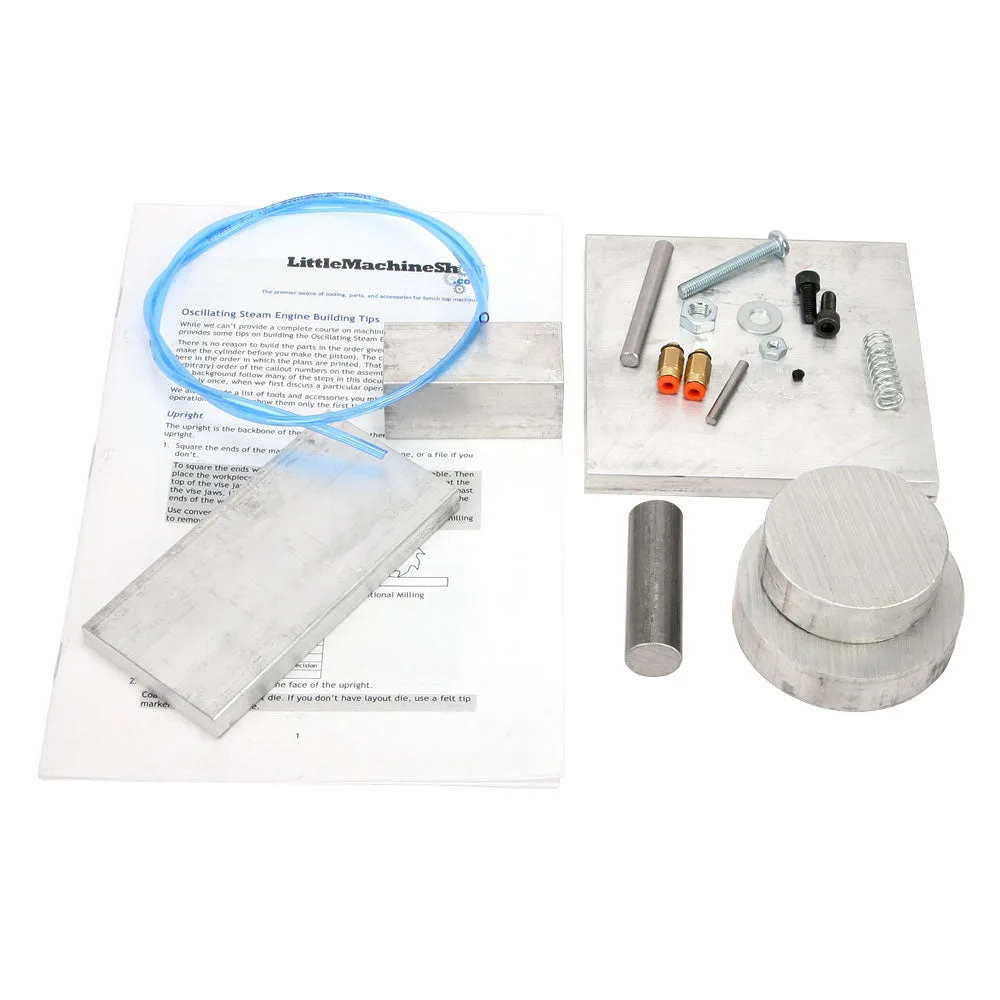
Oscillating Steam Engine Material Kit