Quick Answer
To use safety eyes and noses in amigurumi, position them before closing the piece, push the post through the fabric from the front, and secure the backing washer firmly on the inside. Always double-check placement and backing tightness to prevent them from popping out.
Why Safety Eyes Beat Embroidered Eyes
Safety eyes give your amigurumi a polished, professional look that embroidered eyes can't match. They come in a variety of colors and sizes, so you can match the personality of your creation. The shiny plastic adds a lively sparkle that makes your handmade creatures instantly more endearing.
However, safety eyes are only as secure as their backing. If the washer isn't pushed on all the way, the eye can pop out and become a choking hazard, especially if the amigurumi is for a child. That's why careful installation is non-negotiable.
Choosing the Right Size and Style
Safety eyes come in many sizes, from tiny 4mm eyes for small amigurumi to larger 18mm or 20mm eyes for bigger plushies. The size you choose affects the overall look—bigger eyes make a character cuter and more expressive, while smaller eyes give a more subtle, realistic appearance.
For noses, you can match the color to your yarn or choose a contrasting shade. A plastic safety nose often comes with a single post and a washer, just like the eyes. When selecting a set, make sure you have enough pieces for your project. A set like the Safety Eyes and Noses Set of 566pcs offers a wide variety, so you can experiment with different sizes and colors without running out.
When to Insert Safety Eyes: Before or After Stuffing?
The best time to insert safety eyes is after you've finished crocheting the head but before you close the opening and stuff it fully. This allows you to access the inside of the piece to secure the backing washer properly. If you try to insert them after the piece is fully stuffed and closed, it's nearly impossible to attach the washer securely.
If you're working on a piece that is already closed, you can still insert safety eyes by making a small opening, but this is risky and can damage your work. It's much easier to plan ahead and insert them during assembly.
Step-by-Step Installation Guide
- Position the Eyes Before Stuffing: Before you close the amigurumi piece, decide where you want the eyes and noses. Use stitch markers or pins to mark the exact spots. The standard placement is about 4-6 rounds apart, depending on the size of your project. Insert the post of the safety eye from the outside, pushing it through the fabric to the inside. Check the placement from the front to ensure both eyes are level and symmetrical.
- Secure the Backing Washer: On the inside of the piece, push the backing washer onto the post as far as it will go. You should hear or feel a click when it's fully seated. If the washer is loose, the eye can come off. Use a small tool like a thimble or a pair of pliers to press it firmly, but avoid damaging the fabric. Test the security by gently tugging on the eye from the front; it should not move.
- Attach the Safety Nose: For the nose, position it slightly below the eyes, centered in the middle of the face. Push the post through the fabric and secure the washer on the inside, just like the eyes. If your pattern calls for a nose, make sure it's aligned with the eyes to create a balanced expression. Ensure the nose is straight and not tilted; use a ruler or your eye to check alignment.
- Stuff and Close the Piece: After all safety eyes and noses are secured, stuff the amigurumi firmly, then close the opening with a whip stitch or invisible seam. Be careful not to push the stuffing against the backs of the eyes too hard, as this can loosen the washers over time. After closing, gently squeeze the piece to check that the eyes stay firmly in place.
- Final Check and Adjustments: Once the piece is complete, inspect the eyes and nose from all angles. If any piece looks crooked or insecure, you may need to remove it and reattach. To remove, use a seam ripper or small screwdriver to pry the washer off from the inside, then reposition and secure again. If you're gifting the amigurumi to a child, do a final tug test on each eye and nose to ensure they cannot be pulled out.
Product Fact
-
Safety Eyes and Noses Set of 566pcs: This colorful set of safety eyes and noses includes 566 pieces, designed to add a magical spark to DIY creations like stuffed animals and bags. With 566 pieces, you'll have a wide range of sizes and colors to choose from, making it easy to find the perfect match for any amigurumi project without buying multiple sets.
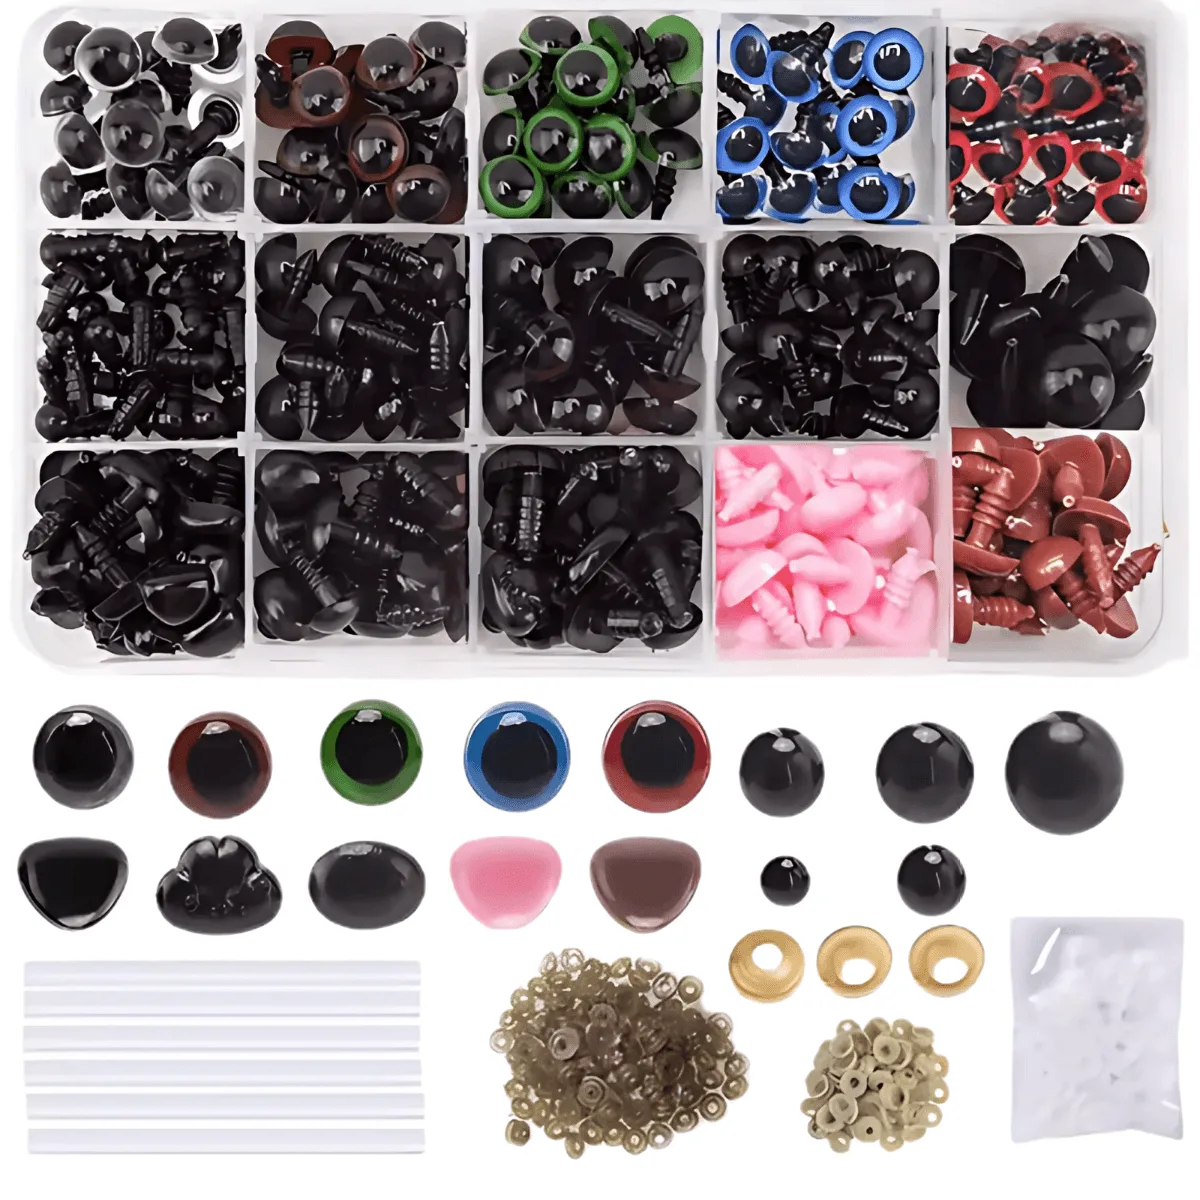
Safety Eyes and Noses Set of 566pcs