Quick answer
Write the message on the left half of the back, put the address on the right half, and keep the address block at least half an inch from every edge. Use a current First-Class stamp, write in waterproof ink, and drop it in a blue USPS collection box. That is the whole process; the rest is choosing a card worth keeping.
A postcard is the only piece of mail most people read before they even set down their bag. It is also the easiest piece of mail to get wrong: smeared ink, a missing apartment number, or a stamp peeled off in the rain. None of that is hard to prevent once you know the order of operations.
This guide walks through writing, addressing, and mailing a postcard step by step, with the mistakes that actually cause cards to arrive late, damaged, or not at all. It also covers the small etiquette choices, like what to write and what not to write, that separate a card someone keeps from one that goes straight into recycling.
Pick a card that survives the mail
The single biggest factor in whether your postcard arrives looking good is the paper it is printed on. Thin, glossy cardstock cracks along the fold lines of sorting machines and shows every fingerprint. Heavier matte stock takes ink cleanly, resists scuffing, and does not glare under a mail carrier's scanner.
Size matters too. Standard 4 x 6 postcards move through USPS automation without a surcharge, while odd sizes and squares often require extra postage or hand-cancelling. If you are buying cards specifically to mail, stick to 4 x 6 unless you enjoy explaining your postage choices at the counter.
- Check the back for a printed dividing line and address lines; if there is no divider, draw a light vertical line yourself.
- Matte finishes hide handling marks better than gloss, which matters for cards that travel in a pocket before they are mailed.
Write the message in the right place
On a standard postcard back, the left half is yours and the right half belongs to the postal system. Write your message on the left, starting near the top, and leave the bottom-left corner clear for a return address or a small sticker. If you fill the entire left side edge to edge, you risk writing into the barcode zone that sorting machines read.
Use a fine-tip permanent pen rather than a ballpoint or gel pen. Ballpoint ink sits on top of coated paper and smears; gel ink stays wet longer than you think. A fine-tip permanent marker dries fast, stays dark, and does not bleed through 110lb cardstock.
- Write the date in the top-left corner so the recipient knows when it was sent, especially for cards that arrive weeks later.
- Keep your message to three or four sentences. A postcard is a snapshot, not a letter.
Address it so it actually gets there
Postcard addressing follows the same rules as any envelope: recipient name on the first line, street address on the second, city, state, and ZIP code on the third. Print in block letters with a dark pen. Cursive is fine if it is genuinely legible, but if there is any doubt, print. A single misread digit sends a card to the wrong side of town.
Leave a margin of at least half an inch between the address block and every edge of the card. Sorting equipment grips the edges, and addresses written too close to the border get partially obscured or smeared. If you are sending internationally, add the country name in capital letters on its own final line.
- Include the apartment or unit number on the same line as the street address, not on a separate line.
- Double-check the ZIP code against the recipient's most recent message; people move and forget to mention it.
Stamp it, then actually mail it
A standard 4 x 6 postcard mailed within the United States needs one First-Class Mail postcard stamp. Rates change, so if you are mailing a batch after a price adjustment, ask at the counter or check the current rate rather than guessing. For international cards, you need a Global Forever stamp or the correct international rate, which is higher than domestic.
Press the stamp down firmly across its full surface, especially the corners. Stamps that lift at one edge get caught in sorting equipment and either fall off or tear the card. If you are mailing in wet weather, hand the card directly to a carrier or drop it at the counter rather than an outdoor box.
- Do not tape over the stamp; postal equipment cannot cancel it properly and the card may be returned.
- Snap a photo of the addressed card before mailing if the message matters, since there is no tracking on standard postcards.
Postcard etiquette that people notice
Postcard etiquette comes down to one question: would you be comfortable if the recipient's roommate, mail carrier, or office front desk read this? The back of a postcard is public. Keep anything private, medical, or passive-aggressive off the card entirely, no matter how funny it seems in the moment.
The other half of etiquette is effort. A card that says only "having fun, wish you were here" is fine from a beach, but a card with one specific detail, a name, a joke you share, or a question, is the one that ends up on a fridge. Write to the person, not to the format.
- Sign your name clearly; not everyone recognizes your handwriting.
- If you are sending a card to a child, write large and keep the message short enough to read aloud.
The postcard mailing checklist, in order
- Choose a 4 x 6 card on heavy matte stock: Standard size and 110lb cardstock move through USPS automation cleanly and take ink without feathering. Avoid glossy or oversized cards unless you are prepared to pay extra postage. Checkpoint: if the card bends easily in one hand, it is too thin to mail.
- Write the message on the left half: Use a fine-tip permanent pen, date the card in the top-left corner, and keep the message to three or four sentences. Leave the bottom-left corner clear. Checkpoint: nothing you write should cross the center line.
- Print the address on the right half: Name, street address with unit number, then city, state, and ZIP on separate lines. Keep at least half an inch of clear space between the address and every edge. Checkpoint: read the ZIP code back to yourself digit by digit.
- Add the correct stamp and press it flat: One First-Class postcard stamp covers a standard 4 x 6 card within the United States; international cards need a Global Forever stamp or the current international rate. Checkpoint: run your thumb across all four corners of the stamp.
- Mail it and let it go: Drop the card in a blue USPS collection box or hand it to your carrier. In wet weather, use an indoor drop or the counter instead of an outdoor box. Next step: photograph the addressed card if the message matters, then move on. Standard postcards are not tracked.
Cards worth writing on
- It's all About the Vibes | Postcard: Digitally drawn, designed, and handmade, this 4 x 6 double-sided postcard is printed on durable 4 x 6 matte 110lb heavyweight cardstock paper. The matte 110lb stock takes permanent ink without smearing and holds up in sorting equipment, so your message stays legible.
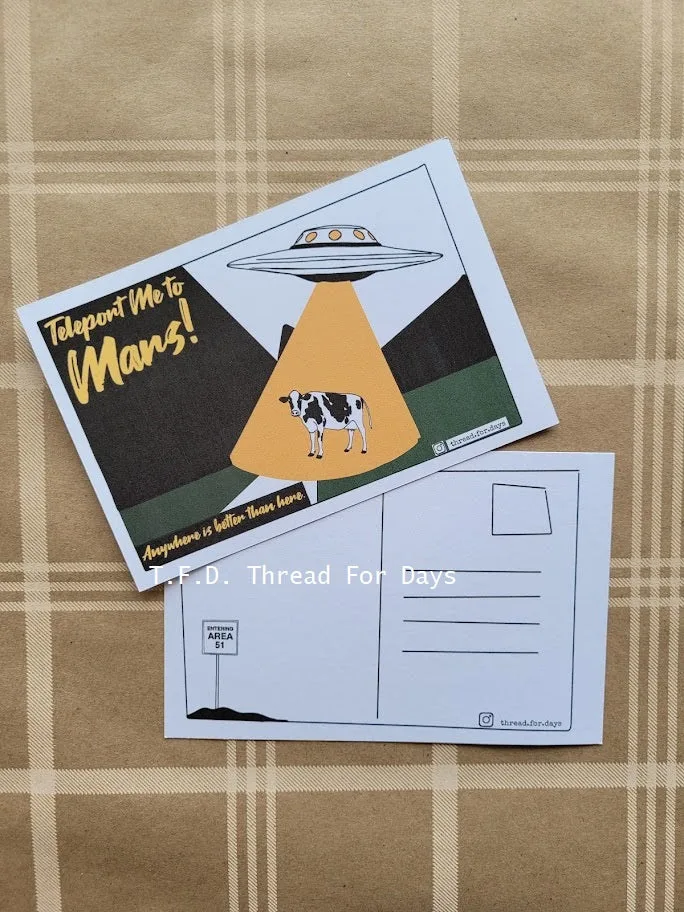
- Teleport Me to Mars | Postcard: Digitally drawn, designed, and handmade, this 4 x 6 double-sided postcard is printed on durable 4 x 6 matte 110lb heavyweight cardstock paper. A standard 4 x 6 size means domestic postcard postage with no surcharge and no hand-cancelling hassle.
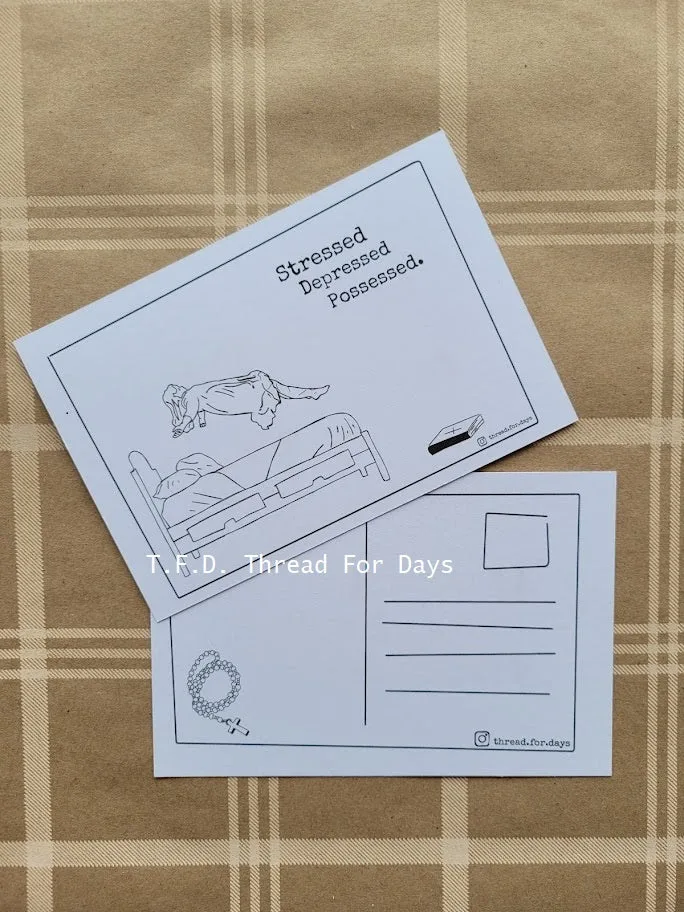
- Stressed, Depressed, Possessed | Postcard: Digitally drawn, designed, and handmade, this 4 x 6 double-sided postcard is printed on durable 4 x 6 matte 110lb heavyweight cardstock paper. Double-sided printing gives you a designed front and a clean back for the address block, which keeps your writing area uncluttered.
Writing a postcard is a five-minute job with a long tail: the card arrives, gets read, and often gets kept. Get the paper weight, the address placement, and the stamp right, and the only thing left to worry about is what to say.