What You Need to Know Before You Start
Adding or replacing a flexible metal conduit connector on your mill is a straightforward task when you have the right part and understand its fit. This guide covers the installation of an 8 mm diameter flexible metal conduit connector, specifically the clearance item from Sieg Industrial Group designed for KX1 and KX3 machines.
Before you begin, confirm your mill model (KX1 or KX3) and that you have a length of 8 mm flexible metal conduit. The connector is a clearance item, so availability may be limited.
Product Facts: 8 mm Flexible Metal Conduit Connector
-
Connector, 8 mm Dia Flexible Metal Conduit CLEARANCE: This connector is designed for use with 8 mm diameter flexible metal conduit. Ensures a snug, secure fit between the conduit and the electrical box on your mill.
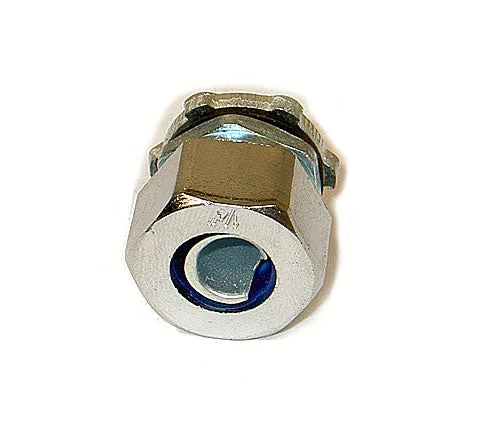
Connector, 8 mm Dia Flexible Metal Conduit CLEARANCE
-
Connector, 8 mm Dia Flexible Metal Conduit CLEARANCE: Compatible with 8 mm flexible metal conduit and intended for use on KX1 and KX3 models. Confirms that this part is specifically designed for these mill models, reducing the chance of compatibility issues.
-
Connector, 8 mm Dia Flexible Metal Conduit CLEARANCE: Manufactured by Sieg Industrial Group and sold as a clearance item – limited availability. If you need this connector, it is advisable to purchase while stock lasts, as it may not be restocked.
Installation Steps
Follow these steps to install the 8 mm flexible metal conduit connector on your mill. Always disconnect power before working on any electrical components.
- Prepare the Conduit and Connector: Cut the 8 mm flexible metal conduit to the required length using a conduit cutter. Ensure the cut is clean and free of burrs. Slide the connector's locknut or compression ring onto the conduit, if applicable.
- Attach the Connector to the Conduit: Insert the end of the conduit into the connector body until it seats firmly. Tighten any compression screws or nuts according to the manufacturer's instructions (not supplied here; follow standard practice for metal conduit fittings).
- Mount the Connector to the Electrical Box: Position the connector against the knockout hole on the mill's electrical box. Secure it with the locknut provided, tightening it with pliers or a suitable tool. Ensure the connector is oriented so the conduit runs without sharp bends.
- Route and Secure the Conduit: Route the conduit to the desired location, using conduit clamps to secure it every few feet as needed. Avoid tight bends that could damage the conduit or wires inside.
- Final Check: Verify that all connections are tight and the conduit is properly supported. Restore power and test the mill's operation. If any issues arise, double-check the connector's fit and the conduit's integrity.
Compatibility and Limitations
This connector is confirmed for use with 8 mm flexible metal conduit and is intended for KX1 and KX3 machines. It may fit other equipment with the same conduit size, but compatibility is not guaranteed by the supplied information. If your mill is a different model, measure your existing conduit diameter and check the electrical box knockout size before purchasing.
As a clearance item, this connector may have limited stock. Consider buying a spare if you anticipate future needs, as restocking is not assured.