What This Kit Does and Who It's For
The Fuel Rail Kit for -6AN Centerfeed "Tucked" K-Series Applications is designed for anyone who has reconfigured their system to support a centerfeed fuel line using -6AN braided hose. This setup is popular in performance builds where a clean, tucked engine bay is the goal.
Centerfeed setups are possible on any port-injected K-Series engine where there is a gap between the runners for cylinders 2 and 3—through which the centerfeed hose can be routed. The kit itself does not include the fuel line, so you'll need to supply your own -6AN braided hose.
Kit Overview and Compatibility
-
Fuel Rail Kit for -6AN Centerfeed "Tucked" K-Series Applications: This kit is designed for anyone that's reconfigured their system to support a centerfeed fuel line using -6AN braided hose. Confirms the kit is intended for builds already set up for a centerfeed return-style system, not a standard OEM rail replacement.
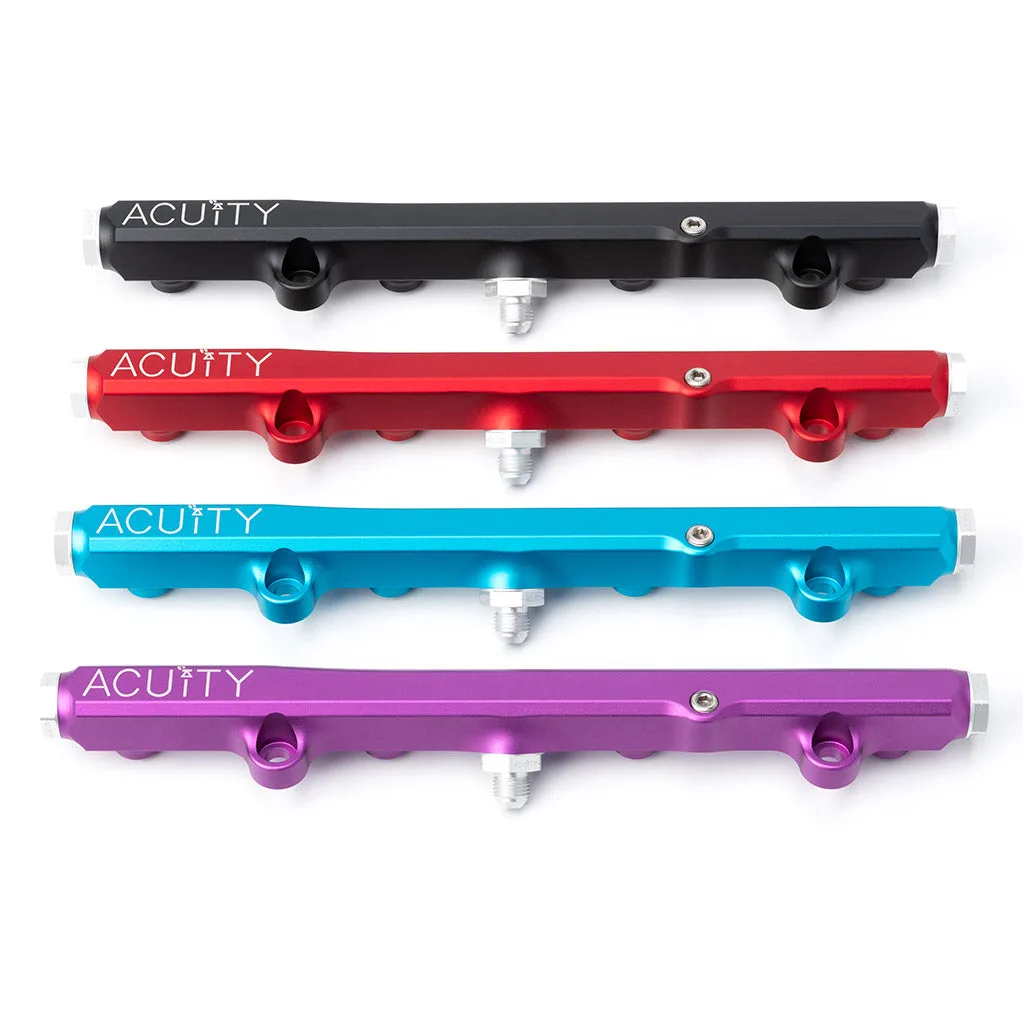
Fuel Rail Kit for -6AN Centerfeed "Tucked" K-Series Applications
-
Fuel Rail Kit for -6AN Centerfeed "Tucked" K-Series Applications: Centerfeed setups are possible on any port-injected K-Series engine where there is a gap between the runners for cylinders 2 and 3 through which the centerfeed hose can be run. Establishes the physical clearance requirement for installation—essential for fitment planning.
-
Fuel Rail Kit for -6AN Centerfeed "Tucked" K-Series Applications: The fuel line is not included with this kit. You must purchase -6AN braided hose separately; plan your order accordingly.
Installation Steps
The following steps are based on the kit's design and typical K-series centerfeed installations. Always follow your vehicle's service manual for fuel system safety procedures.
- 1. Verify Compatibility: Confirm your vehicle is one of the supported models: 2002-2006 Acura RSX (m/t only), 2004-2008 1st Gen Acura TSX (m/t only), 2009-2014 2nd Gen Acura TSX (m/t only), 2006-2011 8th Gen Civic Si/R, 2012-2015 9th Gen Civic Si, 2001-2005 7th Gen Civic Si/R, or 2003-2008 CL7R Accord. Also ensure your engine has the necessary gap between cylinders 2 and 3 runners.
- 2. Gather Components: You will need the fuel rail kit, -6AN braided hose (not included), and appropriate fittings. Decide whether you want to run a gauge and where to mount it—top or side of the rail—before assembly.
- 3. Depressurize Fuel System: Relieve fuel pressure according to your vehicle's service manual. Disconnect the battery and work in a well-ventilated area.
- 4. Remove Existing Rail and Injectors: Carefully remove the stock fuel rail and injectors. Keep the injectors clean and set aside for reuse.
- 5. Configure the Kit: Assemble the rail with your chosen gauge port orientation (top or side). Install the injectors into the rail using new o-rings if needed.
- 6. Route the Centerfeed Hose: Run your -6AN braided hose through the gap between cylinders 2 and 3. Connect one end to the rail inlet and the other to your fuel system's return line.
- 7. Mount the Rail: Secure the rail to the intake manifold using the supplied hardware. Torque bolts to factory specifications.
- 8. Connect Fuel Lines and Leak Test: Attach all -6AN fittings. Reconnect the battery, prime the system (turn key to ON without starting), and inspect for leaks before starting the engine.
Configuration Choices: Gauge Port Location
When configuring the kit, you'll need to decide if you want to run a gauge with your setup, then determine if you want to run the gauge on the top of the rail or the side. This choice affects clearance and accessibility. Top-mounted gauges are easier to read but may interfere with hood clearance on some chassis; side-mounted gauges are more discreet but can be harder to see. Plan your routing before final assembly.
Key Considerations Before You Start
This kit is intended for manual transmission vehicles only—automatic transmission models are not listed as compatible. The fuel line is not included, so ensure you have the correct length and fittings for your specific chassis. If you're unsure about routing, test-fit the hose before committing to cutting it. A leak-free installation depends on quality -6AN fittings and careful assembly.