Quick answer
Replace the stock links one at a time, matching each Incision stainless link to the length and position of the link you remove, then tighten every screw until the link pivots freely with no side-to-side play.
Why the 12.0-inch wheelbase changes the job
The Incision kit is built for SCX10-II models with a 12.0-inch wheelbase, including the Deadbolt, 1969 Chevrolet Blazer, and Wraith 1.9. If your truck has a different wheelbase, the supplied link lengths will not line up with the stock mounting points, so confirm your chassis before you start.
Stainless steel links add durability at a lower price than some alternatives, but they are not lighter than stock. Keep that in mind if you are also changing shocks or springs, because the extra mass at the axles can make small spring-rate changes more noticeable.
Work on one link at a time
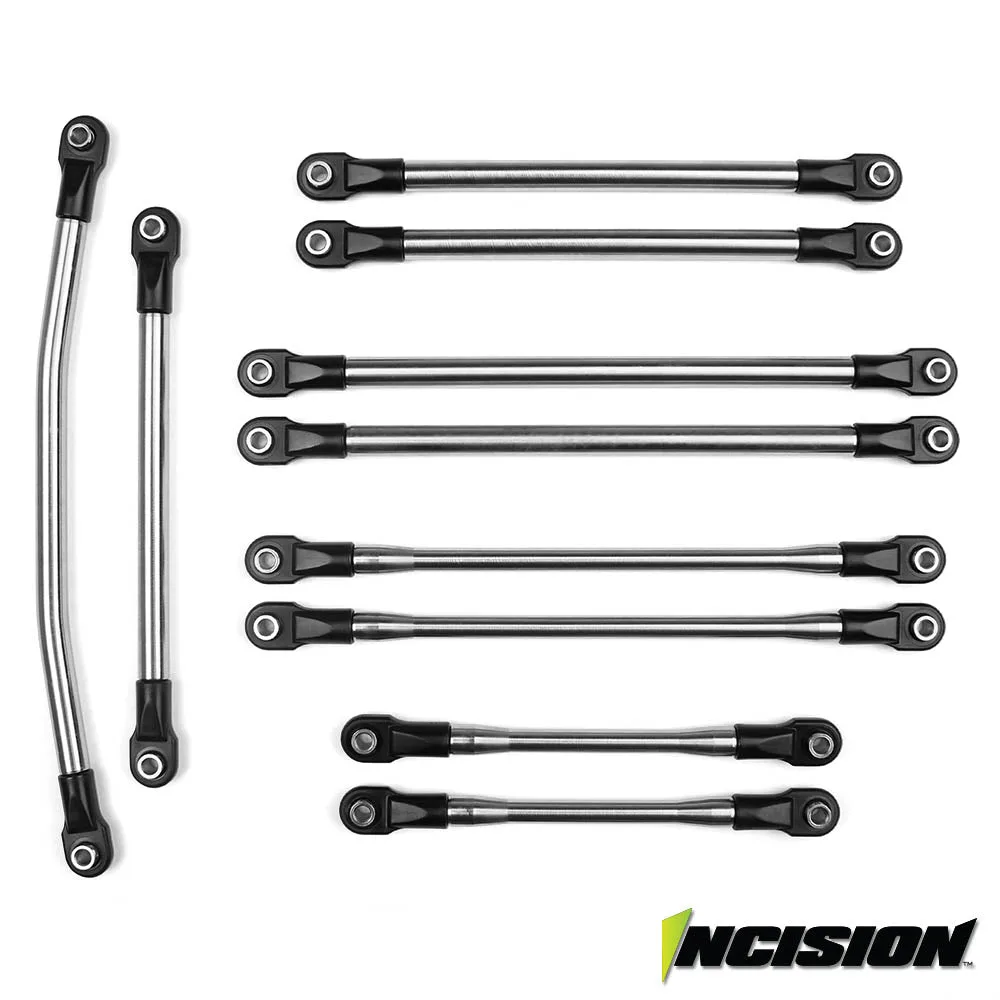
The most reliable way to avoid mixing up the 10 pieces is to remove one stock link, install its replacement, and only then move to the next. The kit includes one drag link, one Panhard link, three upper links, and four lower links, so the count itself helps you confirm you have the right part in hand.
Photograph the stock linkage before you loosen anything. The front and rear upper links can look similar, and a photo removes guesswork when you are checking link length setup later.
Installation steps
- Confirm the wheelbase and lay out the parts: Check that your SCX10-II is a 12.0-inch wheelbase model, then sort the 10 Incision links into drag link, Panhard, upper, and lower groups before removing anything. If the count does not match the kit list, stop and identify the missing piece before disassembly.
- Remove one stock link and compare length: Take off a single stock link, place it beside the matching Incision link, and compare eye-to-eye length and bend direction. Install the Incision link in that same position before moving on. A link that is visibly longer or shorter than its stock counterpart is in the wrong position.
- Set screw depth and check free movement: Thread the mounting screws in by hand first, then tighten until the link pivots smoothly. Back off if the link binds or feels stiff through its travel. Over-tightening crushes the pivot and is the most common cause of a stiff suspension after a link upgrade.
- Repeat for the drag link and Panhard link: Install the drag link and Panhard link last, since their positions depend on the steering and axle placement you have already set with the suspension links. Check steering travel left and right before tightening the Panhard hardware fully.
- Cycle the suspension and recheck: Lift the truck and move the suspension through full droop and compression, watching for links that contact the chassis, motor, or driveshaft. Recheck screw torque after the first run. Any contact at full compression means a link is in the wrong position or installed backward.
Product facts
-
Incision SCX10-II 12.0" 1/4 Stainless Steel 10pc Link Kit: The Incision SCX10-II 12.0 kit is a 10-piece stainless steel set with one drag link, one Panhard link, three upper links, and four lower links. The piece count lets you verify each position as you go, so a missing or swapped link is obvious before you finish.
Incision SCX10-II 12.0" 1/4 Stainless Steel 10pc Link Kit