Quick Answer
Installing a VW Transporter T5 T6 under seat sub box is a direct upgrade that fits under the driver or passenger seat. Focus on securing the enclosure, routing power safely, and tuning the subwoofer to your head unit.
Why an MDF Under Seat Box Works for the Transporter
The VW Transporter T5, T6, and T6.1 have limited floor space, making under-seat enclosures a practical choice. A layered MDF subwoofer enclosure like the one designed for these vans fits snugly under the seat without sacrificing passenger legroom. MDF provides a rigid, non-resonant structure that helps the subwoofer produce clean bass without rattling the cabin.
What to Check Before You Start
Verify that your subwoofer is a 10-inch (250mm) model to match the enclosure opening. The enclosure is unfinished, so you may want to paint or carpet it before installation to protect against moisture and wear. Also confirm that your amplifier can handle the subwoofer's impedance and power rating.
Installation Steps
- 1. Disconnect the Battery: Disconnect the negative terminal of your vehicle battery to prevent short circuits while working with power wires. Wait at least 5 minutes for the electrical system to discharge. A common mistake is forgetting to disconnect the battery, which can cause sparks or damage to your amplifier.
- 2. Route Power Wire from Battery to Amplifier: Run a 4-gauge or 8-gauge power cable from the battery positive terminal through a grommet in the firewall. Keep the wire away from moving parts and hot surfaces. Install an inline fuse within 18 inches of the battery. Check that the grommet is sealed after routing to prevent water or exhaust fumes from entering the cabin.
- 3. Connect Ground Wire to a Clean Metal Point: Attach the amplifier ground wire to a bare metal spot on the vehicle chassis near the amplifier. Use a ring terminal and bolt, and scrape off any paint or rust for a solid connection. A poor ground is the most common cause of amplifier noise and intermittent power loss.
- 4. Run RCA and Remote Turn-On Wires: Route RCA cables from your head unit to the amplifier on the opposite side of the car from the power wire to avoid noise. Connect the remote turn-on wire to the head unit's remote output or a switched 12V source. Running signal wires parallel to power cables can introduce alternator whine into your audio.
- 5. Mount the Enclosure Under the Seat: Place the MDF sub box under the driver or passenger seat. Ensure it does not obstruct seat movement or the seatbelt mechanism. Use the existing seat bolt holes or adhesive Velcro strips to secure the enclosure. If the box shifts during driving, it can rattle or damage the subwoofer. Secure it firmly.
- 6. Install the Subwoofer and Connect Speaker Wires: Mount the 10-inch subwoofer into the enclosure using the provided screws. Connect speaker wire from the amplifier to the subwoofer terminals, ensuring positive-to-positive and negative-to-negative. Overtightening screws can strip the MDF. Hand-tighten until snug.
- 7. Set Gain and Crossover on the Amplifier: Turn the amplifier gain to minimum and the crossover low-pass filter to around 80 Hz. Reconnect the battery, play a familiar track, and slowly increase gain until the bass blends cleanly without distortion. Setting gain too high causes distortion and can damage the subwoofer. Use your ears or a multimeter for accuracy.
Product Facts
-
VW Volkswagen Transporter T5 T6 T6.1 Under Seat MDF Sub Box Subwoofer Enclosure: Layered MDF under seat subwoofer enclosure for VW Transporter T5, T6 & T6.1, 10-inch speaker size. The layered MDF construction reduces unwanted resonance, giving you tighter bass without adding weight or bulk under the seat.
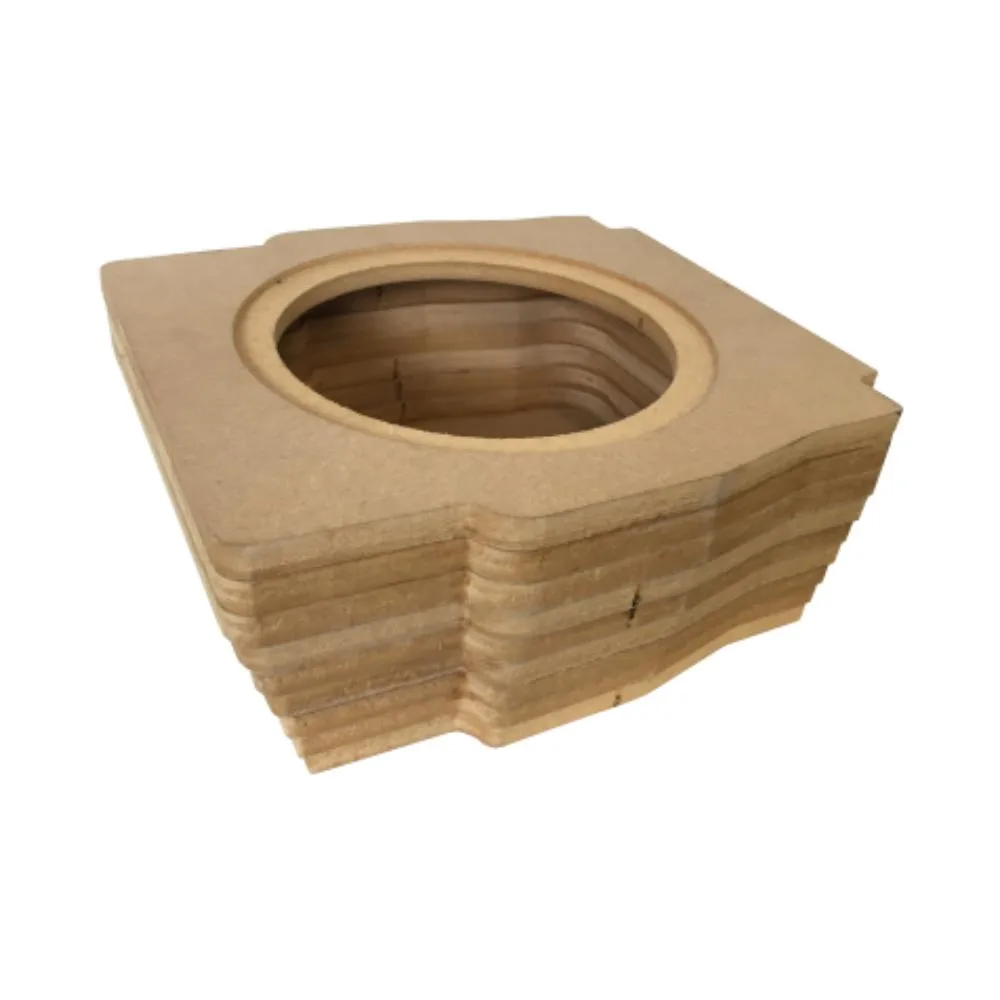
VW Volkswagen Transporter T5 T6 T6.1 Under Seat MDF Sub Box Subwoofer Enclosure