Understanding the Kina 3 Flush Mount
The Kina 3 Flush Mount from Blueprint Lighting is a large-scale fixture inspired by the organic form of a sea urchin. Its asymmetrical design and spike finials make it a dramatic statement piece for modern interiors. One of its standout features is its dual functionality: it can be mounted as a ceiling flush mount or as a dramatic wall light, giving you flexibility in placement.
Before you begin installation, it's important to note that the Kina 3 is an over-scaled fixture. Its size and weight require careful planning for both ceiling and wall installations. This guide will walk you through the key considerations and steps for a successful setup.
Key Facts About the Kina 3 Flush Mount
-
Kina 3 Flush Mount: The Kina 3 Flush Mount boasts an asymmetrical design inspired by an intricate sea urchin. Its unique shape means you may need to consider the visual balance in your room before finalizing the mounting location.
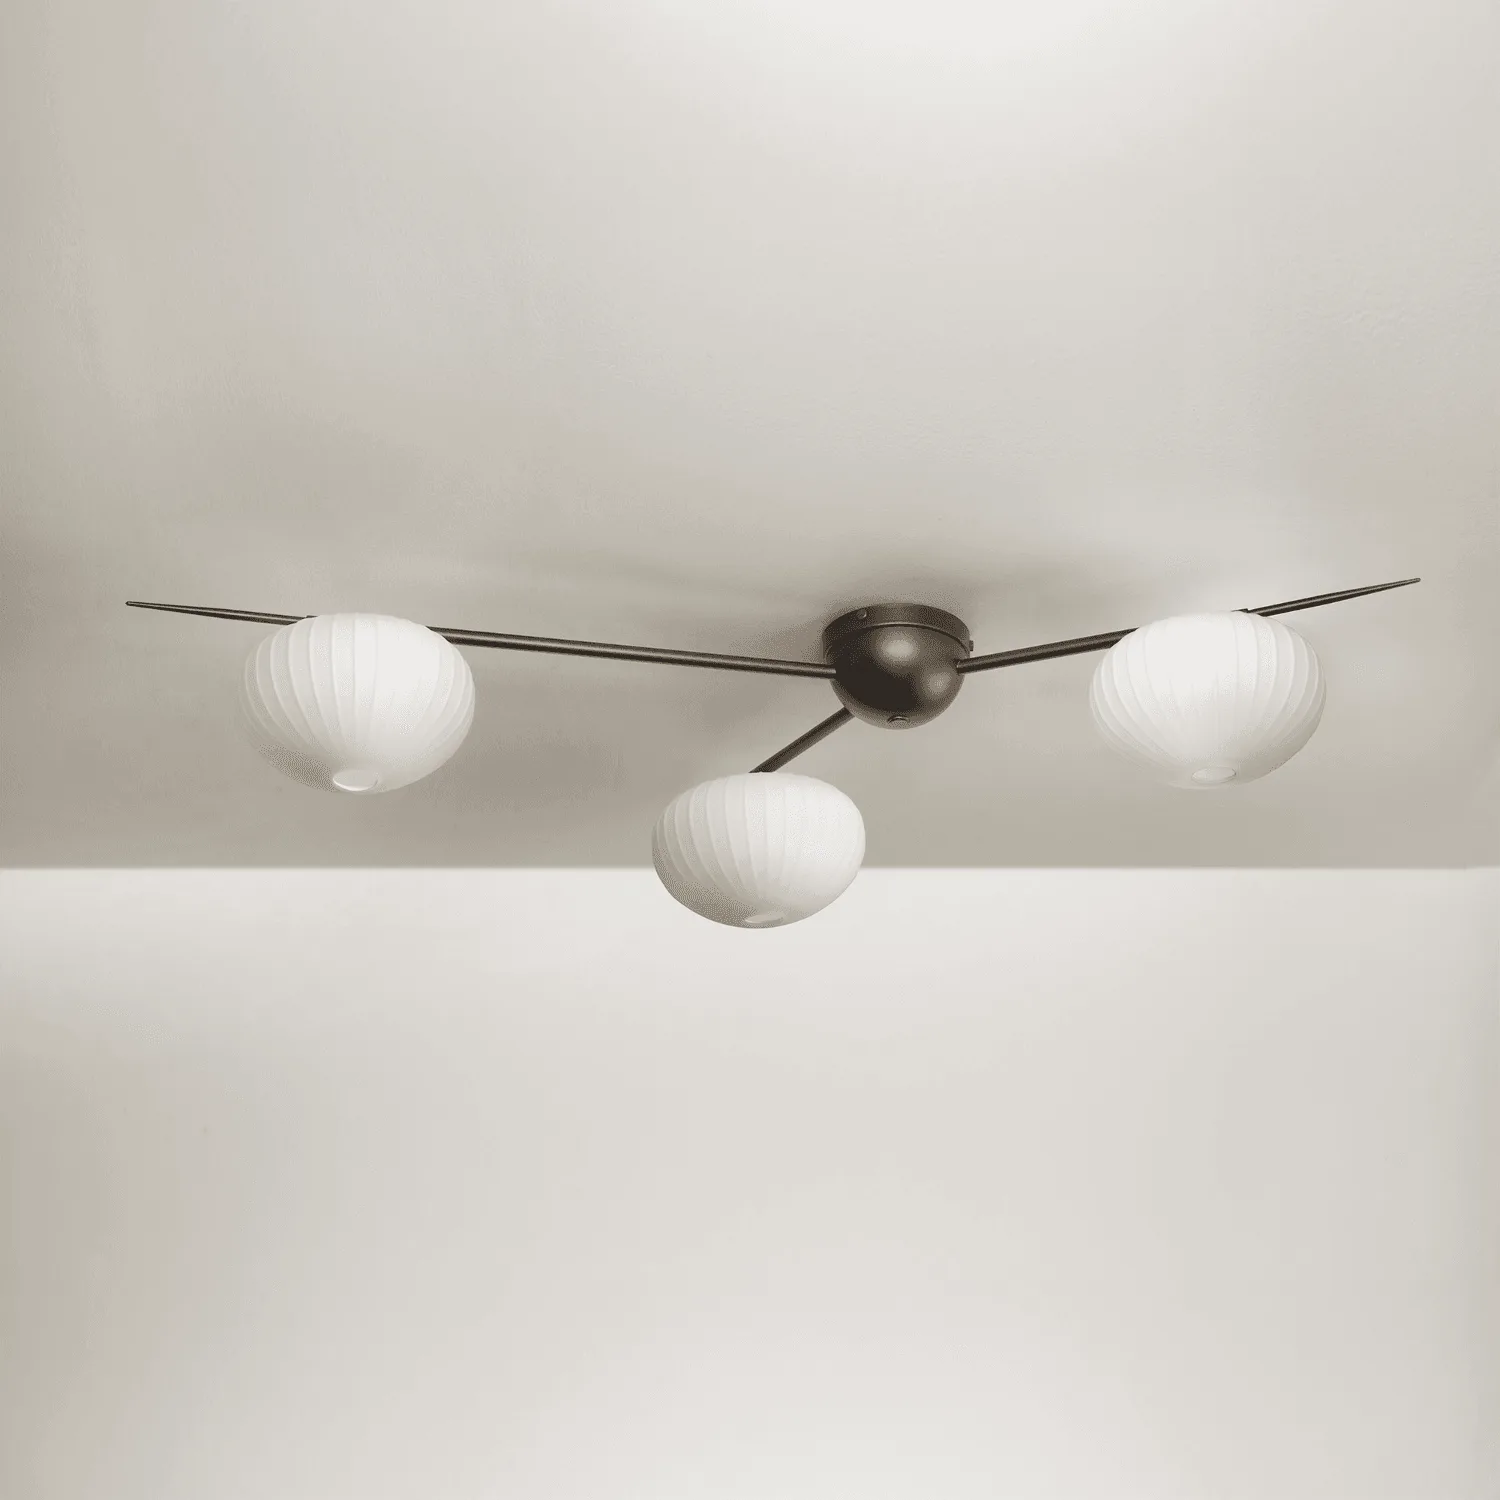
Kina 3 Flush Mount
-
Kina 3 Flush Mount: This fixture can function as a ceiling flushmount or a dramatic wall light. This versatility allows you to use it in different spaces, but the installation method and height considerations will vary depending on your choice.
-
Kina 3 Flush Mount: Kina 3's large scale and spike finials evoke a sense of organic elegance. The large scale means you'll need a sturdy mounting surface and possibly additional support for a secure installation.
Installation Steps for the Kina 3 Flush Mount
The following steps are based on general best practices for installing a large flush mount fixture. Always refer to the manufacturer's instructions that come with your specific unit for any model-specific details.
- 1. Choose your mounting orientation: Decide whether you want the Kina 3 as a ceiling flush mount or a wall light. This will affect the mounting hardware and the electrical box placement. For wall mounting, ensure the wall can support the fixture's weight and that the electrical box is rated for wall-mount fixtures.
- 2. Turn off power and prepare the area: Switch off the circuit breaker for the room where you'll be working. Use a voltage tester to confirm the power is off. Clear the area and have a helper available, as the large size of the Kina 3 makes it a two-person job.
- 3. Install the mounting bracket: Securely attach the provided mounting bracket to the electrical box. For ceiling installations, ensure the electrical box is rated for the weight of the fixture (consult your local codes). For wall installations, use appropriate anchors if the electrical box alone isn't sufficient.
- 4. Connect the wiring: Connect the fixture wires to the house wiring: black to black (live), white to white (neutral), and green or bare copper to ground. Use wire nuts and wrap with electrical tape for a secure connection. Tuck the wires carefully into the electrical box.
- 5. Attach the fixture to the bracket: With the help of an assistant, lift the Kina 3 flush mount and align it with the mounting bracket. Secure it using the provided screws or bolts. Tighten evenly to avoid stressing the fixture.
- 6. Adjust height and orientation: The Kina 3's spike finials and asymmetrical design may allow for some adjustment in how the fixture sits. Gently rotate or tilt the fixture as needed to achieve your desired look. Ensure all fasteners are tight before releasing the fixture.
- 7. Restore power and test: Turn the circuit breaker back on and test the light. If it works, you're done. If not, double-check your wiring connections.
Height Adjustment Considerations
Because the Kina 3 can be mounted on a ceiling or wall, height adjustment is more about choosing the right mounting height than adjusting the fixture itself. For ceiling installations, a flush mount is ideal because it doesn't hang down. For wall installations, mount the fixture at the height recommended in the product instructions for the best visual impact.
The fixture's large scale means it will draw attention, so consider the surrounding furniture and architecture. In a hallway, a wall-mounted Kina 3 can serve as a dramatic focal point. In a living room, a ceiling-mounted version can anchor the room's lighting scheme. No specific height adjustment mechanism is confirmed in the supplied information, so treat the fixture's position as fixed once mounted.
What to Keep in Mind
The Kina 3 Flush Mount is a statement piece, and its installation requires careful planning. The supplied information does not include specific installation instructions, so always follow the manual that comes with your fixture. If you're unsure about any step, consult a licensed electrician.
For wall mounting, ensure the wall can support the fixture's weight and that the electrical box is properly rated. For ceiling mounting, consider the ceiling material (drywall, plaster, etc.) and use appropriate anchors if needed. The Kina 3's asymmetrical design may also affect how light is distributed, so test the orientation before finalizing the installation.