Quick answer
To use the Kreg 20V Ionic Drive Random Orbit Sander, attach a compatible battery, connect dust collection, select a grit and speed, then let the tool do the work with light pressure. Keep the pad flat, move steadily, and avoid tilting or pressing hard. This guide walks through setup, sanding technique, and cleanup so you get smooth results without swirl marks.
Why random orbit sanding works differently
A random orbit sander spins the pad while the orbit moves in a small circle, creating a random scratch pattern that reduces visible swirl marks. The Kreg 20V Ionic Drive Sander uses a 3/32-inch orbit, which balances fast material removal with a smooth finish. That orbit size is a good middle ground for general woodworking, from leveling glue lines to prepping for stain. Because the pad moves randomly, you do not need to sand with the grain the way you would with a block. Let the tool glide; forcing it slows the orbit and can leave marks.
Match grit to the job before you start
Start with a coarser grit only if you need to remove material or flatten a surface. For most finish prep, begin around 120 grit, then step to 150 and 180. Skipping more than one grit step makes the finer paper work harder and can leave scratches. If you are sanding bare wood that will be stained, stop at 180; going finer can close the pores and reduce stain absorption. For painted surfaces or between coats, 220 or higher is typical. The sander accepts standard 5-inch hook-and-loop discs, so you can swap grits quickly.
Set up dust collection to keep the air clear
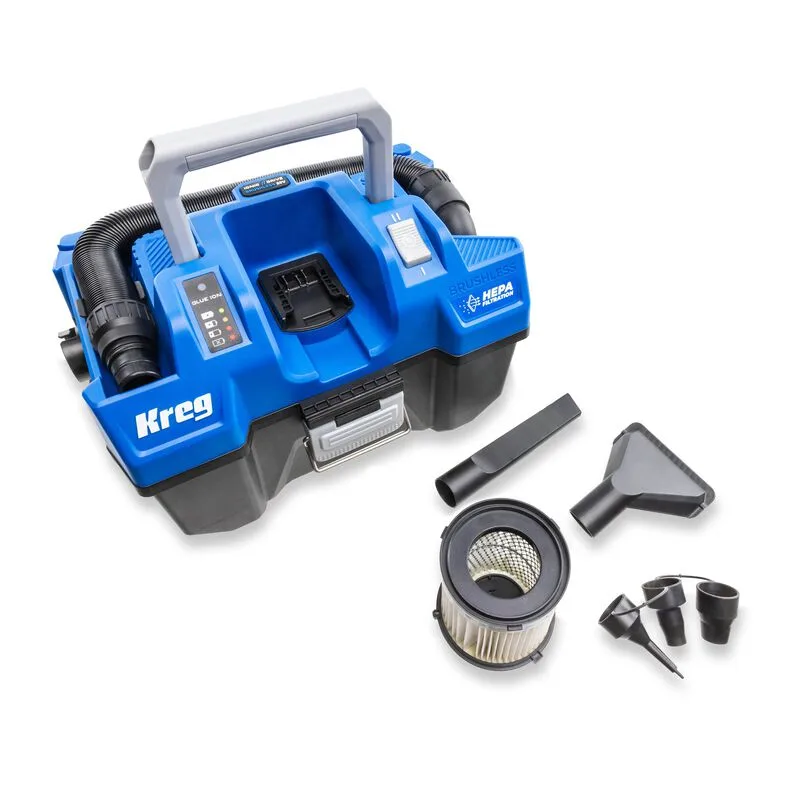
The sander has a sealed dust containment system that captures debris at the pad. You can attach the included dust bag for small jobs, but for larger sanding sessions a vacuum is more effective. The Kreg 20V Ionic Drive Wet/Dry Vac with HEPA has a universal connector that fits 1-1/4-inch and 36mm tool ports, so it connects directly to the sander. That vacuum captures 99.97% of particles 0.3 microns and larger, which matters when you are sanding fine dust. If you use the vac, check the hose for clogs and empty the canister before it fills; reduced airflow lets dust escape into the air. For the sander's onboard bag, empty it when it is about half full to maintain suction.
Choose a speed and start sanding
The Kreg 20V Ionic Drive Sander has variable speed from 6,000 to 12,000 OPM. Use lower speeds for finish sanding and higher speeds for aggressive removal. Start the sander before touching the wood, then set it down flat. Keep the pad level; tilting concentrates pressure on one edge and cuts grooves. Move the sander in overlapping passes, either with or across the grain, at a steady pace. Let the weight of the tool do the work. Pressing down slows the orbit and can create swirl marks. If you feel the sander bog down, you are pressing too hard or the grit is loaded. Lift the sander before turning it off to avoid leaving a mark.
Check your work and clean up
After each grit, wipe the surface with a tack cloth or vacuum to remove dust. Look at the surface under good light and feel it with your hand. If you see scratches from a previous grit, go back one step. When you are done, remove the disc and tap it clean or replace it. Empty the dust bag or vacuum canister. If you used the HEPA vac, check the filter; a clogged filter reduces suction. The Kreg 20V Ionic Drive Wet/Dry Vac HEPA Replacement Filter is a direct replacement that captures 99.97% of particles and helps maintain strong airflow. Replace it when you notice a drop in suction or visible debris on the filter pleats.
Step-by-step random orbit sanding
- Prepare the work surface: Remove loose debris and check for protruding nails or staples. Secure the workpiece so it cannot move. Loose material can tear the sanding disc or cause kickback.
- Attach the battery and dust collection: Slide a charged 20V battery into the sander until it clicks. Connect the dust bag or a vacuum hose to the port. A loose hose or bag reduces dust capture and can fall off during sanding.
- Select the right grit and speed: Start with the coarsest grit you need, then step through finer grits. Set the speed dial to a low setting for finish work or higher for removal. Skipping grits or using too high a speed on fine paper can leave swirl marks.
- Start the sander and set it down flat: Turn on the sander before contacting the wood. Place it flat on the surface and move it in overlapping passes. Tilting the sander or pressing down too hard creates gouges and slows the orbit.
- Let the tool do the work: Guide the sander with light pressure. Keep it moving; dwelling in one spot removes too much material. If the sander bogs down, you are pressing too hard or the disc is clogged.
- Lift before turning off: When you finish a pass, lift the sander off the wood before switching it off. Stopping the sander on the surface can leave a circular mark.
- Check and repeat with finer grit: Wipe away dust and inspect the surface. If scratches remain, repeat with the same grit or go back one step. Good lighting and a hand rub help you catch defects before finishing.
Product facts
- Kreg 20V Ionic Drive™ 5" Random Orbit Sander (Tool Only): Variable speed settings (6,000–12,000 OPM) for controlled sanding. Lower speeds help you avoid burning the surface on fine grits, while higher speeds remove material faster.
- Kreg 20V Ionic Drive™ 5" Random Orbit Sander (Tool Only): 3/32" orbit delivers fast material removal and smooth finishes. This orbit size is versatile for both aggressive sanding and final prep, reducing the need for multiple sanders.
- Kreg 20V Ionic Drive™ 5" Random Orbit Sander (Tool Only): Sealed Dust Containment System captures dust at the pad. Keeps more debris in the bag or vacuum and less in the air, which is healthier and keeps your shop cleaner.
- Kreg 20V Ionic Drive™ Wet/Dry Vac with HEPA (Tool Only): Universal connector fits 1-1/4" and 36mm tool ports. Connects directly to the sander without adapters, so you can set up dust collection quickly.