Quick answer
Use one sandbag per light stand as a minimum, and add a second bag on the base or boom counterweight when the stand carries a heavy modifier or extends high. Fill each bag about two-thirds full with dry sand or gravel so it stays flexible, then cinch it closed and place it over the lowest part of the stand.
Why bag placement matters more than bag count
A sandbag only stabilizes a stand when its weight pulls downward on a low point. Hanging a bag from a hook halfway up the stand raises the center of gravity and can make a tip-over worse. Place the bag on the floor across the stand’s base legs, or drape a saddlebag-style bag over the lower column so the weight sits as close to the ground as possible.
If your stand has a boom arm, the counterweight bag belongs on the short end of the boom, not on the stand column. That placement counterbalances the camera or light on the long end and reduces the chance of the boom swinging down.
How much weight is enough for a studio stand
There is no universal sandbag weight for stands because the safe amount depends on the stand’s rated load, the height you extend it, and the size of the modifier. A small speedlight umbrella needs far less counterweight than a large softbox on a boom. Check your stand’s manual for any maximum load guidance, and treat that number as a limit for the equipment, not a target for the sandbag.
As a practical starting point, use one bag that you can comfortably lift with one hand for a lightweight stand, and add a second bag only when the stand feels top-heavy or the manufacturer’s instructions call for counterweight. Never guess by adding weight until the stand “feels stable” while the light is powered on—test stability with the light off and the stand at its working height.
Filling mistakes that shorten bag life
Overfilling is the most common mistake. A bag packed to the seams becomes rigid, does not drape over a stand base, and puts stress on the stitching. Damp sand is another problem: it can promote mold and add unpredictable weight. Use dry sand, gravel, or small heavy items, and leave room to fold or cinch the top.
If the bag will stay in a studio, a plastic liner or double-bagging helps contain dust. For location work, choose a bag with a secure closure so material does not spill in a client’s space.
Step-by-step: fill and place light stand sandbags
- Choose dry fill material: Use dry sand, gravel, or small heavy items. Avoid damp sand or wet material that can clump, mold, or change weight unpredictably. Check that the fill is dry before it goes into the bag.
- Fill each bag about two-thirds full: Leave the top quarter to third of the bag empty so you can fold or cinch it closed. A bag that is packed tight will not sit flat on a stand base. Squeeze the bag gently—it should still flex, not feel like a brick.
- Close the bag securely: Fold the top over and fasten the closure fully. If the bag has no secure closure, tie it off or use a liner so fill cannot spill during transport. Turn the filled bag upside down over a trash bin to test for leaks before use.
- Place the bag on the lowest stable point: Drape a saddlebag over the stand’s base legs or lower column so the weight pulls straight down near the floor. For a boom, place the bag on the short end as a counterweight. Never hang a sandbag from a high hook or from the light fixture itself.
- Test stability with the light off: Set the stand to its working height, attach the modifier, and gently press the top of the stand in four directions. If it tips or feels light, add a second bag or reduce the boom length. Recheck stability after any change to stand height, boom length, or modifier size.
Product facts
-
2 x Light Stand Sandbags Photo Video Sand Bag Saddlebag: Each saddlebag measures 9.5 by 10 inches per side and can be filled with sand, rocks, gravel, or heavy items. The two-sided saddle shape drapes over a stand base or boom arm, so you can add weight without a separate hook.
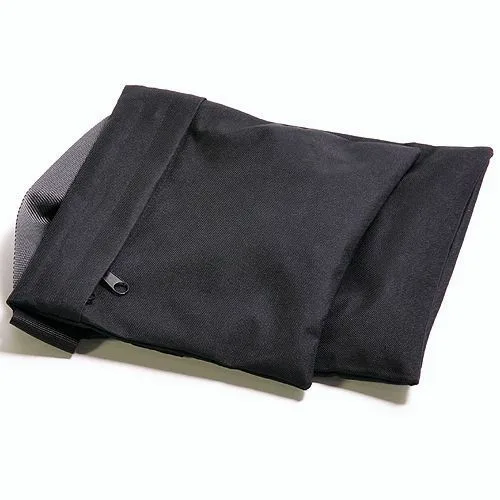
2 x Light Stand Sandbags Photo Video Sand Bag Saddlebag