Quick answer
To adapt a 54mm motor mount in a LOC kit with the LOC-N-Ring system, choose the LOC-N-Ring Adaptors that match your desired motor diameter (29mm or 38mm) and follow the installation steps below. Always dry-fit all components before applying epoxy.
Why the LOC-N-Ring system simplifies motor adaptation
The LOC-N-Ring system uses a set of rings that screw into the existing 54mm motor mount, allowing you to switch between 29mm and 38mm motors without building a new mount. This modular approach saves time and lets you fly the same rocket with different motor sizes.
The adaptors are designed for LOC kits that already have the LOC-N-Ring system, such as the BBX, IRIS, ZEUS, Wolverine, and Magnum. If your kit lacks this system, these adaptors will not fit without modification.
Key sizing considerations
Motor mount sizing is critical: the adaptor must match both the motor diameter and the mount's inner diameter. The LOC-N-Ring Adaptors come in two variants: LNRMMA29 for 29mm motors and LNRMMA38 for 38mm motors. Each includes a motor tube, aft ring, and the necessary rings and hardware.
Check your kit's motor mount diameter before ordering. These adaptors are specifically for 54mm mounts in LOC kits with the LOC-N-Ring system. Using them in other mounts may require additional parts or modification.
Step-by-step installation
- Identify your motor mount size: Measure the inner diameter of your motor mount. LOC-N-Ring Adaptors are designed for 54mm mounts in LOC kits with the LOC-N-Ring system. If your mount is not 54mm or lacks the LOC-N-Ring system, these adaptors may not fit.
- Select the correct adaptor variant: Choose LNRMMA29 for 29mm motors or LNRMMA38 for 38mm motors. Verify the motor tube length matches your intended motor size. Using the wrong variant will result in improper fit and potential motor ejection failure.
- Dry-fit all components: Before applying any adhesive, assemble the adaptor rings, motor tube, and aft ring into the motor mount. Check that all parts seat fully and the motor tube aligns with the mount. A dry fit reveals interference or gaps that must be corrected before permanent assembly.
- Install the t-nuts: Insert the provided t-nuts into the aft ring from the back side. Secure them with a small amount of epoxy to prevent them from pushing out during motor installation. T-nuts provide secure mounting points for the adaptor rings; skipping this step can lead to loose hardware.
- Bond the adaptor rings: Apply a thin, even layer of epoxy to the outside of the 29mm to 54mm rings and slide them into the motor mount. Ensure they are fully seated and aligned. Excess epoxy can obstruct the motor tube; wipe away any squeeze-out immediately.
- Insert and secure the motor tube: Slide the motor tube through the adaptor rings until it protrudes the correct amount for your motor. Secure with the provided screws through the t-nuts. The motor tube must be centered and tight; any play will affect thrust alignment.
- Final check and cure: Verify all screws are tight and the motor tube is perpendicular to the mount. Allow epoxy to cure fully per manufacturer instructions before flight. A cured assembly should have no movement; test with a dummy motor if possible.
Product facts
-
LOC-N-Ring Adaptors: LNRMMA29 includes a 29mm x 12″ motor tube, 4″ aft ring, 2 x 29mm to 54mm rings, 2 t-nuts and screws. This kit provides all necessary hardware to adapt a 54mm mount to 29mm, ensuring a complete installation.
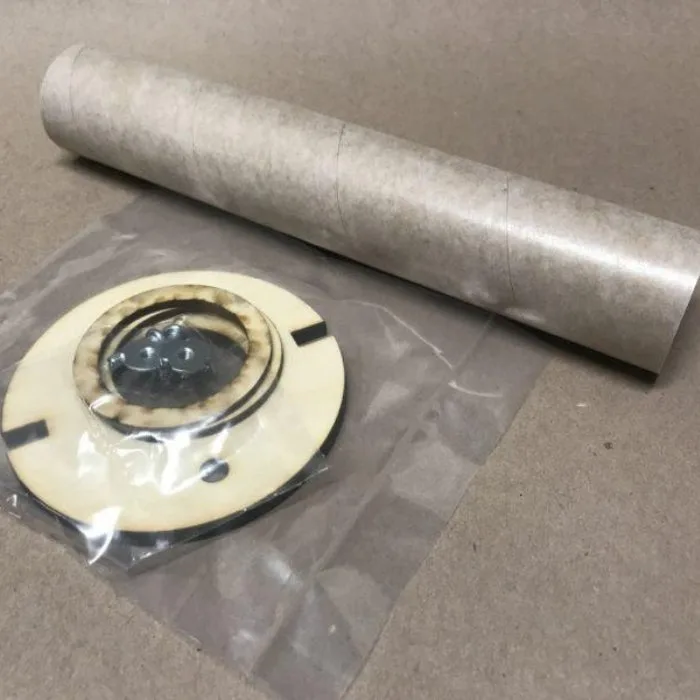
LOC-N-Ring Adaptors