Quick Answer
Build the M.S.G Mecha Supply 25 Expansion Armor Type H by following the runner layout, dry-fitting parts before gluing, and using the armor's reconfiguration joints to customize your mecha display.
Why the Reconfiguration Joints Matter
The Expansion Armor Type H is designed as an 'Infinite Reconfiguration Armor Unit.' That means the joints and connection points are meant to be repositioned, not locked into a single pose. Spend time testing the articulation before committing to glue or paint.
Because the kit is a separate armor set, it won't include a full mecha body. Plan your build around an existing model you already own, and check that the connection ports match before you start.
Painting and Finishing Trade-offs
The armor comes with molded colors, so you can build it straight from the box. But if you want a custom look, painting individual armor plates before assembly gives cleaner results than painting after the joints are in place.
Keep in mind that painting the connection pegs can make them thicker. If you plan to reconfigure the armor frequently, mask the pegs or leave them unpainted to avoid a tight fit.
Step-by-Step Build and Customize
- Sort and identify runners: Lay out all runners and identify the armor plates, joint pegs, and connection parts. Match each part to the instruction manual before cutting anything from the sprue. Check that you have all runners listed in the manual before you start cutting.
- Cut parts carefully: Use a hobby nipper to cut parts from the runner, leaving a small nub. Trim the nub with a hobby knife or sand it flat to avoid stress marks. Cut away from your body and work on a mat to protect your work surface.
- Dry-fit before gluing: Assemble each armor section without glue first. Test the reconfiguration joints to see how they move and whether any parts need sanding for a smoother fit. If a joint feels too tight, sand the peg lightly rather than forcing it.
- Paint or finish in sections: If you're painting, do it on individual armor plates before final assembly. Mask connection pegs to keep them from thickening, and let all paint cure completely before snapping parts together. Test paint on a spare runner to confirm the color and finish before applying to visible parts.
- Attach to your base mecha: Connect the armor sections to your existing model kit's ports. Reconfigure the joints to achieve the pose you want, and adjust the armor placement for balance. If the armor feels loose, add a tiny drop of glue on the peg only if you don't plan to reconfigure it later.
Product at a Glance
-
M.S.G MECHA SUPPLY25 EXPANSION ARMOR TYPE H [REPRO]: This is part of the MECHA SUPPLY series and is described as an 'Infinite Reconfiguration Armor Unit.' The armor is built for flexibility, so you can attach it to different mecha or rearrange it for varied poses without needing a new kit each time.
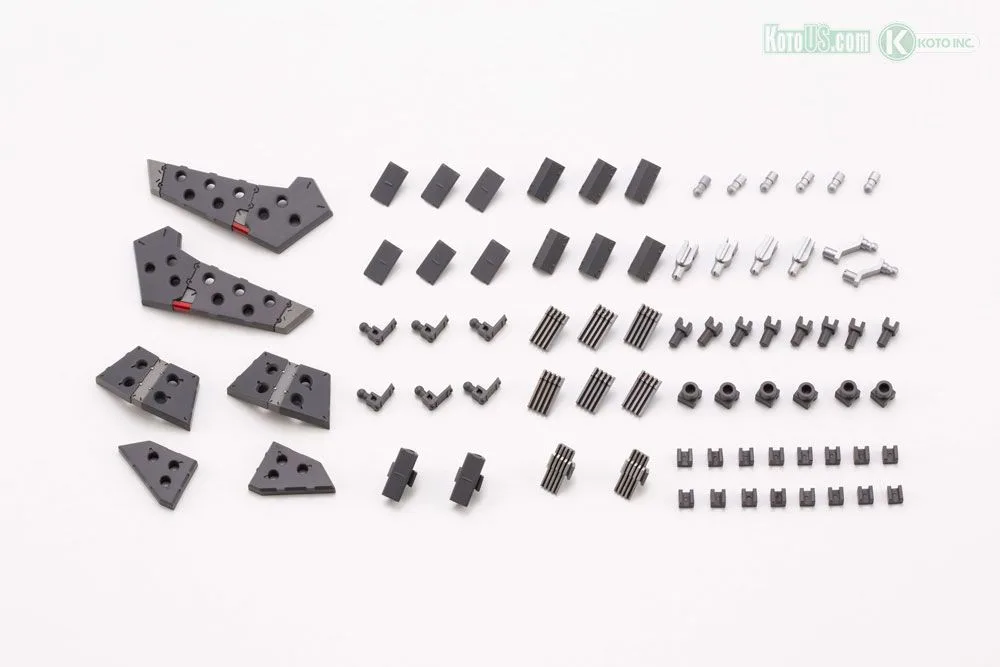
M.S.G MECHA SUPPLY25 EXPANSION ARMOR TYPE H [REPRO]