Quick answer
Start with a small grid and a clear color plan, build flat pixel art first, then snap sections together and check every seam before adding height. The 400-piece set works best when you treat it as a limited palette and plan the silhouette before placing cubes.
Why planning a grid matters more than cube count
With 400 half-inch cubes, it is tempting to start snapping immediately, but the set rewards a little planning. Because each cube connects magnetically on any side, a single misplaced cube can pull a whole row out of alignment. Sketching your design on a grid first keeps the silhouette readable and prevents color shortages in the middle of a build.
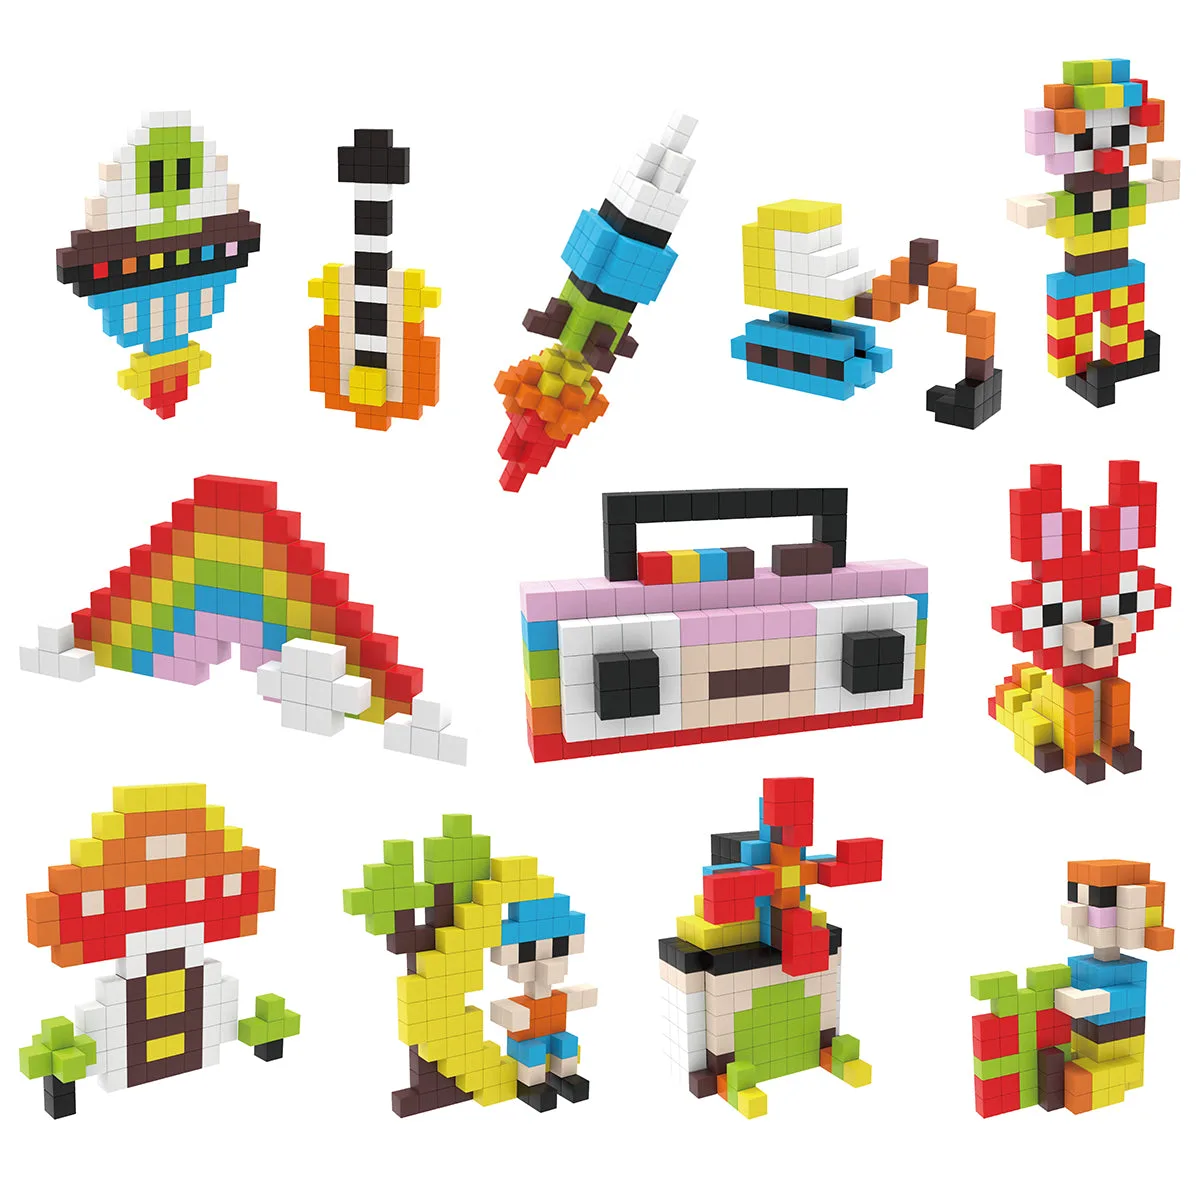
The included idea cards are a useful starting point, but they are not a fixed instruction manual. Use them to borrow shapes and color combinations, then adapt the grid to your own design. If you want to build a character or animal, count the widest row first and work outward from there.
Where the 400-piece set stops and other tools start
This set is built for pixel-style flat and low-relief designs, not for large architectural models. The mini cube size limits how much surface area you can cover, so a detailed scene will use up pieces quickly. If your design needs tall walls or long spans, plan to build in sections rather than one continuous structure.
The set does not include a baseplate or display frame, so you will need a flat, non-metal work surface to keep rows aligned. A baking sheet or magnetic whiteboard can help hold pieces in place, but check that the surface does not pull cubes out of your design when you lift it.
Step-by-step: build a magnetic cube pixel design
- 1. Sketch your design on a grid: Draw your pixel art on graph paper or a free grid app, counting the width and height in cubes. Keep the design within a 20 by 20 cube area so you do not run out of one color. Common mistake: starting without a grid and discovering halfway through that your character is too wide for the pieces you have left. Check your color counts before you snap the first cube.
- 2. Sort cubes by color into small trays: Separate the 400 cubes by color before building. Keep each color in its own shallow container so you can grab pieces without scattering the rest. Common mistake: mixing all colors in one pile, which slows down placement and makes it easy to use the wrong shade in a critical area. A muffin tin or ice cube tray works well for sorting.
- 3. Build the outline first, then fill in: Place the outer edge of your design first, snapping each cube to its neighbor on any side. Then fill the interior row by row. Common mistake: filling the center before the outline, which makes it harder to see whether the silhouette matches your sketch. Leave gaps for colors you plan to add later.
- 4. Press each seam firmly and check alignment: After every few cubes, press the row gently to make sure the magnets are fully engaged. Run a finger along the seam to feel for high or low cubes. Common mistake: assuming the magnets will pull everything into place, when a slightly rotated cube can create a visible bump in the pixel grid. Fix misaligned cubes immediately rather than at the end.
- 5. Build in sections for larger designs: If your design is wider than about 15 cubes, build it in two or three panels and snap them together at the end. Keep the connection edges straight so the panels join cleanly. Common mistake: building one large flat sheet and trying to lift it, which can cause the magnets to shear apart. Test the join on a small section before committing.
- 6. Add height only after the flat layer is stable: Once the flat design is complete, add a second layer by stacking cubes directly on top of matching colors. Start at the center and work outward. Common mistake: stacking on the edges first, which makes the structure top-heavy and prone to tipping. Keep tall sections short and supported on all sides.
- 7. Photograph and store by color: Take a photo of your finished design against a plain background so you can rebuild it later. Then separate the cubes back into color trays before storing. Common mistake: tossing all cubes into one bag, which makes the next build slower and risks losing the smallest pieces. A photo plus sorted storage turns one build into many.
Product facts
-
PicassoTiles 400pc Magnetic Tiles Mini Pixel Puzzle Cubes: The set includes 400 magnetic 0.5-inch mini cubes and 50 idea cards. The small cube size makes grid planning essential, and the idea cards give you ready-made color patterns to copy or adapt.
PicassoTiles 400pc Magnetic Tiles Mini Pixel Puzzle Cubes