Why a Thoughtful Loadout Matters
A shooting belt is only as effective as its arrangement. The Magnetix Battle Belt Loadout Black comes with a complete set of pouches and accessories, but how you position them on the belt determines your speed, comfort, and access under stress. This guide covers practical tips for organizing your gear so you can move efficiently on the range or in the field.
What's in the Box
-
Magnetix™ Battle Belt Loadout Black: Includes: Magnetix™ Battle Belt, Mag-Release Dump Pouch, Pincer™ Single Multi-Caliber Mag Pouch, Agilite General Purpose Pouch, Pincer™ Pistol Double Pouch, MD2™ Compact Trauma Kit | IFAK Knowing every component helps you plan placement before you attach anything. Each pouch has a specific role in your loadout.
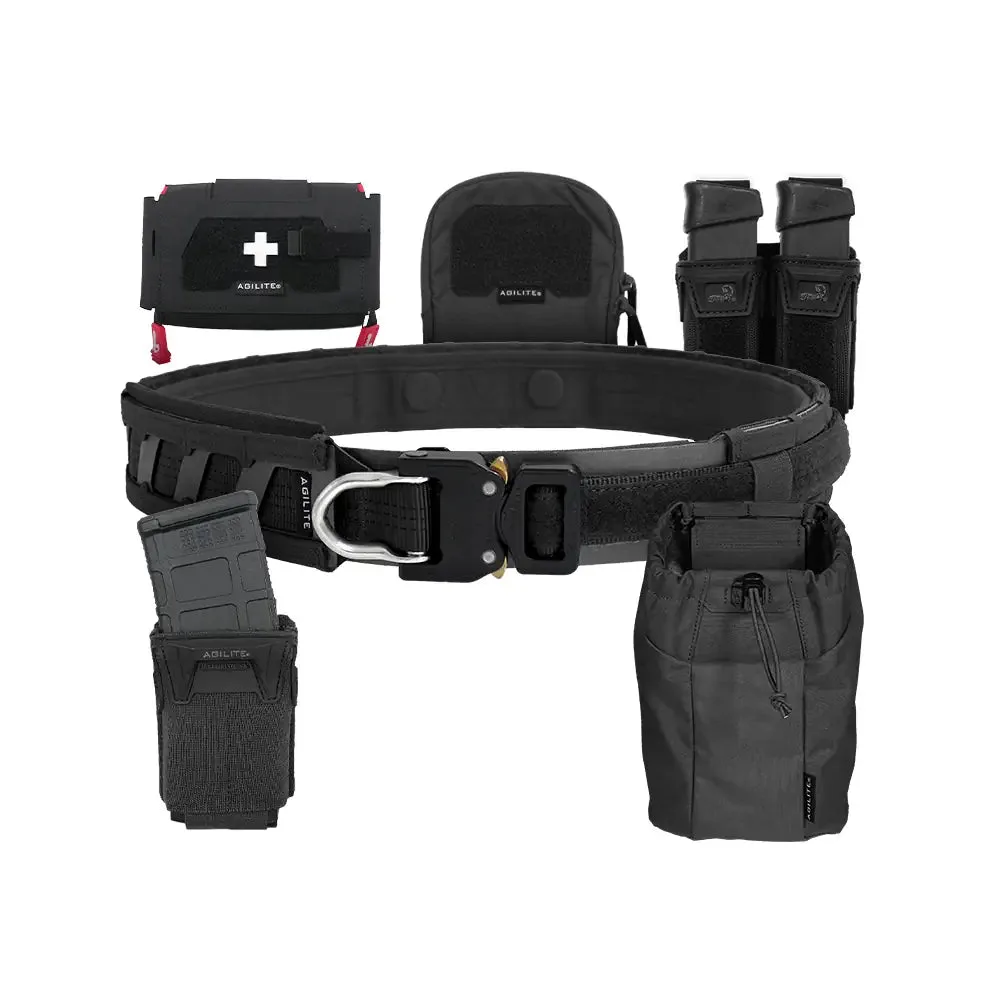
Magnetix™ Battle Belt Loadout Black
Step-by-Step Loadout Setup
Follow this sequence to build a balanced belt that keeps your essentials within easy reach.
- Choose the Right Belt Size: The Magnetix Battle Belt is available in Small, Medium, Large, and XL. Select a size that fits snugly over your clothing or outer layer without shifting during movement.
- Attach the Main Belt: Thread the inner belt through your trouser belt loops if you use one, or wear the outer belt over your gear. Secure the buckle and adjust for a comfortable, non-slip fit.
- Position the Mag Pouches First: Place the Pincer™ Single Multi-Caliber Mag Pouch and the Pincer™ Pistol Double Pouch on your support side (usually the left for right‑handed shooters). This puts spare magazines where your non‑dominant hand can reach them quickly.
- Add the Dump Pouch: Mount the Mag-Release Dump Pouch behind the mag pouches or at your 7–8 o'clock position. It gives you a place to stow empty magazines without dropping them.
- Mount the General Purpose Pouch: Position the Agilite General Purpose Pouch near your weak‑side hip or wherever you need extra storage for tools, a multi‑tool, or admin gear.
- Secure the IFAK: Attach the MD2™ Compact Trauma Kit | IFAK to your strong side rear (around 4–5 o'clock). This keeps medical access close but out of the way of your primary reload and draw.
Balance and Quick Access Tips
Distribute weight evenly around the belt to avoid sagging or hot spots. Heavier items like loaded magazines should sit closer to your body's centerline, while lighter pouches can go farther out. Test your setup by running through a few dry reloads and draws; adjust pouch positions until every motion feels natural.
The Pincer™ pouches are designed for retention and one‑handed access. Practice indexing the magazine before you need it under time pressure. The Mag-Release Dump Pouch also lets you dump empties quickly without looking, so keep it in a consistent spot.
Final Check Before Use
Once your loadout is assembled, do a full range of motion test: bend, twist, kneel, and simulate shooting positions. Tighten any loose straps and confirm that nothing interferes with your holster draw or rifle manipulation. A well‑organized belt saves seconds when it counts.