Start with the kit contents, not the instructions
Before you open any adhesive, lay out every part from the Magnum 3.1" kit and compare it to the component list. The kit ships with a single 29mm motor mount, a nylon shock cord with sewn loops, a 36" nylon parachute, a starter fire blanket, and all necessary hardware. The decal set is limited to the Magnum logo only, so plan your finish accordingly.
This initial inspection is your first checkpoint. Confirm that the airframe tube, payload section, nose cone, fins, centering rings, and motor mount hardware are all present and undamaged. If anything is missing or cracked, resolve it before you begin assembly—not after epoxy is mixed.
What the Magnum 3.1" kit includes
-
Magnum 3.1": Single 29mm motor mount with all necessary hardware. Confirms the motor mount configuration so you can plan motor retention and adapter needs before assembly.
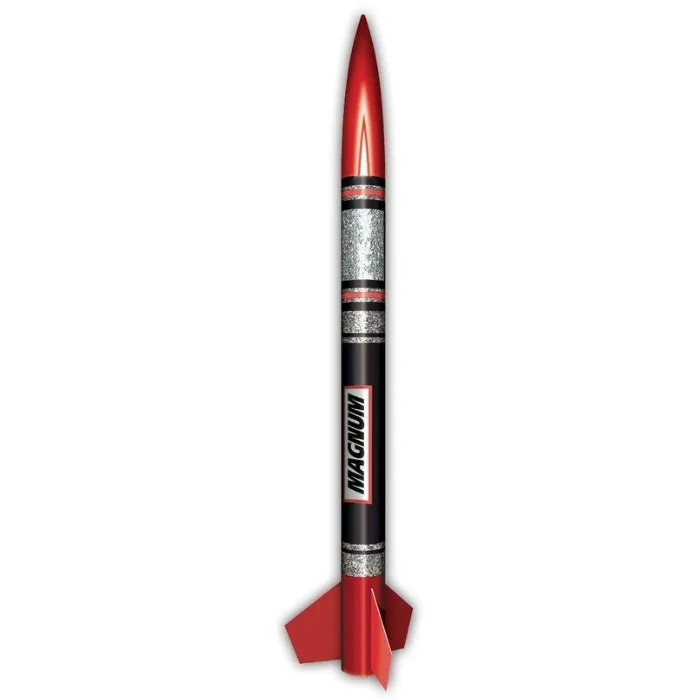
Magnum 3.1"
-
Magnum 3.1": Nylon shock cord with sewn loops, 36" nylon parachute, and starter fire blanket included. Recovery components are already in the box, so you can focus your build prep on fit and installation rather than sourcing parts.
-
Magnum 3.1": Payload section included; kit is described as perfect for level one certification flights. The payload bay gives you space for electronics or tracking, and the certification intent tells you the expected performance envelope.
A dry-fit sequence that catches problems early
Dry fitting means assembling without adhesive to verify that every joint closes and every part aligns. Work through these checks in order, and correct any interference before you mix epoxy.
- Check the motor mount against the airframe: Slide the 29mm motor mount into the airframe and confirm it seats without forcing. The mount should align with the fin slots and the aft end should sit flush or at the intended depth.
- Test-fit the centering rings: Slide each centering ring onto the motor tube and into the airframe. They should slide with light friction—not loose, not requiring a hammer. Note any ring that needs sanding before glue.
- Trial-fit the fins: Insert each fin into its slot and check that the tab reaches the motor mount and the root edge sits against the airframe. The fins are 1/8" birch, so avoid over-sanding the tabs.
- Assemble the payload section: Test-fit the payload tube, coupler, and nose cone. Confirm the coupler slides smoothly and the nose cone seats fully. This is also the time to plan how you will secure the payload bay for flight.
- Route the shock cord: The nylon shock cord has sewn loops and mounts to a shock cord mount. Plan the anchor point and verify that the cord can be packed without tangling or binding against the payload or motor mount.
Match your build plan to the 3.1" airframe and 29mm mount
The Magnum 3.1" is 42.5" tall and weighs 22oz, with a 3.1" diameter airframe and a 29mm motor mount. Those dimensions matter for build prep because they set the working envelope for your fin alignment, recovery packing, and rail button placement. The kit includes 1010 series rail buttons, so confirm your launch rail or rail guide matches that series before you drill.
The fin stock is 1/8" birch and the centering rings are 1/8" thick. Both are light and adequate for the kit's intended level one certification flights, but they reward careful dry fitting. If a ring or fin tab needs persuasion, sand the high spot rather than forcing the joint—forced fits can crack the birch or distort the tube.
Dimensions and hardware that shape your prep
- Magnum 3.1": Diameter 3.1", height 42.5", weight 22oz. These dimensions define your workspace needs and help you plan fin alignment and recovery packing.
- Magnum 3.1": Fin thickness 1/8" birch; ring thickness 1/8"; rail buttons 1010 series. Tells you the structural materials and rail interface so you can prepare the right tools and avoid mismatched launch equipment.
- Magnum 3.1": Shock cord: NW-15 15' 3/8" nylon with sewn loops; shock cord mount: SCM-2. Confirms the recovery harness length and mount type so you can plan packing and anchor placement before assembly.
Inspection points that the catalog does not cover
The supplied product information confirms the kit's major components and dimensions, but it does not include a step-by-step assembly manual or a complete inspection checklist. That means you should treat the dry-fit sequence above as your own quality gate, not as a manufacturer's procedure. Pay particular attention to tube seams, fin slot quality, and the fit of the nose cone shoulder—these are common areas where a little sanding now prevents a lot of frustration later.
If you plan to use the payload section for electronics or tracking, verify that your chosen hardware fits inside the payload tube before you commit to a mounting method. The catalog does not specify payload internal dimensions, so measure the tube yourself and test-fit your components.
Tools and supplies to have on the bench
You do not need a full machine shop, but gathering these items before you start keeps your build moving and reduces the temptation to improvise.
- Sanding block and assorted grits: For easing centering rings, fin tabs, and tube edges. Start with a medium grit and finish fine.
- Masking tape and a fine-tip marker: For labeling parts and marking alignment lines during dry fit.
- Ruler or caliper: For confirming dimensions and checking that components sit at the intended depth.
- Drop cloth and disposable gloves: For the adhesive stage that follows your dry fit.
What to confirm before you reach for adhesive
Once every dry fit closes cleanly, you are ready to move to assembly. Before you mix epoxy, do one final inventory: all parts accounted for, all fits verified, and your recovery components—shock cord, parachute, and fire blanket—set aside in a clean area. The Magnum 3.1" is an intermediate-complexity kit, and the prep work you do now is what keeps the build on track through the adhesive stages.
If you discover a missing or damaged part, stop and resolve it before proceeding. A kit that is complete and dry-fitted is far easier to assemble than one where you are troubleshooting mid-build.