Start with the rough letters, not the pictures
The Montessori carte alfabeto tattile set is built around a simple sequence: feel the letter, then connect it to a real image. Begin with the textured letter cards alone. Place one card in front of your child and guide their finger along the rough finish. The special rough surface is designed to help children recognize letters through touch, so the first sessions should be about that physical sensation, not naming or writing.
Keep the first few sessions short and quiet. One or two letters at a time is enough. The goal is familiarity with the shape and texture, not speed or accuracy.
What the Montessori Alfabeto Tattile set actually contains
-
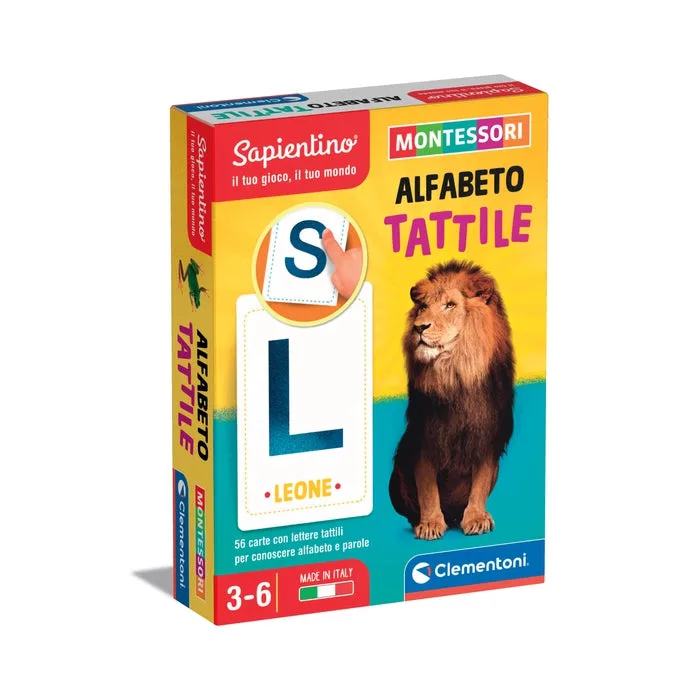
Montessori carte - Alfabeto tattile: The set includes cards with tactile letters for learning the alphabet and cards with realistic images to associate with the letters, inspired by Montessori pedagogy. Knowing the two card types helps you plan the sequence: letter cards first, image cards second.
Montessori carte - Alfabeto tattile
-
Montessori carte - Alfabeto tattile: The letter cards have a special rough finish that helps the child recognize letters through tactile exploration. This is the core tactile feature, so your routine should give it dedicated time rather than rushing to matching.
-
Montessori carte - Alfabeto tattile: The image cards reproduce realistic pictures, for an approach faithful to the Montessori method. Realistic images support clear association, so choose image cards that your child can easily recognize.
-
Montessori carte - Alfabeto tattile: An included guide suggests many progressive activities to prepare the child for reading and writing. You do not need to invent a curriculum; the guide provides a supported progression you can follow.
A simple three-step routine for home use
Use this sequence once your child is comfortable with the feel of the rough letters. Repeat it with different letters over several days rather than trying to cover the whole alphabet in one sitting.
- 1. Trace the letter: Place a textured letter card in front of your child. Guide their finger along the rough shape, then let them try alone. Say the letter sound softly as they trace.
- 2. Match a realistic image: Lay out two or three image cards and ask your child to find the picture that starts with the letter they just traced. The realistic images make the connection concrete.
- 3. Name and review: Ask your child to say the letter and the image name together. Then put the cards away and revisit them the next day. Short, repeated sessions work better than long ones.
Checkpoints to know the routine is working
These are signs of progress you can observe during play. They are not formal assessments, and every child moves at a different pace.
- Your child traces without prompting: If they reach for the rough letter and follow its shape on their own, the tactile feature is doing its job.
- They pair letters with images correctly: Matching the right image to the right letter shows the association is forming.
- They ask for the cards: Interest is a reliable sign that the activity feels manageable and enjoyable.
What the catalog does not confirm
The supplied product record does not specify the number of cards, the exact letter set, or the recommended age range. It also does not include care instructions or safety details. If you need those specifics before buying, check the physical packaging or contact the retailer. The record does confirm the rough letter finish, realistic image cards, and an included guide with progressive activities, so you can plan a routine around those supported features.