Start with the sky, not the mountain
The Mt. Fuji painting kit is built around a serene Japanese landscape: a rolling countryside dotted with cherry blossom trees, a towering pagoda, and Mt. Fuji’s snow-capped peak beneath a soft rose-colored sky. The sky sets the mood for everything else, so give it your full attention before you touch the mountain or the trees.
The kit’s tutorial is your guide for the actual brushwork. What follows is a practical order for the session and a few blending habits that make a calm sky easier to control.
What the Mt. Fuji kit gives you to work with
-
Mt. Fuji: Mt. Fuji is a painting kit inspired by traditional Japanese painting, with a rolling countryside, cherry blossom trees, a pagoda, and a snow-capped peak under a rose-colored sky. Knowing the full scene helps you plan where the sky ends and the landscape begins, so you do not overwork one area while another waits.
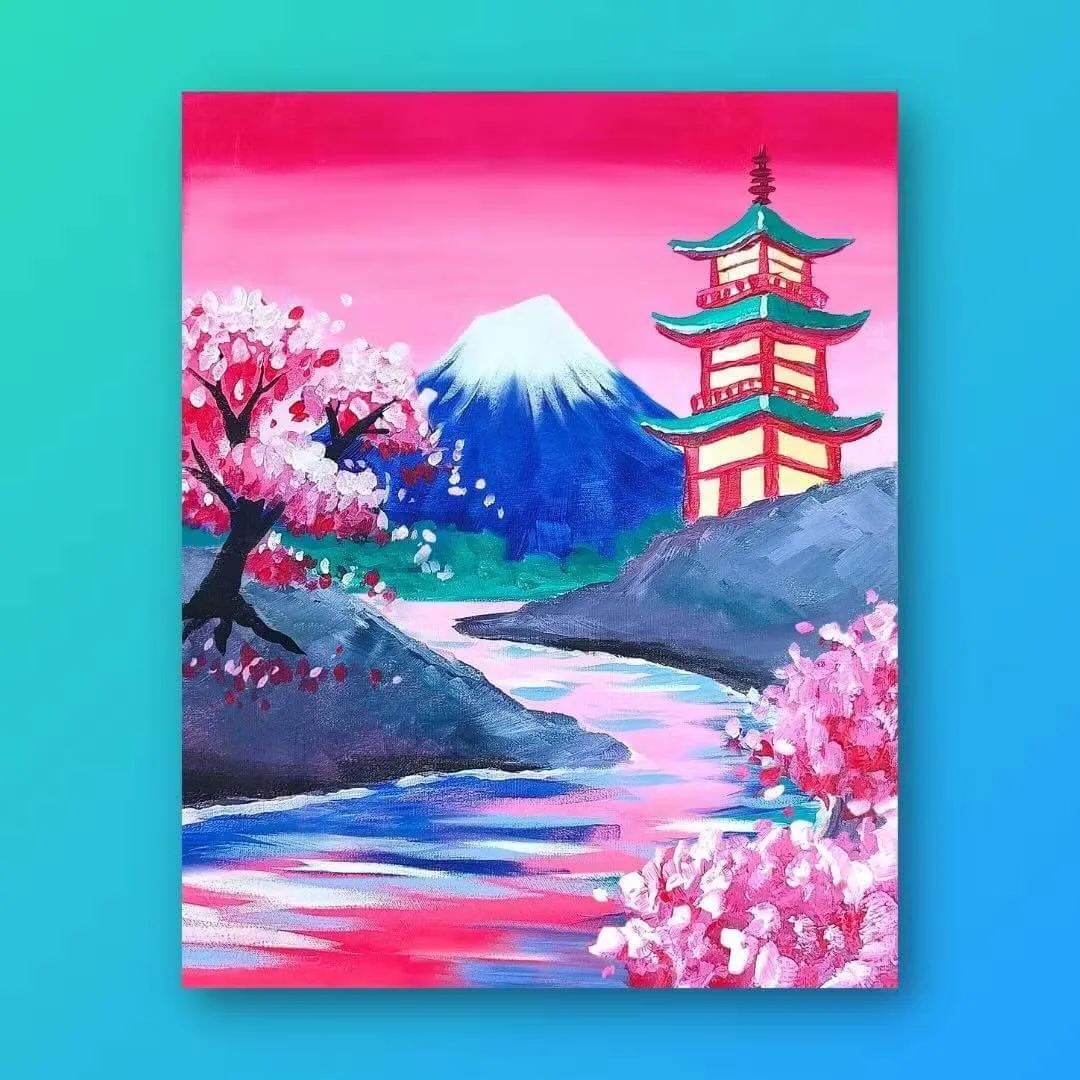
Mt. Fuji
-
Mt. Fuji: The kit is sold in four versions: Studio Kit ($49.99), Essentials Kit ($39.99), Refill Kit ($24.99), and Video Only ($14.99). Your version determines what supplies and guidance you already have, so check it before you begin blending.
A calm painting order for the Mt. Fuji scene
Work from the background forward. The kit’s tutorial remains the authority on specific colors and strokes; this sequence simply keeps the session organized.
- 1. Block in the rose sky: Cover the upper area with your lightest rose tones first. Keep the coverage even and stop before the paint gets heavy. A soft, thin base is easier to blend than a thick one.
- 2. Blend the sky while it is still workable: Use gentle back-and-forth strokes where two tones meet. If the paint starts to drag or dry, reload the brush lightly rather than scrubbing. The goal is a gradual shift, not a perfectly smooth gradient.
- 3. Shape Mt. Fuji’s peak: Once the sky is stable, paint the mountain silhouette and its snow-capped peak. Keep the mountain edges clean against the sky so the peak reads clearly.
- 4. Add the rolling countryside: Layer the foreground land in broad, calm shapes. Let the countryside sit below the mountain without covering the peak or the sky you just blended.
- 5. Place the pagoda and cherry blossoms: Paint the pagoda’s graceful lines and the cherry blossom trees last. These details are easier to place when the larger shapes are already settled.
Acrylic sky blending tips that keep the rose soft
Acrylics dry faster than oil paints, so blend in small sections rather than trying to perfect the whole sky at once. Keep a damp brush on hand, but avoid flooding the surface; too much water can lift the paint underneath and leave streaks.
If a transition looks patchy, let that area dry completely and glaze a thin layer of the lighter tone over it. Glazing is slower than wet blending, but it protects the calm, layered look the scene depends on.
The supplied product information does not include specific drying times, paint quantities, or brush sizes. Use the tutorial and the supplies in your kit as your guide, and test a small area first if you are unsure how a color behaves.
Which kit version fits your sky-blending session?
The catalog lists four versions. Choose based on what you already own and how much guidance you want.
- Studio Kit ($49.99): The most complete listed option. Choose it if you want the full kit experience for this landscape without sourcing supplies separately.
- Essentials Kit ($39.99): A middle option for painters who have some supplies already but still want the core materials for the project.
- Refill Kit ($24.99): Best if you have painted this kit before or already own the tools and only need to restock.
- Video Only ($14.99): For painters who already have their own paints and brushes and want the tutorial guidance.
What to confirm before you buy
The supplied catalog information does not list the exact contents of each kit version, the paint colors included, or the canvas dimensions. Check the product page for those details before ordering, especially if you are buying the Video Only or Refill version.
The catalog also does not include care or safety instructions for this kit. Follow the guidance printed on the paints and materials you receive, and keep the tutorial open as you work.