Quick answer
To style neon press-on nails for day and night, anchor them with neutral clothing during the day, then let them pop against darker or metallic pieces after dark. Apply the nails with a proper bond and seal the edges to keep the bold color intact through both settings.
Why neon works differently in daylight and low light
Neon pigments reflect more visible light than most polish colors, so they appear brighter and more saturated in daylight. In the evening, artificial lighting can make the same neon look slightly deeper or more electric, which changes how the nails interact with your outfit and makeup. Plan your look around that shift: daytime outfits benefit from calm neutrals that let the neon stand out, while evening outfits can handle darker tones or metallic accents that echo the nails without competing.
The trade-off: bold nails demand more intentional styling
A neon manicure is a statement, so it can overwhelm a busy print or a lot of competing jewelry. The easiest way to wear bold neon nail tips is to treat them as the main accessory and keep everything else relatively simple. That does not mean you cannot wear color, but choose one other focal point—a bright lip, a metallic bag, or a single statement earring—rather than several at once.
Step-by-step styling and application for neon press-on nails
- 1. Prep your natural nails for a secure bond: Push back cuticles, lightly buff the nail surface, and wipe each nail with alcohol to remove oils. Choose the press-on size that matches your natural nail width; if between sizes, size down to avoid lifting at the edges. Skipping the alcohol wipe is the most common reason press-ons pop off early—do not skip it.
- 2. Apply the press-ons with the right adhesive for your plans: For a day-to-night look that lasts, use nail glue for a stronger hold, or adhesive tabs if you plan to remove them within 24 hours. Press each nail down firmly for 10–15 seconds, starting from the cuticle and working toward the tip. Check for air bubbles by pressing gently; bubbles weaken the bond and cause lifting.
- 3. Seal the edges to protect the neon finish: Brush a thin layer of clear top coat around the seam where the press-on meets your natural nail. This prevents water and daily wear from loosening the adhesive and helps the glossy finish stay intact. Reapply top coat every two days if you are wearing the set for an extended period.
- 4. Build a daytime outfit that lets the neon stand out: Pair the nails with neutral clothing—white, beige, denim, or soft gray—and minimal jewelry. If you want a hint of color, echo one of the neon tones in a small accessory like a hair clip or a thin belt. Avoid busy prints or multiple bright colors during the day; the nails should be the focal point.
- 5. Transition to evening with darker or metallic accents: For night, switch to a black, navy, or deep green outfit and add metallic jewelry (silver or gold) that complements the pearly embellishments. A bold lip in a similar neon family can tie the look together without clashing. If your outfit is very dark, a single metallic accessory is enough—too much shine competes with the 3D details.
- 6. Keep the nails clean and check for wear: Carry a soft nail brush or a cotton swab to gently clean around the 3D accents, which can trap lint or makeup. At the end of the night, check each nail for lifting and press down any edges that have loosened. Remove and reapply any nail that lifts more than a millimeter to prevent it from catching on clothing.
Product facts
-
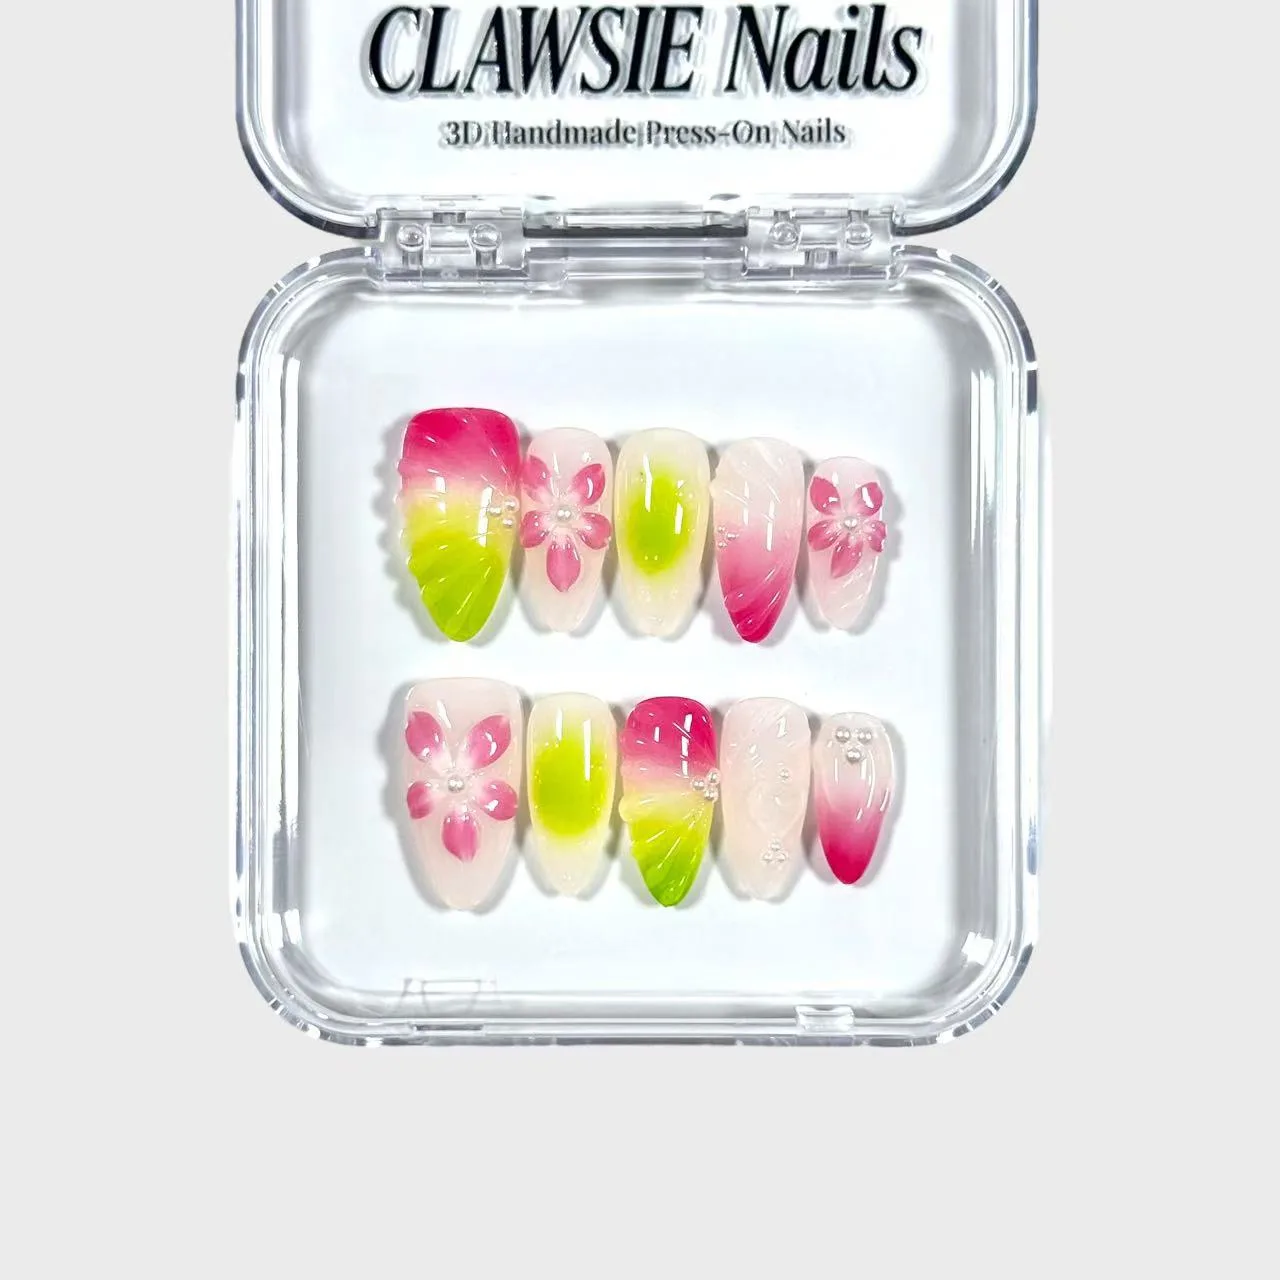
NEON: Medium almond press-on nails with neon green and hot pink tones, 3D floral accents, pearly embellishments, and a glossy finish. The two-tone neon and 3D details already provide visual interest, so you can keep the rest of your look simpler and let the nails lead.
NEON