What the Outdoor Low-Volt T-Connector Does
The Outdoor Low-Volt T-Connector is designed to give you more flexibility when setting up your outdoor smart lighting with Perifo track. It lets you join LowVolt outdoor lights together in a T shape, so you can add space between lights or extend your setup across your yard. This accessory is especially useful when your layout needs a branch off the main track line.
Key Product Details
-
Outdoor Low-Volt T-Connector: Easily customize your outdoor smart lighting! The T-connector offers even more flexibility in joining LowVolt outdoor lights together, letting you add space between lights or extend your setup throughout your yard. This tells you exactly how the T-connector helps: it creates a branch point in your track, so you can position lights further apart or reach new areas without needing a separate power source.
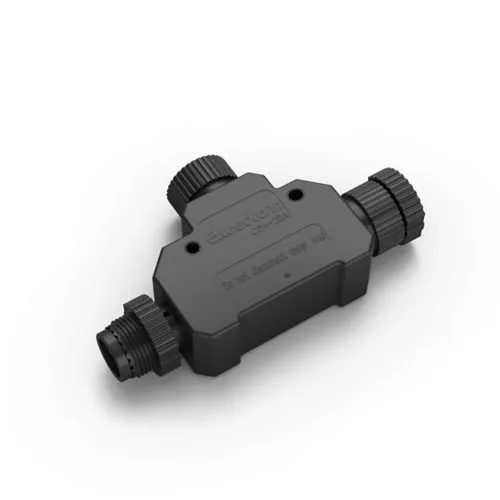
Outdoor Low-Volt T-Connector
How to Plan Your Track Layout with the T-Connector
Before you buy, think about where you want the branch to go. The T-connector works with LowVolt outdoor lights and track sections, so you need compatible components. Sketch your yard or patio layout and mark where the main track runs and where you want the branch to split off. The connector lets you add distance between lights, so you can space them evenly or cluster them for effect.
Check that your existing power supply and track sections are LowVolt rated. The T-connector does not convert voltage or increase circuit capacity; it only provides a physical connection point. If you need to run a longer distance, you may also need a separate cable extension.
Steps to Install the T-Connector
Installing the T-connector is straightforward, but you should follow the manufacturer's instructions for your specific track system. The general process is:
- 1. Turn off power: Always disconnect the power supply before handling any low-voltage track components. This prevents accidental shorts or damage.
- 2. Attach the T-connector to the main track: Slide the T-connector onto the end of your existing track section where you want the branch to start. It should click into place securely.
- 3. Connect the branch track: Take a new track section and attach it to the open side of the T-connector. This creates the T shape.
- 4. Add your lights: Attach your LowVolt outdoor lights to the track sections as desired. The T-connector allows you to place lights along both the main and branch sections.
- 5. Restore power and test: Turn the power back on and test each light to ensure they all work. If a light doesn't turn on, check the connections.
What the Catalog Does Not Settle
The supplied information confirms the T-connector's purpose and basic compatibility, but it does not specify the exact track profile or maximum number of connectors per run. If you are planning a complex layout with multiple branches, you may need to verify the load capacity of your power supply. The T-connector itself does not add electrical capacity; it only provides a mechanical and electrical junction. For long runs, consider using a separate cable extension to maintain voltage.