Quick Answer
To build the Panther Pup engine, start by inspecting the aluminum castings, then machine each component to the plans, and finish with careful assembly and testing.
Why Choose the Panther Pup Engine?
The Panther Pup engine is a popular project for hobby machinists and model engine builders. The aluminum castings provide a lightweight yet durable foundation, and the set includes all four castings needed to complete the engine. This makes it an ideal starter project for those new to casting-based engine builds.
Because the castings are precision-made, you can focus on machining and assembly rather than correcting defects. However, you still need to follow the plans carefully to ensure proper fit and function.
Tools and Materials You'll Need
Before you begin, gather the necessary tools: a mini lathe, a bench mill, precision measuring tools (calipers, micrometers), and appropriate cutting tools for aluminum. You'll also need the Panther Pup engine plans (PN 2341) and a set of fasteners and small parts as specified in the plans.
Having a clean, organized workspace is essential. Aluminum chips can be sharp and easily contaminate other parts, so keep your work area tidy and use cutting fluid to improve surface finish and tool life.
Step-by-Step Build Process
- Inspect the Castings: Examine each casting for surface defects, flash, or excess material. Verify that the castings match the dimensions in the plans. Use a deburring tool to remove any sharp edges or small imperfections. Check for hidden cracks or porosity before machining; these can cause failure later.
- Machine the Cylinder: Mount the cylinder casting in the lathe and machine the bore to the specified diameter. Take light cuts and use a boring bar for accuracy. Ensure the bore is straight and round by measuring at multiple points. Avoid overheating the aluminum; use cutting fluid and let the part cool between passes.
- Machine the Head and Base: Secure the head and base castings in a mill. Machine the mating surfaces flat and to the correct thickness. Drill and tap any holes for studs or screws as per the plans. Use a fly cutter for a smooth finish. Check the flatness of the mating surfaces with a straightedge; warping can cause leaks.
- Fit the Piston and Connecting Rod: The plans specify the piston and connecting rod dimensions. Machine the piston to fit the bore with the correct clearance. Assemble the connecting rod and ensure it moves freely without play. Test the piston fit by hand; it should slide smoothly without binding.
- Assemble the Engine: Follow the plans to assemble the engine. Use thread locker on fasteners that will be subjected to vibration. Ensure all moving parts are lubricated with a light oil before final assembly. Rotate the crankshaft by hand to check for smooth rotation before adding fuel or spark.
- Test and Fine-Tune: Once assembled, perform a leak test on the cylinder and head. If the engine is designed to run, follow the manufacturer's instructions for starting. Adjust the timing and fuel mixture as needed. If the engine doesn't run, recheck the valve timing and compression rather than forcing it.
Product Facts
-
Panther Pup Engine Castings, Aluminum: These are the four aluminum castings required to build the Panther Pup engine (PN 2341). Having all four castings in one set ensures you have the correct materials to complete the project without sourcing parts separately.
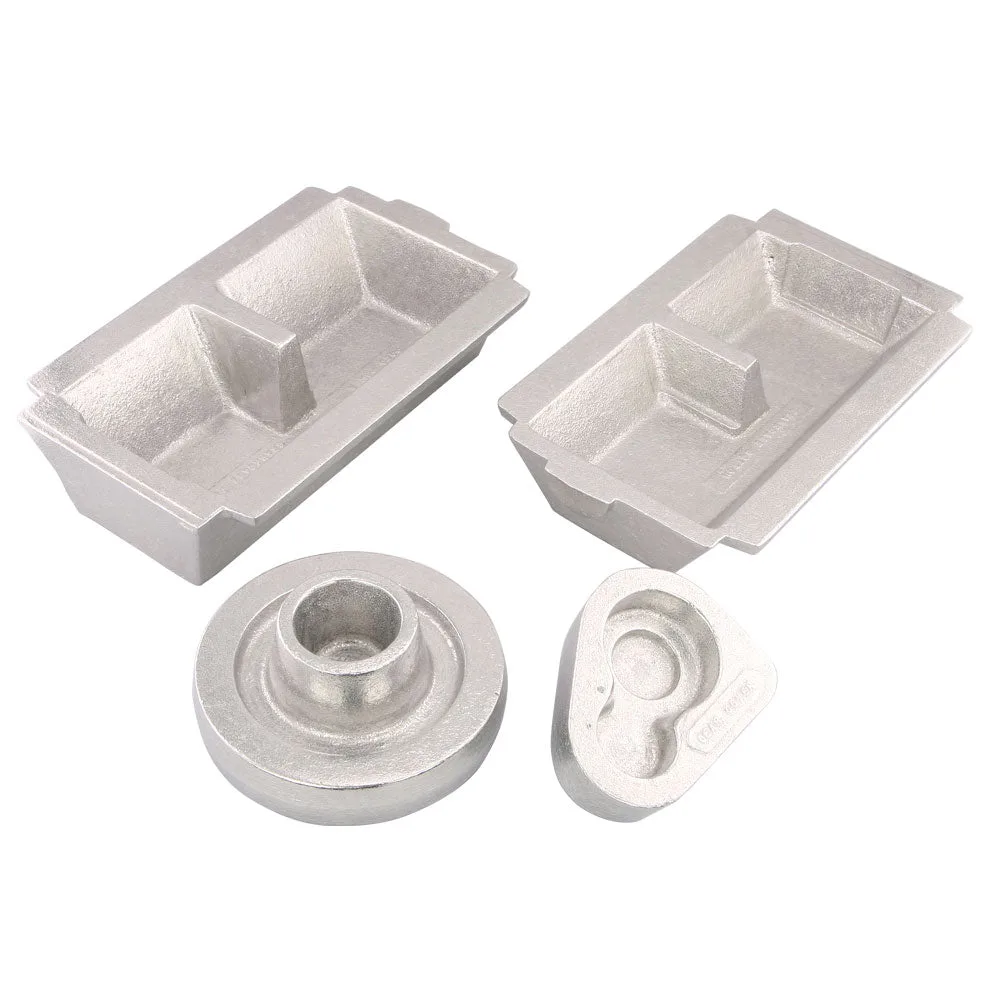
Panther Pup Engine Castings, Aluminum