What the Paterson Auto Print Washer Does
The Paterson 8x10" Auto Print Washer "Standard" is designed to wash both RC (resin-coated) and fiber-based papers efficiently. Its key feature is that one print never touches another, allowing water to circulate freely around each print for thorough washing.
Prints are loaded into a cradle, which is then lowered into the tank. Faucet pressure gently rocks the cradle, creating continuous water exchange. The washer holds up to 12-8x10" or 24-5x7" prints, making it suitable for both small and medium batch processing.
Paterson 8x10 Auto Print Washer at a Glance
-
Paterson 8x10" Auto Print Washer "Standard" (Accepts 12-8x10" or 24-5x7" Prints) PTP231: The Standard Paterson Auto Print Washer efficiently washes both RC and fiber-based papers. You can use the same washer for different paper types without modification, simplifying your darkroom workflow.
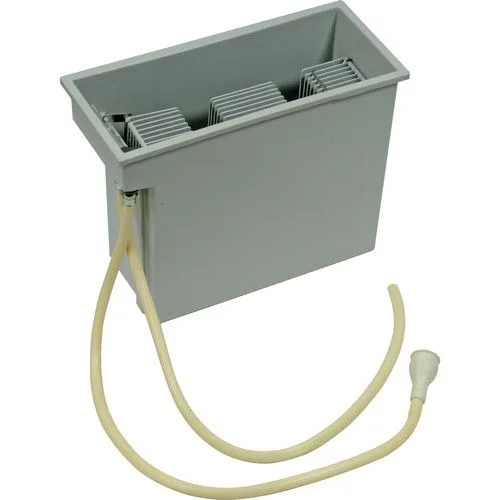
Paterson 8x10" Auto Print Washer "Standard" (Accepts 12-8x10" or 24-5x7" Prints) PTP231
-
Paterson 8x10" Auto Print Washer "Standard" (Accepts 12-8x10" or 24-5x7" Prints) PTP231: One print never touches another and water can circulate freely. Prevents prints from sticking together and ensures each print gets consistent washing, reducing the risk of chemical residue.
-
Paterson 8x10" Auto Print Washer "Standard" (Accepts 12-8x10" or 24-5x7" Prints) PTP231: Holds up to 12 - 8 x 10" or 24 - 5 x 7" prints. Lets you wash a full session's output in one go, saving time and water.
Setting Up the Paterson Auto Print Washer
Setting up the washer is straightforward. You'll need a faucet with a standard threaded adapter and a sink or drain to handle the continuous water flow.
- 1. Position the washer: Place the washer on a stable, level surface near a faucet and drain. Ensure the drain hose can reach the sink without kinking.
- 2. Connect the water supply: Attach the included hose to a faucet adapter. The supplied information does not specify the exact adapter type; check your faucet and use a standard threaded adapter if needed.
- 3. Adjust water flow: Turn on the faucet and adjust the flow so that the cradle rocks gently. Too much pressure may cause splashing; too little reduces washing efficiency.
- 4. Load the prints: Place prints into the cradle, separating them with the dividers so that one print never touches another. Lower the loaded cradle into the tank.
- 5. Begin washing: Allow water to flow continuously. The rocking action will exchange water around each print. Wash times depend on paper type and chemical use; follow your paper and chemistry manufacturer's recommendations.
Tips for Best Results
For fiber-based papers, longer wash times are typically needed compared to RC papers. The continuous water exchange helps, but always follow the paper manufacturer's guidelines for wash duration.
Check that the drain hose is clear and not blocked. A slow drain can cause the tank to overflow. If the rocking motion seems weak, increase water flow slightly until gentle rocking resumes.
After washing, remove the cradle and let prints drain briefly before handling. The washer itself can be rinsed and stored dry.