Quick answer
Plan the L around one corner of the room, place the three spots so each lights a different work zone, and confirm rail length and outlet position before drilling. The kit's three 59.1-inch rails and left-turning L connector set the shape; your job is deciding which corner and how far each spot reaches.
Why the corner choice drives everything else
The Perifo L-shaped ceiling base kit (3 spots) includes a connector that turns to the left, so the kit only forms an L in one direction. That makes corner selection the first real decision: pick a corner where the left turn follows the room's geometry rather than fighting it. If your natural corner turns the other way, this kit is the wrong starting point.
In a kitchen, the L usually follows two runs of counters or a counter-plus-island arrangement. In an open living area, it can trace a seating corner. Either way, the corner you choose determines where the power supply sits, because the PSU is designed to sit between two rails.
What three spots can and cannot cover
Three cylinder spots are a focused setup, not a whole-room wash. Expect to light three distinct zones, such as a sink, a prep area, and a dining or island edge. If you need broad ambient light across the entire ceiling, plan for additional fixtures or accept that some areas will stay dimmer.
The kit does not include dimmer switches or smart bulbs in the box, so light output depends on the Perifo spot units you pair with it. Check the spot specifications before assuming a brightness level for a large kitchen.
Rail length and ceiling realities
Each rail is 59.1 inches, and the kit includes three. That is enough to run two legs of an L, but the total length is fixed unless you add rails. Measure both legs of your intended L before committing; a long galley kitchen may need more rail than the kit provides.
Ceiling type matters too. The kit is a ceiling base kit, so it assumes a ceiling mount. Confirm your ceiling structure can support the rails and spots, and identify where the power supply will sit between two rails so it is not left dangling over a walkway.
Step-by-step Perifo 3-spot layout plan
- Choose the corner and confirm the left turn: Stand in the room and identify the corner where an L turning left matches your counters or seating. Sketch the two legs on paper with approximate lengths. Common mistake: assuming the connector can be flipped; it cannot, so a right-turning corner will not work with this kit. If your corner turns right, stop and consider a straight kit instead.
- Measure both legs against the 59.1-inch rails: Measure each leg of the L from the corner to the intended end. Compare the total to the three 59.1-inch rails included, allowing for the connector and PSU between two rails. Common mistake: forgetting the PSU takes up rail space, which shortens the usable run. Write down the leftover length on each leg before ordering.
- Assign one spot per work zone: Decide which three zones get a spot: for example sink, prep, and island edge. Place each spot roughly above the center of its zone rather than evenly spacing them along the rail. Common mistake: spacing spots at equal intervals for looks, which leaves one zone poorly lit. Each spot should have a named job before you mark the ceiling.
- Set spot spacing and beam direction: Aim each cylinder at its zone and check that beams do not cross into another spot's area. Keep spots far enough apart that their light pools read as separate zones, and tilt them toward task surfaces rather than straight down. Common mistake: pointing all three straight down, which flattens the room and wastes the adjustable heads. Stand at each zone and confirm the spot above it actually reaches the work surface.
- Locate the PSU between two rails: Mark where the power supply will sit between two rails, keeping it off walkways and away from heat sources. Confirm a power outlet or wiring point is reachable from that spot. Common mistake: planning the rails first and discovering the PSU has no clean home. The PSU position is a hard constraint, not an afterthought.
- Dry-run the layout before drilling: Lay the rails and spots on the floor in the planned L, or mark the ceiling with tape, and walk the room to check reach and glare. Adjust spot angles and rail positions on paper before committing. Common mistake: drilling the first rail before checking the full L, which leaves no room to shift the corner. Only drill once the taped layout matches your zone plan.
Kit facts that shape your plan
-
Perifo L-shaped ceiling base kit (3 spots): Includes three cylinder spotlights, three 59.1-inch rails, an in-line PSU, and a left-turning L connector. The fixed left turn and rail count define the L shape, so confirm your corner direction and leg lengths before buying.
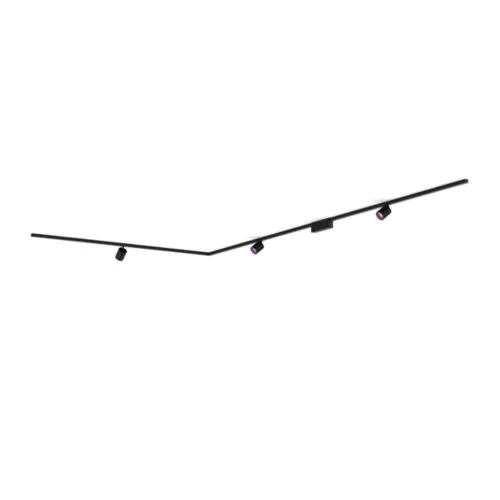
Perifo L-shaped ceiling base kit (3 spots)