Quick Answer
To personalize an embroidery project, fold a woven label in half and insert it into a seam before stitching, or apply it flat and sew around the edges with matching thread.
Why Woven Labels Add a Personal Touch
A woven label turns a handmade piece into a keepsake. It tells the story of who made it and when, which is especially meaningful for gifts, heirlooms, and personal projects.
Choosing between a 'Made By Me' label and a playful 'Made By Unicorns' label lets you match the label to the project's personality. Both options are pre-cut and heat-sealed, so they won't fray and are ready to sew.
Placement Options: Seam vs. Flat
The two main ways to attach a woven label are folded into a seam or applied flat. Folding the label in half and inserting it along a seam keeps the label discreet and durable. Applying it flat works best for finished pieces without accessible seams, like hoops or wall art.
Consider the fabric and the project's use. Seam insertion hides the raw edges and is ideal for garments and quilts. Flat application is easier for quick projects but requires neat edge stitching.
Step-by-Step: How to Sew On a Woven Label
- Choose Your Label and Placement: Decide whether to fold the label in half and insert it into a seam, or apply it flat. For seams, place the label so the text is centered and the fold is inside the seam allowance. For flat application, position it where it won't interfere with the design. Check that the label is straight and centered before pinning.
- Pin the Label in Place: Use fine pins to secure the label to the fabric. For seam insertion, pin through the folded label and both fabric layers. For flat application, pin along the edges. Make sure the label lies flat and doesn't pucker. Pinning prevents shifting; avoid placing pins where you'll stitch.
- Sew the Label with Matching Thread: Use a needle and thread that matches the label border or the fabric. For seam insertion, stitch along the seam line, catching the label in the seam. For flat application, sew a small hem stitch around all four edges, keeping stitches neat and close to the edge. Check the back of the fabric to ensure stitches are secure and not loose.
- Trim and Finish: After sewing, trim any loose threads. For seam insertion, press the seam open or to one side. For flat labels, press the label gently to smooth any wrinkles. The heat-sealed ends won't fray, so no extra finishing is needed. A final press gives a crisp, professional look.
Woven Labels to Consider
-
Woven Labels - Made By Unicorns: These labels feature a gold metallic border and read 'Made by Unicorns.' Each set includes four pre-cut, sew-in labels measuring 3" x 5/8" with heat-sealed ends. The playful message and metallic border make this label a charming choice for whimsical or gift projects where you want a touch of magic.
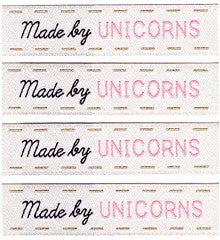
Woven Labels - Made By Unicorns
-
Woven Labels - Made By Me: These labels read 'Made By Me' and come as four pre-cut, sew-in labels measuring 3" x 5/8" (7.6 cm x 1.6 cm) with heat-sealed ends. This classic label is a simple, elegant way to sign your work, perfect for handmade gifts or personal keepsakes.
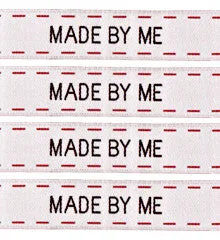
Woven Labels - Made By Me