Two different problems that look the same
Lifting and silvering both show up as a decal that refuses to sit flat, but they are worth separating before you touch the kit. Lifting is a decal edge or corner that has come away from the surface. Silvering is trapped air or a cloudy film under the clear carrier, so the marking reads grey instead of sitting on the plastic.
Separating the two matters because the diagnosis depends on where the decal sits. On a 1/60 kit like the PG Strike Rouge and Sky Grasper, a single marking can run across a wide, gently curved panel and then over a raised edge, and those two zones behave differently. Check the edge first: if it has curled up, you have lifting. If the edge is down but the film looks milky, you are looking at silvering.
What the EVO Studio set confirms before you diagnose
-
PG Strike Rouge + Sky Grasper 1/60 Water Decal: Compatible with PG Strike Rouge and Sky Grasper 1/60 kits. Compatibility is the one thing the listing settles. If your kit is not these 1/60 kits, the fit question is not answered by this record.
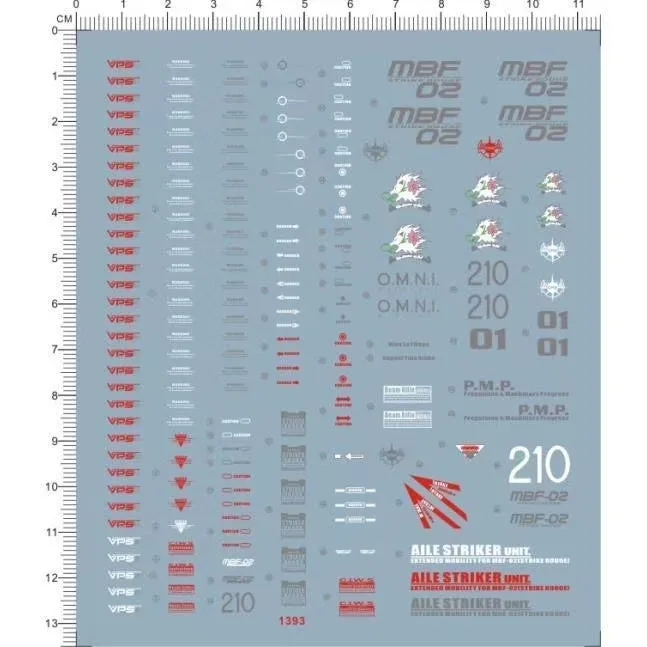
PG Strike Rouge + Sky Grasper 1/60 Water Decal
-
PG Strike Rouge + Sky Grasper 1/60 Water Decal: Water-slide decals for precise application and repositioning. Repositioning is part of the intended workflow, so a decal that is not yet settled can be moved rather than forced down.
-
PG Strike Rouge + Sky Grasper 1/60 Water Decal: Includes a variety of markings and emblems to enrich your build. Larger emblems cover more surface and therefore cross more curvature, which is where lifting and silvering are most likely to appear.
Curved surfaces: why the decal has nowhere to go
A water-slide decal is a thin film carried on a flat sheet. On a flat panel it has nothing to fight. On a curved surface, the film has to follow the curve, and any excess has to fold or wrinkle somewhere. That is the physical reason a decal not sticking to a curved surface is a common complaint, and it is why the fix is usually about preparation and settling rather than pressure.
The supplied record describes this EVO Studio set as water-slide decals for precise application and repositioning. It does not list a softener, a setting solution, a drying time, or a recommended topcoat. Treat those as decisions you make yourself and test on a spare part, not as instructions the listing provides.
A diagnosis order that saves the decal
Work through these in sequence. Each step tells you whether to keep going or stop and reposition.
- Confirm the surface is clean and dry: Dust, skin oil and moisture under the film are the usual suspects when a decal will not lie down. The record does not specify a cleaning product, so use what you normally trust on your kit and let it dry fully.
- Check whether the decal is still movable: Because the set is described as repositionable, a decal that has not settled can be slid back into position rather than pressed harder.
- Look at the edge, not the middle: A curled edge is lifting. A flat edge with a milky patch beneath is silvering. The two need different next steps.
- Decide before you seal: Once you apply a topcoat, repositioning is no longer an option. The record does not confirm a topcoat is required, so this is your call.
Silvering: what is actually trapped under the film
Silvering is air or a film of moisture caught between the decal and the plastic. It shows up most on dark surfaces, which makes the Strike Rouge's darker panels a place to watch. The practical response is to work the trapped air or water out toward the nearest edge while the decal is still wet and still movable.
If a marking has already dried with silvering under it, the honest answer is that the supplied information does not describe a removal or rescue procedure for this set. Rewetting a dried decal is a technique some builders use, but this record does not confirm it for these decals, so test on an inconspicuous marking or a spare sheet before committing to a visible emblem.
Lifting on edges and raised detail
Lifting usually starts at an edge that crosses a panel line, a raised vent or a sharp change in curvature. The film has to bend over that feature, and if it was not fully settled when it dried, the edge lifts first. On a 1/60 build, the Sky Grasper's slimmer forms and the Strike Rouge's larger shoulder and leg panels put decals across both wide curves and tighter edges, so expect the two zones to behave differently.
The record confirms the decals are water-slide and repositionable, which means a lifted edge you catch early can be worked back down. It does not confirm a softener is compatible with this film, so if you use one, test it on a marking you can afford to lose.
Decal softener for 1/60 kits: how to decide
Softener is the tool most often reached for when a decal will not conform, but the supplied record does not list one as part of this set or confirm compatibility. Use these checks before you apply any to a visible marking.
- Test on a spare marking first: The set includes a variety of markings and emblems, so you have room to sacrifice one to a compatibility test.
- Apply to the decal, not the plastic: Softener is intended to relax the film. Keep it off surrounding painted or coated surfaces unless you have tested that too.
- Watch for wrinkling before it dries: A film that softens unevenly can wrinkle. If that happens, stop and let it dry rather than adding more.
- Do not stack products blindly: The record does not confirm a setting solution plus softener plus topcoat combination. Add one variable at a time.
What the listing does not settle
The supplied record gives compatibility, the water-slide and repositioning behaviour, and the contents. It does not give a drying time, a recommended softener or setting solution, a topcoat recommendation, a cure window, or a removal method. It also does not state an age range or safety warnings for this decal set, so if you are buying for a younger builder, confirm those details with the store before checkout rather than assuming them.
That is not a reason to avoid the set. It is a reason to plan your first application on a low-visibility marking, keep the sheet flat and dry until you use it, and treat each product you add as a separate test. The EVO Studio set is a detail upgrade for two specific 1/60 kits, and the most reliable results come from slowing down at the curved sections rather than adding more chemistry.