Quick answer
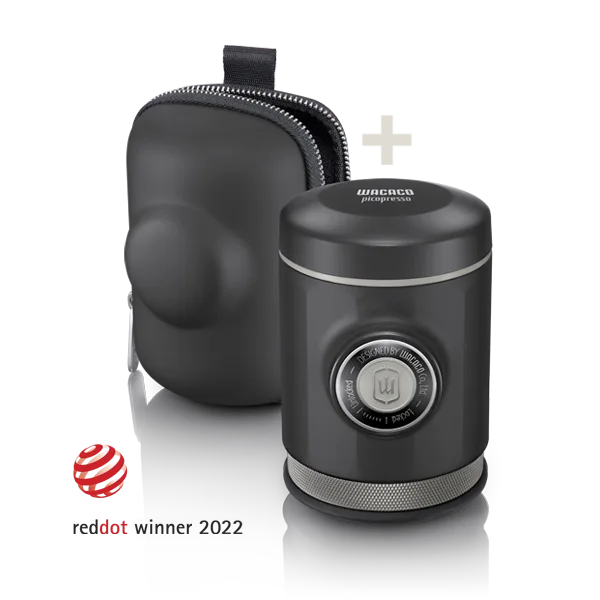
Install the Picopresso Gauge on your Picopresso, then aim for 9–12 bars during extraction. Too low and the shot tastes sour; too high and it turns bitter. Use the gauge to adjust your pump speed and grind until the needle stays in that range.
Picopresso
Why the Picopresso Gauge changes your brewing
Without a gauge, you're guessing at pressure. The Picopresso Gauge replaces the standard pump cap and shows live pressure in bars as you press. That feedback turns every shot into a lesson: you see exactly when pressure spikes or drops, so you can correct your technique immediately. It's especially useful when you switch coffees, grinders, or brew ratios, because the gauge tells you whether your changes helped or hurt.
Step-by-step: Install and read the gauge
Follow these steps in order. Each one includes a common mistake and a checkpoint so you know you're on track.
What the pressure readings tell you
Once you're comfortable reading the dial, you can diagnose shots quickly. Low pressure (under 6 bars) usually means the grind is too coarse or you're pumping too slowly. High pressure (over 14 bars) often points to a grind that's too fine or pumping too aggressively. The sweet spot for espresso is typically 9–12 bars. Adjust one variable at a time—grind first, then pump speed—and taste the result.
When to use the gauge (and when to skip it)
The gauge is most valuable when you're learning, troubleshooting, or switching beans. It's also a great teaching tool if you're helping someone else dial in. However, once you've mastered your routine, you may not need it every session—especially if you're packing light for travel. Keep it as a training aid and a periodic check, not a permanent crutch.
Step-by-step: Install and read the gauge
- Remove the standard pump cap: Unscrew the black cap on top of the Picopresso and set it aside. Common mistake: forcing it when it's cross-threaded. Checkpoint: the threads should be clean and the cap should come off with light pressure. Keep the original cap in a safe place—you'll want it for travel when you don't need the gauge.
- Attach the Picopresso Gauge: Thread the gauge onto the Picopresso body until it's snug. Do not overtighten—hand-tight is enough. Common mistake: overtorquing and damaging the seal. Checkpoint: the gauge should sit flush with no wobble. If it doesn't thread smoothly, back it off and try again; cross-threading will cause leaks.
- Zero the needle before brewing: With no pressure applied, the needle should rest at 0 bar. If it doesn't, gently adjust the bezel if your model allows, or note the offset. Common mistake: assuming the gauge is broken when it's just not zeroed. Checkpoint: needle at 0 when the pump is untouched. A zeroed gauge is essential for accurate readings.
- Preheat and prepare your basket: Fill the basket with your dose (typically 18g for double) and tamp level. Common mistake: uneven tamping causes channeling and erratic pressure. Checkpoint: the puck should be flat and level. A level puck is the first step to stable pressure.
- Start pumping and watch the needle: Press the pump slowly and steadily. The needle should climb to 9–12 bars within a few seconds. Common mistake: pumping too fast, which spikes pressure and causes bitterness. Checkpoint: needle in the 9–12 bar zone during most of the shot. If pressure is too low, grind finer; if too high, grind coarser.
- Maintain pressure through the shot: Keep the needle steady by adjusting your pump rhythm. Aim for a 25–30 second extraction. Common mistake: letting pressure drop in the last third of the shot. Checkpoint: needle stays within 1–2 bars of your target until you stop. Consistent pressure equals consistent taste.
- Clean and store the gauge: After brewing, remove the gauge, rinse it with warm water, and dry it thoroughly. Common mistake: leaving coffee residue that clogs the sensor port. Checkpoint: no grounds or oil left on the gauge. Proper cleaning keeps readings accurate for years.
Product facts
- PICOPRESSO GAUGE: Effortlessly installed onto your Picopresso unit, the pressure meter instantly allows you to monitor and control the pressure during each extraction. You get real-time feedback without modifying your Picopresso, so you can correct pressure mid-shot.
- EXAGRIND: The Wacaco Exagrind is an excellent fit for all coffee lovers looking for a compact and robust manual grinder that doesn't compromise precision and grind quality. Consistent grind is the foundation of stable pressure; a precise grinder helps you hit the 9–12 bar range more reliably.