Why a Bubble Level Matters for Tripod Work
An unlevel camera produces tilted horizons and uneven compositions, especially in landscape and architectural photography. The PM Bubble Level 2-Axis gives you a simple visual reference to level your camera on two separate planes—horizontal and vertical—so you can correct tilt before you press the shutter.
Unlike relying on your camera's built-in electronic level (which may not be visible in all shooting positions), a physical bubble level stays readable in bright sunlight and works even when the camera is powered off. It is a compact accessory that fits standard camera setups and adds minimal weight to your kit.
What the PM Bubble Level 2-Axis Confirms
-
PM Bubble Level 2-Axis: Two-axis bubble level for horizontal and vertical leveling You can check both roll and pitch in one glance, which is essential for balanced framing in photography and videography.
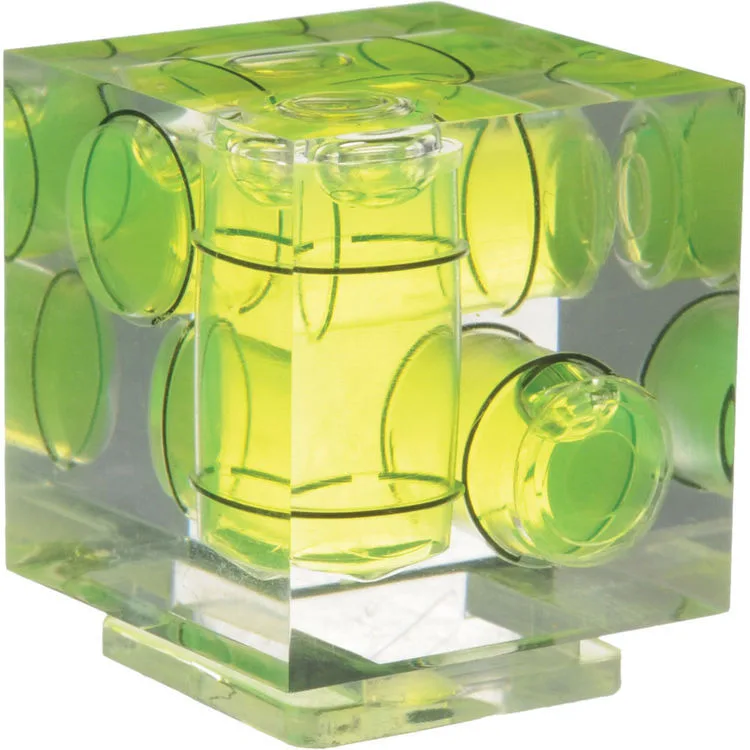
PM Bubble Level 2-Axis
-
PM Bubble Level 2-Axis: Compact accessory that fits standard camera setups The level slides into a hot shoe or mounts via a standard 1/4-20 thread, making it compatible with most tripod heads and camera rigs without requiring adapters.
Mounting the Level on Your Camera or Tripod
The PM Bubble Level 2-Axis fits standard camera setups. The most common mounting points are the camera's hot shoe or a tripod head with a 1/4-20 thread. The supplied information does not include specific installation instructions, so the following sequence is based on the accessory's typical design and standard camera rig practices.
- Hot shoe mount: Slide the level's metal foot into the camera's hot shoe until it clicks or sits flush. This places the level directly on the camera body, so it shows the camera's tilt rather than the tripod's.
- Tripod head mount: If your tripod head has a threaded hole or a secondary cold shoe, attach the level there. This lets you check the tripod's level before you mount the camera.
- Check for obstruction: Ensure the level does not block any camera buttons, ports, or the viewfinder. The compact design helps, but it is worth confirming with your specific camera body.
Using the Two Axes for a Level Shot
Once mounted, the two bubble vials give you immediate feedback on two planes. The supplied information confirms the level works for horizontal and vertical leveling, but does not specify which vial corresponds to which axis. In practice, the larger vial usually indicates horizontal (roll) and the smaller one vertical (pitch), but you can confirm by tilting the camera gently in each direction.
- Level the horizontal axis (roll): Adjust the tripod legs so the bubble in the horizontal vial centers between the two lines. This eliminates left-right tilt and keeps the horizon straight.
- Level the vertical axis (pitch): Adjust the tripod head tilt or leg length to center the vertical vial's bubble. This corrects forward-backward tilt, which is critical for architectural lines and multi-row panoramas.
- Recheck both axes: Adjusting one axis can shift the other. After any leg or head adjustment, glance at both vials again before locking everything down.
Practical Checkpoints for Outdoor Shooting
On uneven terrain, start by extending the tripod legs to a rough height, then use the bubble level to fine-tune each leg individually. The level's simple visual reference means you can work quickly without taking your eye off the composition.
For panoramic or stitched shots, the two-axis leveling helps ensure consistent overlap between frames. The supplied information does not confirm compatibility with specific panoramic heads, but the level's compact size and standard mount make it a useful companion for such setups.
The PM Bubble Level 2-Axis is designed to help you level your camera on two separate planes for improved alignment and composition. It does not replace a geared panorama head or a three-axis leveling base, but it provides a quick, reliable check for the most common tilt errors.