Quick answer
Start with a warm shower or sitz bath, apply a water-based lubricant to the tool, and gently press the curved end along the perineal area for 1–2 minutes per spot, stopping if you feel sharp pain. Use the tool only after your healthcare provider clears you, and keep sessions short and consistent rather than intense.
Why a tool can be easier than fingers
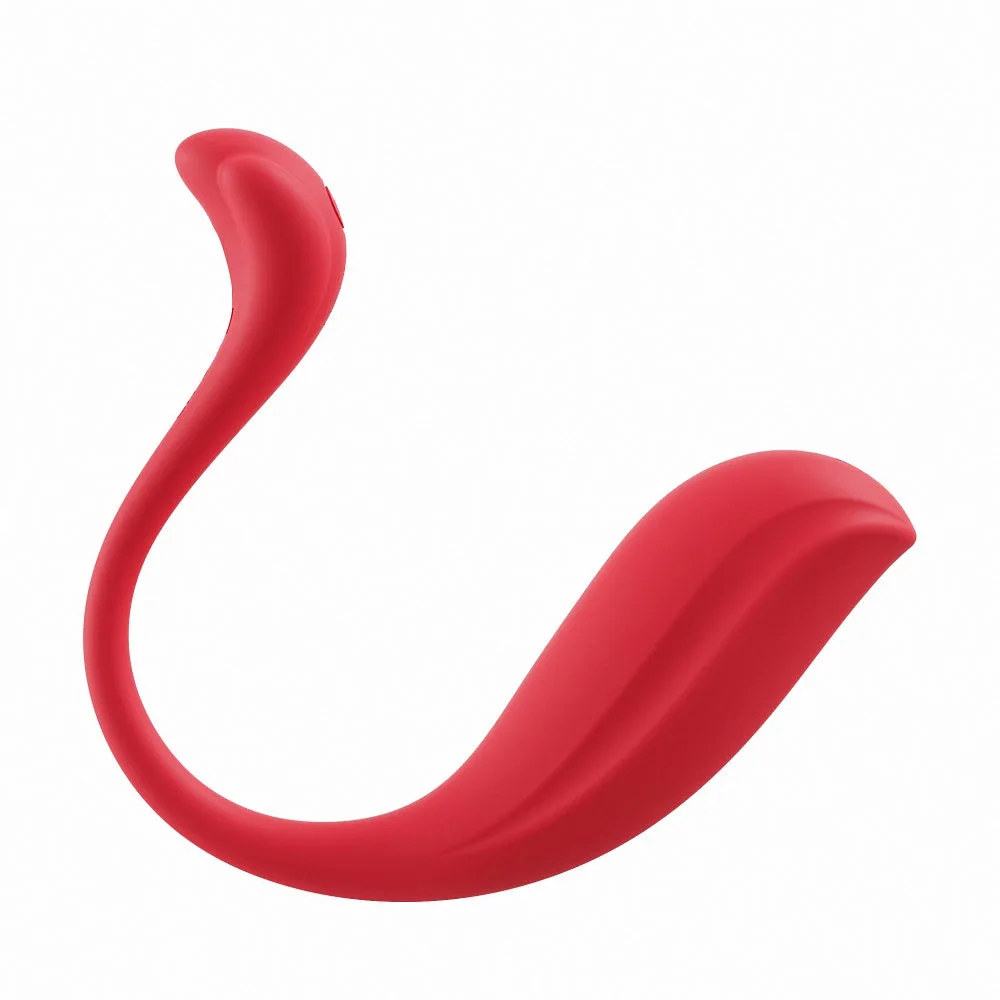
After birth, reaching the perineal area with your hand can be awkward, especially in the first weeks when you are also managing stitches, swelling, or limited mobility. A perineum massage tool is shaped to let you apply gentle pressure from a more comfortable angle, so you can control how much pressure you use without straining your wrist or back. The dual-ended design of the GROWNSY tool gives you a broader surface for general massage and a slimmer tip for more targeted spots, which helps you adjust as your comfort level changes.
When to start and when to wait
Do not begin any internal or perineal massage until your healthcare provider says it is safe, usually after your postpartum checkup. If you had a tear, episiotomy, or cesarean birth, your timeline may be different. Start with external massage only, and only add internal work if your provider approves. If you feel burning, sharp pain, or bleeding increases, stop and contact your provider.
How to prepare your space and supplies
Set up a clean, private space where you can lie back or prop yourself up with pillows. Wash your hands and the tool with mild soap and warm water, then dry it. Use a generous amount of water-based lubricant on both the tool and the area you are massaging. Keep a towel nearby, and have a postpartum self care kit within reach so you are not getting up and down during the session.
Pressure, angle, and what to expect
The goal is gentle, sustained pressure, not deep tissue work. Think of a stretch that feels mild and slightly warm, not sharp. Start with the wider end of the tool and use slow, small movements. If you are using the slimmer end for targeted contact, keep the angle shallow and let the tool do the work. You may feel a pulling or tingling sensation; that is usually fine. Any stinging, numbness, or pain that makes you hold your breath is a signal to ease off.
Adding pelvic wand work for postpartum tension
Some people use a pelvic wand for postpartum to address internal trigger points or scar tissue once they are cleared for internal work. The technique is similar: go slowly, use lubricant, and press only to the point of mild tension. Hold for a few breaths, then release. Do not force through pain, and keep sessions under 10 minutes. If you are working with a pelvic floor physical therapist, ask them to show you the specific angles that match your needs.
Cleaning and storage
Wash the tool after every use with mild soap and warm water, then rinse and dry it completely before storing it in a clean, dry place. Do not share your tool with anyone else. If the surface becomes sticky, cracked, or discolored, replace it. Keeping the tool clean is part of postpartum comfort essentials because it protects you from irritation or infection while you heal.
Step-by-step routine
- 1. Get clearance and set up: Wait for your healthcare provider to say it is safe to begin perineal massage. Wash your hands and the tool, lay out a towel, and have lubricant and a postpartum self care kit within reach. Checkpoint: If you are unsure whether you are cleared for internal work, start with external massage only.
- 2. Warm up with a shower or sitz bath: A warm shower or sitz bath helps relax the area before you begin. Pat dry, then apply a water-based lubricant to the tool and the perineal area. Common mistake: skipping lubricant and trying to massage dry, which increases friction and discomfort.
- 3. Start with the wider end: Lie back or prop yourself up. Use the thicker end of the tool to apply gentle, broad pressure along the perineal area. Move slowly and breathe. Spend 1–2 minutes per spot. Checkpoint: You should feel a mild stretch, not sharp pain. If it hurts, use less pressure or stop.
- 4. Switch to the precision end for targeted spots: If your provider approves internal work, use the slimmer end for targeted contact. Keep the angle shallow, press to mild tension, and hold for a few breaths. Release slowly. Common mistake: pressing too hard or too deep because the slim end feels more precise.
- 5. Keep sessions short and consistent: Aim for 5–10 minutes total, a few times a week, rather than one long session. Consistency matters more than intensity for postpartum recovery care tips. Checkpoint: Stop if you feel burning, numbness, or increased bleeding, and contact your provider.
- 6. Clean the tool and rest: Wash the tool with mild soap and warm water, rinse, and dry it completely. Store it in a clean, dry place. Give yourself a few minutes to rest before moving on with your day. Next step: Pair this routine with other postpartum comfort essentials, like a peri bottle and cooling pads, to stay comfortable between sessions.
Product facts
- Dual-Ended Perineum Massage Tool and Pelvic Wand: Dual-End Design: The thicker end is designed for gentle perineal massage during pregnancy, while the precision end features a slimmer contour for comfortable, targeted contact. You can start with the broader end for general massage and switch to the slimmer end when you need more precise pressure, which is useful as your comfort level changes during postpartum recovery.
- GROWNSY Postpartum Mom & Baby Essential Kits: One-Step Postpartum Care Kit: The GROWNSY Postpartum Kit includes a 6-piece set for moms and a 5-piece set for babies. For mothers, it features a PERI bottle, herbal cooling spray, herbal cooling pad liners, perineal hot and cooling packs, disposable underwear, non-slip socks, and a convenient canvas bag. Having these items together means you can set up a comfortable recovery station and avoid last-minute searches for a peri bottle or cooling pads while you are healing.