What the 600nm effect actually does
Revolog 600nm 120 film is built around one idea: a monochromatic color shift. The supplied catalog record says the effect changes the color of your photo monochromatically, so the whole frame leans in one color direction rather than picking out individual objects. That makes it a different tool from films with structure or texture effects, which can overlay a pattern across the image.
The record is also clear that the final tint is not fixed. Depending on exposure and on the scanner settings used by your lab or by you, the picture will come out with a reddish or a bluish-green tint. Treat those two outcomes as the range you are working within, not as a fault.
The catalog facts that shape your shooting plan
-
Revolog 600nm 120 Special Effects Film: The effect of the 600nm film changes the color of your photo monochromatically. This tells you to compose for an overall color mood rather than expecting selective color or a pattern overlay.
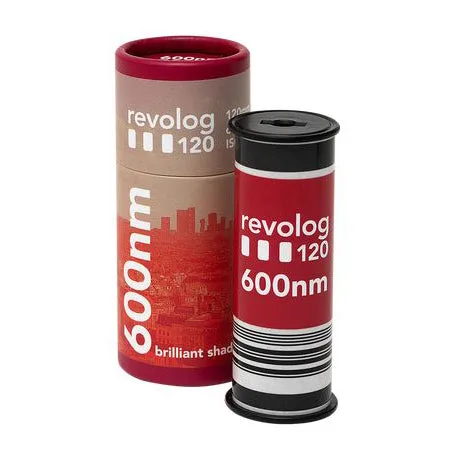
Revolog 600nm 120 Special Effects Film
-
Revolog 600nm 120 Special Effects Film: Depending on exposure and which scanner settings are used (by the photographic lab or you) to scan the negatives, your picture will have a reddish or a bluish-green tint. Exposure and scanning are the two levers you can plan around, so both belong in your workflow before you load the roll.
-
Revolog 600nm 120 Special Effects Film: You're afraid that a structure effect might obstruct a certain part of your photo? Then this film is for you! If you want a color shift without a structure effect covering part of the frame, this is the reason the film is offered.
A practical way to shoot a roll of 600nm
The supplied information does not include a recommended exposure index, filter, or development procedure, so the steps below focus on what the record does support: choosing subjects, varying exposure deliberately, and communicating with whoever scans the film.
- Choose scenes that can carry one overall color: Because the shift is monochromatic, frames with a clear subject and simple color relationships will show the effect most legibly. Busy scenes with many competing colors give the tint more to work against.
- Shoot the same scene at more than one exposure: The catalog says the tint depends on exposure, but it does not state which direction or how much. Bracket a few frames on your first roll so you can see the difference on your own negatives instead of guessing.
- Decide the tint direction before scanning: Reddish and bluish-green are both described outcomes. If you have a preference, tell your lab before it scans, or plan to scan the negatives yourself so you control the settings.
- Keep notes linking frames to settings: Note the exposure you used for each bracketed frame and the scan settings applied. Without those notes, you cannot tell whether a difference came from exposure or from scanning.
Reddish or bluish-green: planning for either result
The record names two tint directions but does not say how to force one over the other. Use this comparison to decide how much control you want to hand to the lab.
- Lab scanning: Convenient, but the tint you get depends on the lab's scanner settings. Ask what settings will be used and whether the lab has scanned 600nm before.
- Scanning yourself: Gives you direct control over the scanner settings the record identifies as a factor in the final tint. It also lets you rescan a frame if the first result is not what you wanted.
- Exposure as the other variable: Exposure is the second factor named in the record. Bracketing on the roll is the only way to learn your own camera-and-film response, since no exposure guidance is supplied.
When 600nm is the right creative choice
- You want color mood without a pattern: The record specifically contrasts this film with structure effects that might obstruct part of a photo, so it suits shooters who want a clean frame with a color cast.
- You are happy to experiment: With two possible tint directions and no supplied exposure guidance, this is a film for testing and comparing rather than for repeatable, predictable color.
- You shoot 120: The product is supplied as 120 film, so it fits cameras and backs that take that format.
What the supplied information leaves open
The catalog record does not state an exposure index, a development time, or a recommended scanner profile, and it does not confirm how much exposure change is needed to move between the reddish and bluish-green results. Those gaps are decision limits, not signs that the film cannot do something. Plan your first roll as a test, keep notes, and let your own negatives and scans tell you which settings you prefer.