Quick Answer
Use the Revolution Etched SS Steaming Pitcher with cold milk, a clean steam wand, and a consistent angle to create silky microfoam that pours into clean latte art.
Why the etched interior helps your milk texture
The etched surface inside the Revolution Etched SS Steaming Pitcher gives the milk a slightly textured surface to grip as it spins. That subtle friction helps you build a more uniform microfoam, which is the foundation for latte art and a creamy mouthfeel.
The 12oz capacity is a practical size for standard drinks like a flat white or a small latte. It also gives you enough room for the milk to expand while steaming without overflowing, as long as you start with the right fill level.
Trade-offs to keep in mind
A 12oz pitcher is not ideal for steaming large batches. If you regularly make drinks over 12oz or steam milk for multiple beverages at once, you may need a larger pitcher to avoid overfilling.
Stainless steel conducts heat well, so the pitcher gets hot during steaming. Always use a heat-resistant glove or hold it by the handle to avoid burns.
Step-by-step frothing guide
- Fill the pitcher with cold milk: Pour cold milk into the pitcher, filling it to about one-third full. This leaves enough room for the milk to expand while steaming. Check that the milk is fresh and cold; warmer milk froths less effectively.
- Purge the steam wand: Before steaming, briefly open the steam valve to release any condensed water. This prevents watery milk and inconsistent texture. Always purge after steaming as well to keep the wand clean.
- Position the wand and start steaming: Place the steam wand tip just below the milk surface, slightly off-center. Turn on the steam and you should hear a gentle hissing sound as air is incorporated. If the milk splashes loudly, the tip is too shallow; lower it slightly.
- Create a whirlpool: Angle the pitcher so the milk spins in a vortex. This helps fold the foam into the milk for a silky, uniform texture. If no whirlpool forms, adjust the pitcher angle or the wand position.
- Stop at the right temperature: Steam until the pitcher feels too hot to hold comfortably, around 140-150°F (60-65°C). Do not overheat, as it can scald the milk and break down the foam. Use a thermometer if you are new to steaming; practice helps you learn the feel.
- Tap and swirl before pouring: After steaming, tap the pitcher on the counter to pop large bubbles, then swirl gently to mix the milk and foam. This gives you a glossy, pourable texture. If the milk looks separated, swirl more before pouring.
- Pour your latte art: Hold the pitcher close to the cup surface and pour steadily. Start with a gentle stream to create the base, then raise the pitcher to draw your design. Practice on a plain cup of coffee first to build confidence.
Product facts
-
Revolution Etched SS Steaming Pitcher (12oz): This 12oz pitcher is crafted from stainless steel and features an etched interior surface for milk texturing and pouring control. The etched surface helps you achieve a finer, more consistent microfoam, which makes pouring latte art more predictable.
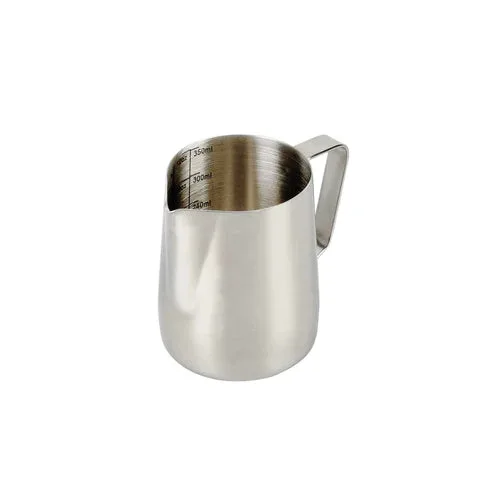
Revolution Etched SS Steaming Pitcher (12oz)