What This Build Guide Covers
The Premium Bandai RG 1/144 RX-0 Unicorn Gundam Unit 3 Phenex Narrative Version is a special order kit with a gold-coated finish. This guide focuses on what the catalog confirms about the kit and how to plan your build around the available information. The gold coating and the 6–8 week lead time are the two factors that shape every decision, from assembly order to display setup.
Kit Facts That Affect Your Build Plan
-
Premium Bandai 1/144 RG RX-0 Unicorn Gundam Unit 3 Phenex Narrative Version: This is a Premium Bandai Real Grade kit at 1/144 scale, part of the RG line. Real Grade kits have a high part count and pre-molded inner frame, which means careful assembly and gentle handling are important, especially with a coated finish.
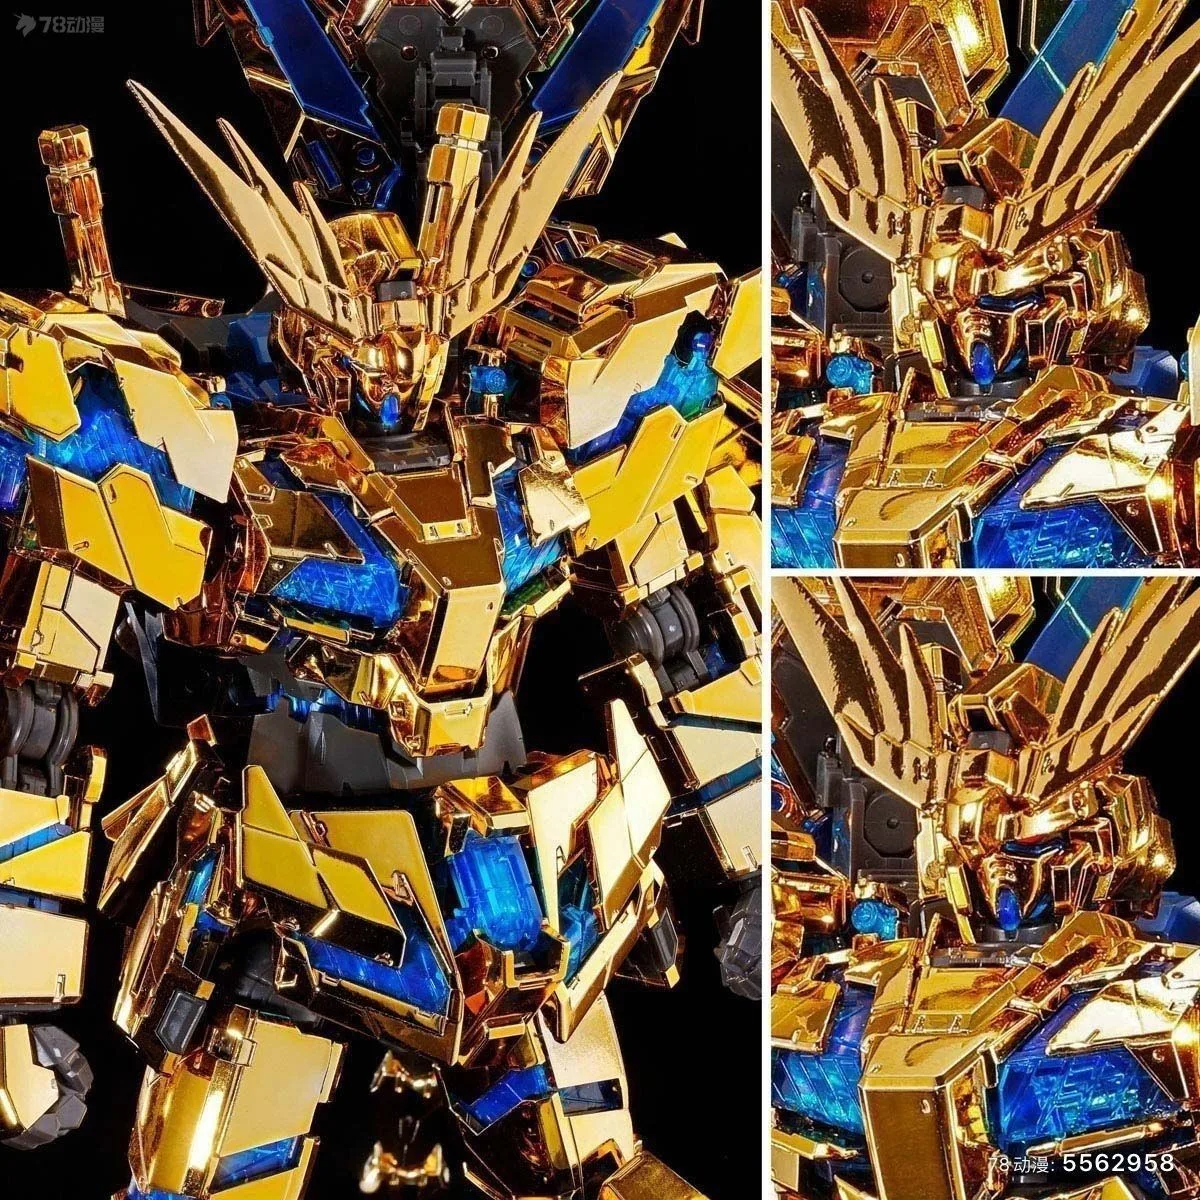
Premium Bandai 1/144 RG RX-0 Unicorn Gundam Unit 3 Phenex Narrative Version
-
Premium Bandai 1/144 RG RX-0 Unicorn Gundam Unit 3 Phenex Narrative Version: It is a special order item with a lead time of 6 to 8 weeks. Plan your build date around the delivery window. The kit arrives after the lead time, so you have time to prepare tools and a clean workspace.
-
Premium Bandai 1/144 RG RX-0 Unicorn Gundam Unit 3 Phenex Narrative Version: The kit presents the RX-0 Unicorn Gundam Unit 3 Phenex in its Narrative Version. The Narrative Version has a distinct gold coating that is prone to scratches. You need to plan for minimal handling and consider using gloves during assembly.
Planning Around the 6–8 Week Lead Time
Because this is a special order item, the kit does not ship immediately. Use the lead time to prepare: gather your tools (nippers, hobby knife, tweezers, and a soft mat), decide on a display location, and research gold coating care. The lead time also means you cannot rush the build once the kit arrives, so plan for several sessions rather than a single marathon.
Suggested Assembly Order for the RG Phenex
The following order is based on typical Real Grade assembly and the special coating of this kit. The catalog does not provide specific instructions, so adapt these steps to your experience level.
- 1. Inspect the runners immediately: Check for any damage or defects before starting. The gold coating can hide fine cracks, so examine each part under good light.
- 2. Build the inner frame first: Assemble the pre-molded inner frame sections without the armor. This lets you test articulation and fit before attaching the coated parts.
- 3. Cut coated parts carefully: Use single-blade nippers and cut the gate away from the part surface. Leave a small nub and trim it with a hobby knife to avoid stress marks on the gold coating.
- 4. Assemble the armor sections: Snap the coated armor onto the inner frame. Do not force any connection; if a part is tight, sand the inner frame peg slightly rather than scraping the coating.
- 5. Pose and display with minimal handling: Once built, pose the kit and place it in a display case. The gold coating is delicate, so avoid frequent repositioning.
Gold Coating Care: What the Catalog Confirms
The catalog does not include cleaning or care instructions for the coating. Based on general model kit best practices, you should handle the kit with clean hands or gloves, use a soft brush for dust, and keep it away from direct sunlight to prevent fading. The coating is not a paint layer that can be touched up easily, so prevention is the best care.
What the Supplied Information Does Not Confirm
The catalog does not specify the exact shade of gold, the number of runners, the presence of decals (waterslide or sticker), or the articulation range. It also does not confirm whether the kit includes a display base or the Unicorn mode transformation sequence. These details are typical for the RG Unicorn line, but you should not assume them for this special order version. If you need those specifics, check with the store before ordering.