Quick answer
Start with a sharp 45 mm rotary cutter, a self-healing mat, and a thick acrylic ruler. Fold fabric selvedge to selvedge, align the folded edge with a horizontal line on the mat, and cut away from your body with steady pressure. Replace the blade the moment it starts skipping instead of slicing, because a dull blade is the most common cause of ragged edges and hand strain.
Rotary cutting is the fastest way to turn yardage into accurate strips, squares, and triangles, and it is the skill that makes piecing feel effortless. The tools are simple, but small habits decide whether your pieces come out square or slightly off. This guide walks through the setup and the cut, in order, with the checkpoints that keep beginners out of trouble.
You do not need a long list of gear to start. A cutter, a mat, and one good ruler cover most beginner projects. Add a second ruler size later, once you know which shapes you actually cut.
Set up your cutting station
Work on a surface at hip height or slightly below, with the mat flat and fully supported. A mat that overhangs the table edge will flex under the cutter and give you an uneven cut. Put your cutter on the side of your dominant hand and keep the ruler within easy reach so you are not stretching across the mat.
Good lighting matters more than most beginners expect. You need to see the fabric edge against the mat grid, and shadows hide the line you are trying to follow. If your table is too low, a riser or a second table solves it faster than changing your technique.
- Checkpoint: press on every corner of the mat. If it rocks or dips, move to a firmer surface before cutting.
Square the fabric before you cut anything
Press your fabric first, then fold it selvedge to selvedge with right sides together. Line up the selvedges and the folded edge so the fold is straight, not bowed. Lay it on the mat with the fold toward you and the raw edges away.
Place your ruler so its edge sits just inside the uneven raw edge, then trim that sliver away. This first trim creates a true straight edge, and every strip you cut afterward is measured from it. Skipping this step is the single most common reason beginner strips come out tapered.
- Checkpoint: after trimming, the cut edge should line up with a vertical line on the mat along its whole length.
How to use a rotary cutter without wobbling
Hold the handle with your whole hand, index finger along the top if your cutter allows it, and keep your wrist straight. Press the ruler down firmly with your non-cutting hand, fingers spread and well back from the ruler edge. Roll the cutter away from your body in one smooth pass, keeping the blade against the ruler the entire time.
Do not stop and restart mid-cut. Each pause leaves a small nick in the edge. If the cutter needs real effort to move, stop, close the blade, and change it rather than pushing harder. A sharp blade glides; a dull one makes you work and pulls the fabric.
- Checkpoint: run your finger along the cut edge. It should feel smooth, not fuzzy or stepped.
Rotary cutting safety habits that become automatic
Close the blade every single time you set the cutter down, even for a second. Most rotary cutter injuries happen during the pause, not during the cut. Always cut away from your body and never toward your hand, and keep your ruler-holding fingers behind the ruler's edge, not on top of the line you are cutting.
Keep the mat clear of pins, scissors, and loose thread, and never cut over a pin. Store the cutter with the blade retracted and out of reach of children and pets. When you change a blade, hold the old one by its edges and put it straight into a rigid container.
- Checkpoint: before every cut, glance at your blade. If it is open and you are not actively cutting, close it.
Cut strips, then subcut into squares
Once you have a true edge, measure your strip width from that edge and cut. Keep the ruler still and move your body instead of twisting your wrist. After cutting several strips, re-square the edge, because small errors compound with every strip.
To subcut, stack two or three strips at a time, align them with a horizontal mat line, and cut across at the needed width. Rotate the mat if reaching across feels awkward. Fewer layers give you more accuracy; speed comes later.
- Checkpoint: measure a finished strip at both ends. If the two ends differ, re-square before cutting more.
Match thread and batting to your cut pieces
Clean rotary cuts give you straight seams, and straight seams show thread choices clearly. For invisible applique and fine detail work, an extra-fine thread disappears into the fabric. For everyday piecing and quilting, a smooth 50 wt. polyester blends well and keeps the seam from adding bulk.
Batting choice affects how those seams behave once quilted. A cotton-poly blend made for machine quilting holds its shape through the needle without fighting your feed dogs, which matters more on a beginner's first quilts than on a show piece.
- Tip: keep a spare bobbin wound with the same thread you are piecing with so tension stays consistent.
Your first rotary cut, step by step
- 1. Press and fold the fabric: Press out wrinkles, then fold selvedge to selvedge with right sides together and the fold straight. Mistake to avoid: folding on a bowed crease instead of aligning the selvedges.
- 2. Position the fabric on the mat: Lay the fold along a horizontal mat line with raw edges facing away from you. Checkpoint: the fold should sit on the line for its full length, not drift.
- 3. Trim a true edge: Place the ruler just inside the uneven raw edge and cut a thin sliver away to create a straight starting edge. Mistake to avoid: measuring your first strip from an untrimmed edge.
- 4. Cut the strip: Measure the strip width from the true edge, press the ruler down, and roll the cutter away from your body in one pass. Checkpoint: the cut edge feels smooth and matches a mat line end to end.
- 5. Subcut into squares: Stack two or three strips, align with a horizontal line, and cut across at the required width. Mistake to avoid: stacking too many layers and letting the bottom strip shift.
- 6. Re-square and clean up: After several strips, trim the edge square again, close the blade, and brush lint off the mat. Next step: label your cut pieces by size so piecing goes faster.
Tools that make beginner cuts easier
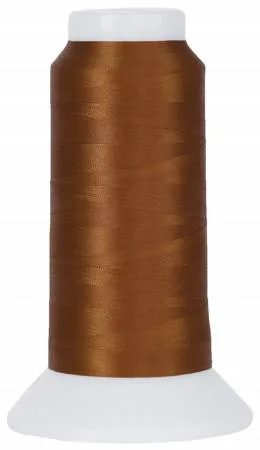
- MicroQuilter #7027 Copper Cone: MicroQuilter is a 100 wt. 2-ply extra-fine polyester thread designed for invisible machine applique and detail quilting, wound 3,000 yds per cone. If your beginner project includes applique or micro stippling, this thread sews with a very small needle and renders nearly invisible, so your cut shapes stay the focus.
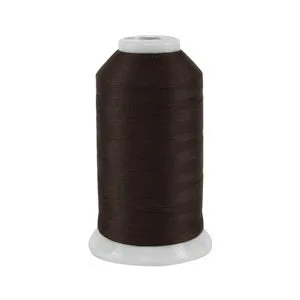
- So Fine! Thread #466 Brown Bear: So Fine! #50 is a 50 wt. 3-ply lint-free polyester thread, 3,280 yards per cone, recommended for quilting and sewing and usable as bobbin thread. A lint-free all-purpose thread keeps your machine cleaner during long piecing sessions and works for both the top and the bobbin, which simplifies setup for a new quilter.
- Quilters Dream Dream Blend 70/30 for Machines: Dream Blend 70/30 for Machines is 70% cotton blended with 30% fine denier poly microfibers, developed for machine quilting. It is soft but takes the tug, so accurately cut pieces stay aligned while you quilt instead of shifting under the needle.
Rotary cutting rewards preparation more than speed. Trim a true edge, keep your blade sharp and closed, and cut away from your body every time. Once those habits are automatic, you can focus on the fun part: choosing fabric and thread for the quilt you actually want to make.