Start with the camera's view, then place sensors around it
The Safe Guard Kit pairs one CAM100 Smart Panoramic Camera with three S100 Door Sensors and two S200 Motion Sensors. Placement works best when you treat the camera as the anchor: pick the spot where its pan and tilt can cover the entry points you care about, then put door and motion sensors where they catch activity before it reaches those entries.
Before you mount anything, confirm two setup facts. The devices only work with a 2.4 GHz wireless connection, so check that your router broadcasts a 2.4 GHz network in the areas you plan to cover. The camera is powered via 1.5A DC 5V current, so it needs a nearby outlet or a power arrangement that matches that supply.
Camera facts that shape where it goes
-
Safe Guard Kit (1 × Smart Home Security Camera, 2 × Motion Sensors, 3 × Door & Window Sensors): CAM100 Smart Panoramic Camera has an adjust angle tilt of -75° to 75° and pan of 0° to 350°. Use the tilt range to aim above or below the horizon, and the pan range to sweep across a room or entry area without moving the mount.
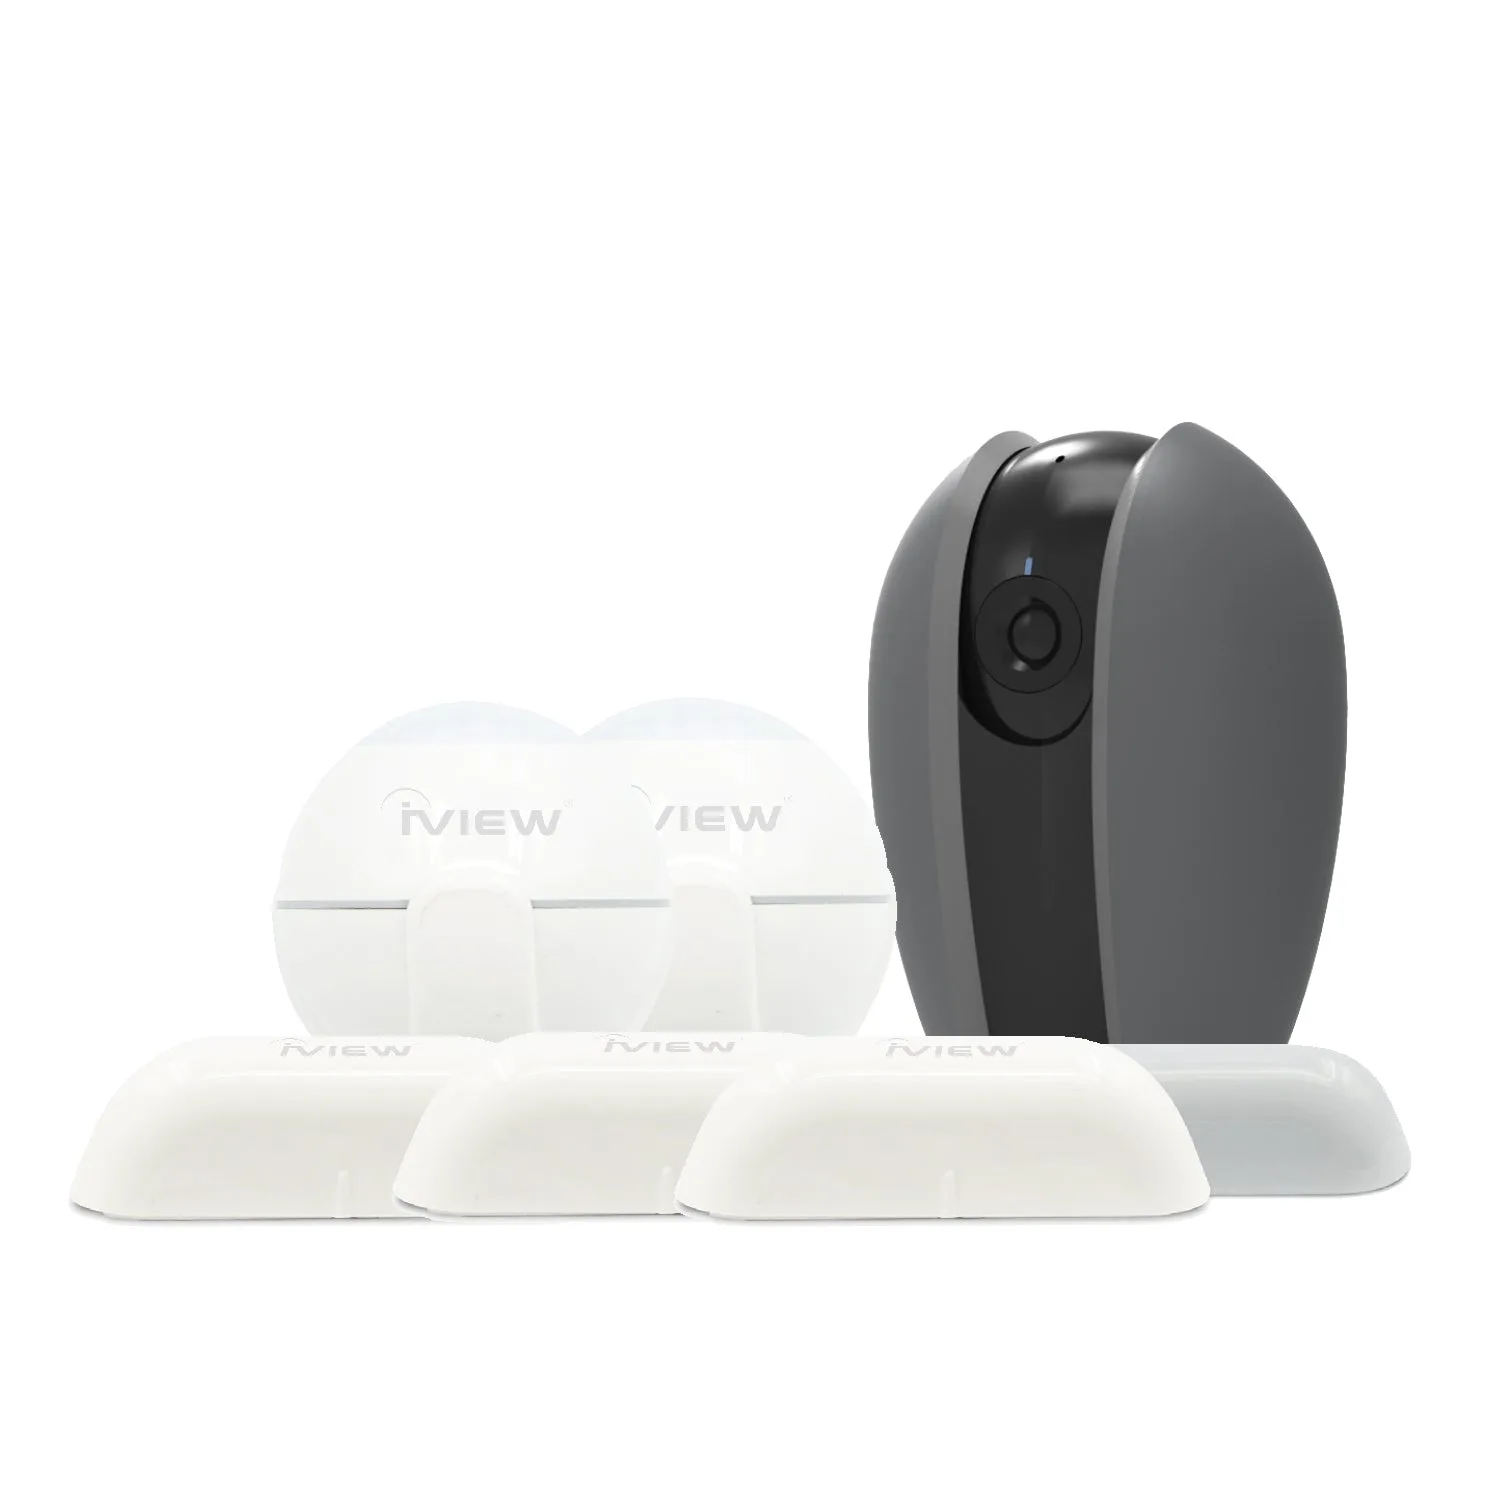
Safe Guard Kit (1 × Smart Home Security Camera, 2 × Motion Sensors, 3 × Door & Window Sensors)
-
Safe Guard Kit (1 × Smart Home Security Camera, 2 × Motion Sensors, 3 × Door & Window Sensors): The camera is powered via 1.5A DC 5V current. Choose a mounting spot within reach of a compatible power source; a high corner with no outlet nearby is not a practical first choice.
-
Safe Guard Kit (1 × Smart Home Security Camera, 2 × Motion Sensors, 3 × Door & Window Sensors): These devices only work with a 2.4 GHz wireless connection. If your router uses a single combined network name or a 5 GHz-only setting, the camera may not connect where you intend to place it.
Door and window sensor placement: height and alignment
The S100 Door Sensor is a contact sensor, so its job is to report when two parts separate. Mount the two pieces so they sit close together when the door or window is closed and pull apart when it opens. The supplied information does not specify a required mounting height or gap distance, so follow the physical fit of the sensor pair rather than a fixed number.
Place door sensors on the entry points that matter most: a front door, a back door, and a ground-floor window are common starting points for a three-sensor kit. Keep the sensor parts aligned with the frame and the moving panel, and avoid spots where the door's swing or a protruding lock could knock them loose.
Motion sensor placement tips for fewer false alerts
The S200 Motion Sensor uses infrared technology to detect unknown movement. Where you aim it matters more than how high you mount it, because heat sources and moving objects can trigger alerts that are not intruders.
- Aim away from windows and direct sun: Sunlight and outdoor heat can look like motion to an infrared sensor. Point the sensor into the room rather than out a window or at a spot that heats up during the day.
- Keep it clear of air vents and heaters: Moving hot air from a vent or a space heater can cause false triggers. Place the sensor where the air is relatively still.
- Cover the path, not the doorway itself: A motion sensor that watches the approach to a door gives you earlier warning than one pointed at the door panel, which the door sensor already covers.
- Test before you commit: The supplied information does not include a recommended mounting height or detection range, so walk-test each sensor after mounting and adjust if alerts are inconsistent.
A practical coverage map for a three-entry home
Use this sequence as a starting layout, then adjust to your floor plan. It uses all six devices in the kit.
- Place the CAM100 camera in the main living area: Choose a spot with a 2.4 GHz signal and a 1.5A DC 5V power source. Aim the tilt within -75° to 75° and use the 0° to 350° pan to sweep across the room and the main entry.
- Put S100 door sensors on the front and back doors: Align the two parts so they separate cleanly when the door opens. These are your first line of entry detection.
- Put the third S100 sensor on a ground-floor window: Choose a window that opens and is reachable from outside. The sensor pair should sit close together when the window is closed.
- Place one S200 motion sensor near the main hallway: Aim it along the path between the entry and the living area, away from vents and windows.
- Place the second S200 motion sensor near a secondary entry or stairway: Cover the route an intruder would take after entering, not the door itself. Walk-test both sensors and adjust aim if you get false alerts.
Kit contents and storage options
- Safe Guard Kit (1 × Smart Home Security Camera, 2 × Motion Sensors, 3 × Door & Window Sensors): The Safe Guard Kit includes 1 × CAM100 Smart Panoramic Camera, 3 × S100 Door Sensors, and 2 × S200 Motion Sensors. Plan placement for all six devices so you do not leave a sensor unused or double up on one entry.
- Safe Guard Kit (1 × Smart Home Security Camera, 2 × Motion Sensors, 3 × Door & Window Sensors): Storage options include NVR, Cloud Storage, or an SD card of up to 128GB. If you plan to record continuously, decide on storage before finalizing camera placement, since an SD card slot may be easier to reach in some spots than others.
What the supplied information does not cover
The kit's supplied details do not include a recommended mounting height for the door or motion sensors, a detection range for the S200, or a battery type or battery life for any device. Treat those as unknowns to test in your own home rather than fixed rules. The camera's pan and tilt ranges and its 2.4 GHz and 1.5A DC 5V requirements are the confirmed constraints to plan around.
If a sensor does not report reliably after mounting, move it closer to the camera's Wi-Fi coverage area or adjust its aim before assuming a hardware problem. The 2.4 GHz requirement applies to all the devices in the kit, so a weak 2.4 GHz signal at a far corner is a common reason a sensor seems unresponsive.