Quick answer
Build The Sailboat: La Brisa in stages, test the warm-white interior lighting before you close the cabin, and display the finished sloop at eye level so the lit cabin and desk details stay visible.
Why the cabin order matters more than the hull
The streamlined hull with its pointed bow and wide stern goes together in a predictable sequence, so most first-timers move through it quickly. The cabin is where the build slows down: the sailing log, route map, and guitar sit inside a space that gets harder to reach once the hull and deck are joined. Treat the interior as its own mini-build rather than a step you squeeze in at the end.
The warm-white lighting is designed to restore a cozy sailing atmosphere, but that effect depends on the light being positioned before the cabin is sealed. If you rush the hull first, you may find yourself partially disassembling it to reach the interior.
Display choices that keep the sloop readable
A brick sailboat has two strong visual axes: the long hull profile and the lit cabin. Placing it on a low coffee table flattens the hull silhouette; placing it too high hides the interior. A shelf at roughly eye level, angled slightly so the pointed bow leads, shows both. Keep the model out of direct sun if you want the warm-white glow to read clearly in the evening.
There is no supplied stand or wall-mount specification for this set, so plan a flat, stable surface rather than assuming a hanging display is supported.
Build and display steps for The Sailboat: La Brisa
- Sort the interior details first: Before attaching any hull plates, set out the sailing log, route map, and guitar pieces in a small tray. Common mistake: mixing them into the general parts pool and discovering a missing detail after the cabin is closed. Checkpoint: all three interior details are accounted for before you start the hull. Losing a tiny interior piece is the most common first-timer delay.
- Build the cabin as a separate module: Assemble the cabin walls and desk area on their own, then place the log, map, and guitar inside while you still have open access. Common mistake: attaching the cabin to the hull too early and then trying to reach in through the doorway. Checkpoint: you can see all three details clearly from above before the roof goes on. If you cannot see the guitar from above, the cabin is not ready to close.
- Route and test the warm-white light: Connect the interior lighting and switch it on before the cabin roof and deck are fixed. Common mistake: assuming the light works and discovering a loose connection after the hull is sealed. Checkpoint: the cabin glows evenly warm-white with no flicker before you continue. Test with the power source you will actually use at home, not just a bench supply.
- Complete the hull and check the profile: Attach the pointed bow and wide stern sections, pressing each plate fully down. Common mistake: leaving a partly seated plate that breaks the streamlined line. Checkpoint: sight along the hull from bow to stern; the curve should be smooth with no raised edges. A quick sight-line check catches most hull seating errors.
- Choose and prepare the display spot: Pick a flat, stable shelf at roughly eye level, away from direct sun, and orient the bow forward. Common mistake: placing the model on a low table where the lit cabin is hidden. Checkpoint: standing in your normal viewing position, you can see both the hull profile and the cabin interior. View the shelf from where you actually sit or stand before committing.
- Do a final light and detail check: Switch the lighting on in the display position and look for hidden or shadowed interior details. Common mistake: skipping this check and only noticing a blocked guitar or map days later. Checkpoint: the warm-white glow reaches the desk area and the log, map, and guitar are all visible. Adjust the model angle slightly if the cabin looks dim from your main viewing spot.
Product facts
-
The Sailboat: La Brisa: The interior uses mainly warm-white lighting to recreate a cozy sailing atmosphere. Plan your display spot for evening viewing, because the warm glow is the feature you will notice most.
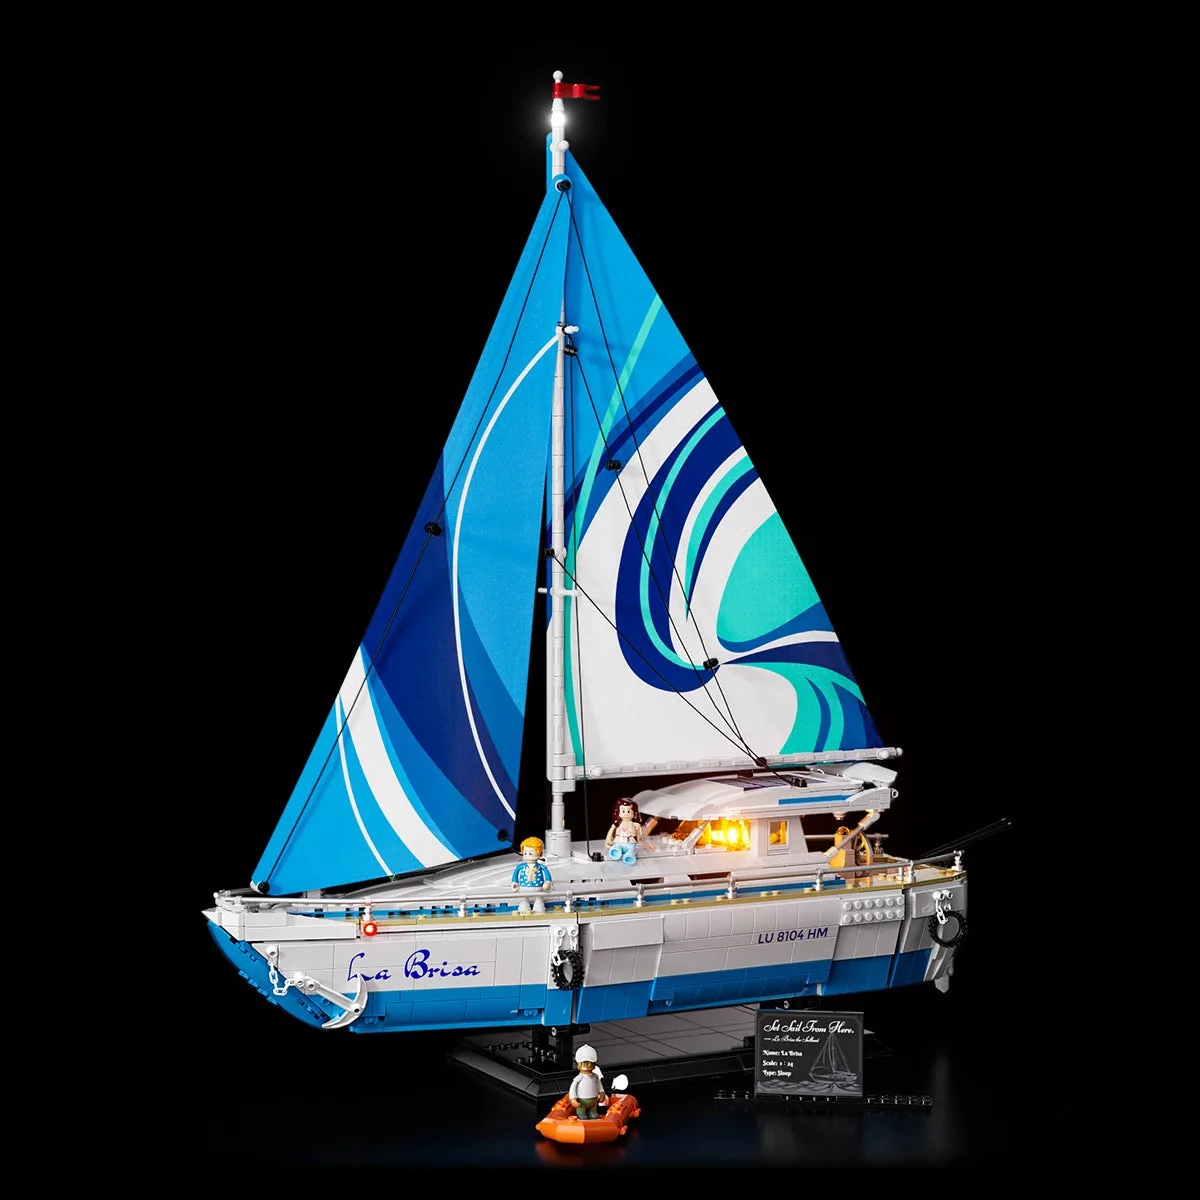
The Sailboat: La Brisa
-
The Sailboat: La Brisa: The hull reproduces a sloop profile with a pointed bow and wide stern. Orient the finished model bow-forward on the shelf so the streamlined shape reads at a glance.
-
The Sailboat: La Brisa: The cabin includes a sailing log on the desk, a route map, and a guitar. These small details are easy to hide if you close the cabin too early, so place them before final assembly.