Quick Answer
Set up your rolling mill work table by positioning it near your bench, securing it for stability, and organizing your tools within reach—this keeps your jewelry bench workstation efficient and safe.
Why Table Stability Matters for Rolling Mills
A rolling mill generates significant downward force when you crank metal through the rollers. If your work table isn't stable, the mill can shift or vibrate, affecting the accuracy of your work and increasing the risk of injury. A sturdy, well-secured table is non-negotiable for consistent results.
Consider the weight capacity and surface area of your table. The Pepetools Rolling Mill Work Table, for example, supports up to 500 pounds and offers a 36-inch by 24-inch solid wood surface, giving you ample room for both the mill and your materials.
Organizing Your Rolling Mill Workstation
Efficient organization reduces setup time and keeps your workflow smooth. Keep the most-used tools—like cutting lubricants, brushes, and safety glasses—within arm's reach. Use the bottom shelf of your workstation for heavier items or raw material storage, freeing up the top surface for the mill and workpieces.
A reversible bottom shelf, like the one on the Pepetools model, adds flexibility. You can flip it to create a flat surface or use it as a tray, depending on your storage needs.
Step-by-Step Setup Process
- Choose the Right Location: Place your rolling mill work table near your main jewelry bench, ideally within arm's reach of your soldering and forming stations. Ensure the floor is level and there's enough clearance for the mill's handle to rotate fully without hitting walls or other equipment. Check that the area has good lighting and ventilation, especially if you'll be using lubricants or annealing nearby.
- Secure the Table for Stability: Lock the casters (if your table has them) and verify the table doesn't wobble. If your rolling mill is heavy, consider bolting the mill to the table surface or using a non-slip mat underneath to prevent movement during operation. Test the stability by applying downward pressure on the table's edge—if it shifts, adjust the locks or add shims before use.
- Organize Your Tools and Materials: Arrange your most-used tools—such as rolling mill lubricant, brushes, and safety glasses—on the top surface within easy reach. Use the bottom shelf for heavier items like metal ingots or a small anvil, keeping the work surface clear for the mill and your workpieces. Group tools by frequency of use; store rarely used items in drawers or bins to minimize clutter.
- Set Up Your Workflow Zones: Designate specific areas on the table for different tasks: one zone for rolling, one for measuring and marking, and one for finished pieces. This reduces cross-contamination of metal filings and keeps your process organized. Use small trays or magnetic mats to keep screws, findings, and small parts from rolling away.
- Test the Setup Before Full Use: Run a test piece through the rolling mill to ensure everything is stable and aligned. Listen for unusual vibrations or noises, and confirm the mill operates smoothly. Adjust the table position if needed to reduce strain on your wrists and back. Perform a final safety check: ensure all tools are secured and the area is free of trip hazards.
Recommended Product
-
Rolling Mill Work Table: This mobile workstation features a 1.5-inch-thick solid wood surface measuring 36 by 24 inches, providing 864 square inches of work area, with a total loading capacity of 500 pounds. The generous surface and high weight capacity give you a stable base for your rolling mill and room to maneuver metal sheets, while the mobility lets you reposition your setup as your bench evolves.
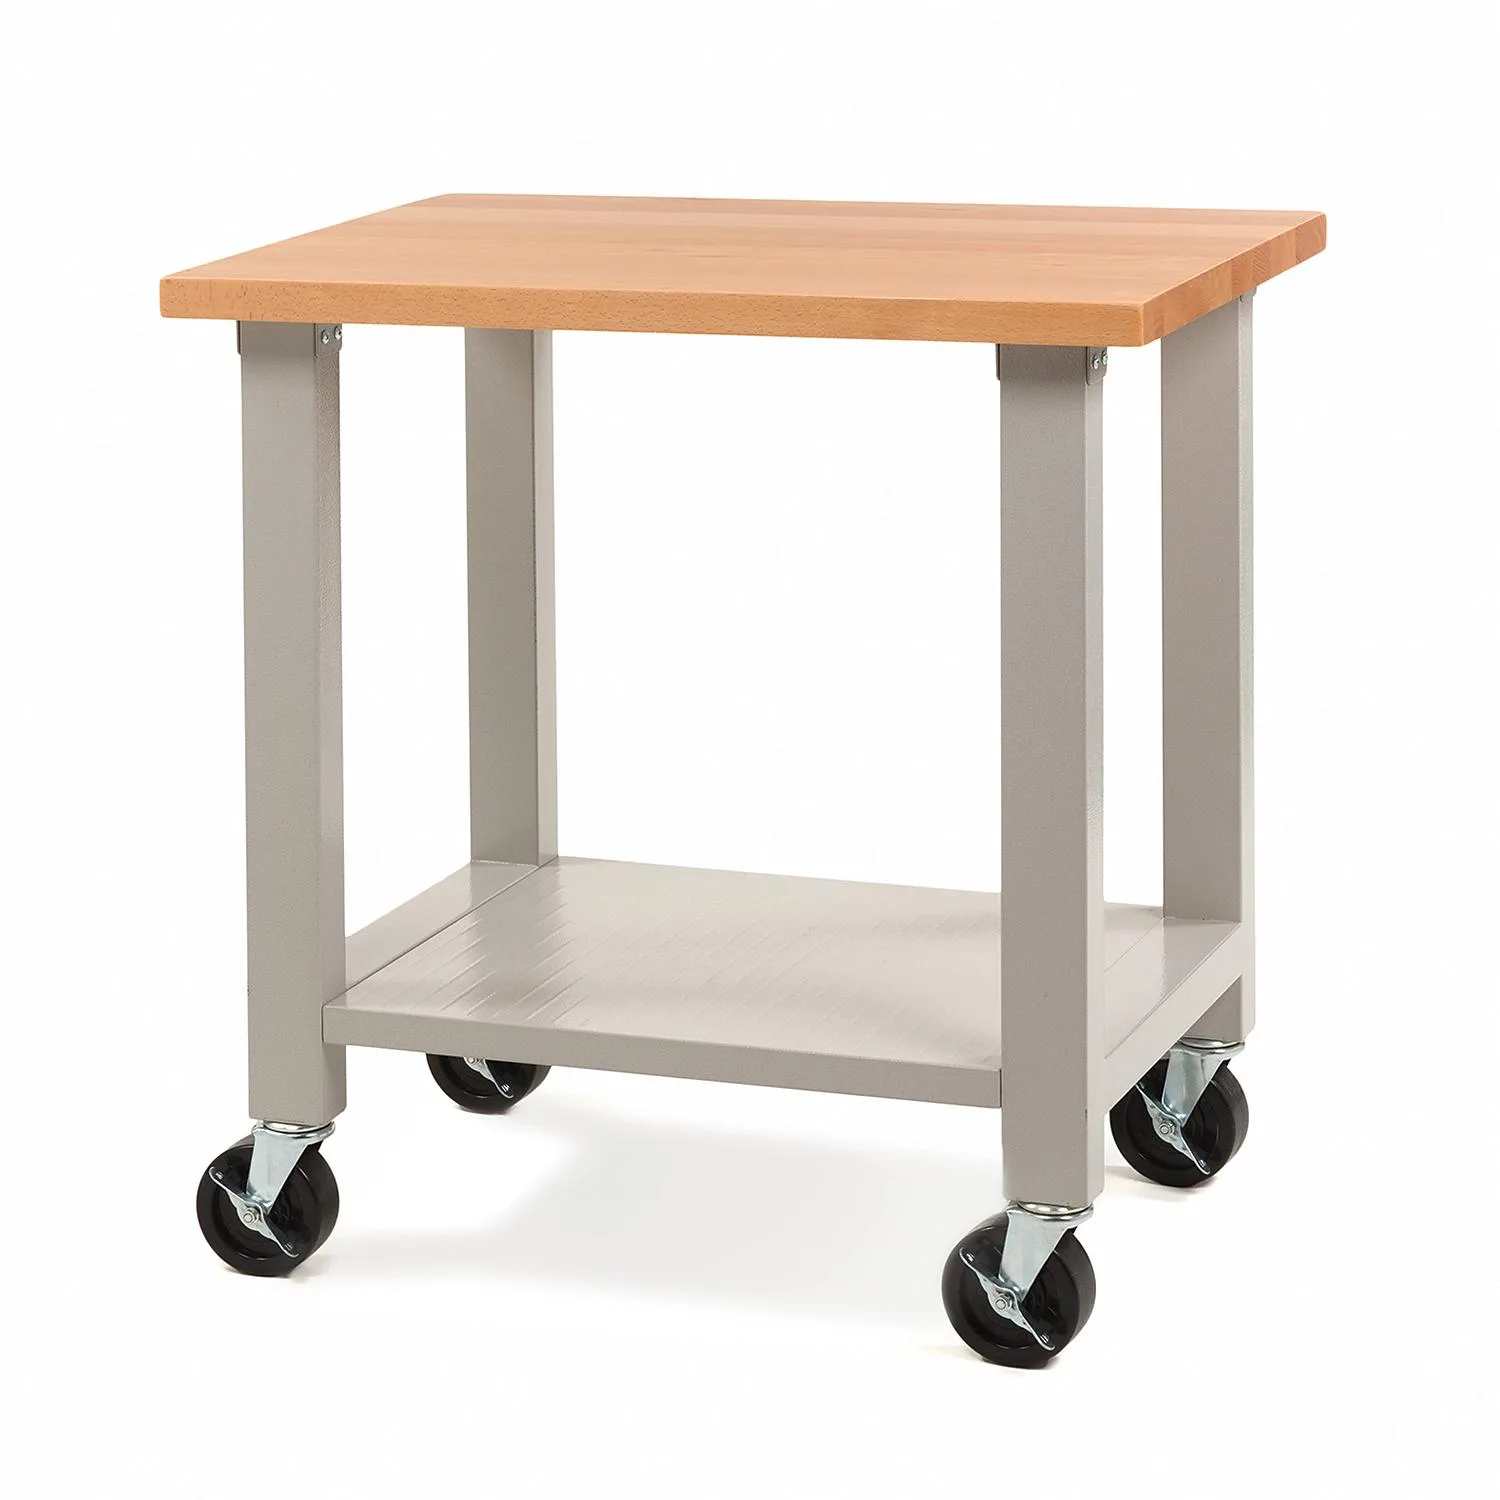
Rolling Mill Work Table