What the Sightmark LoPro Mini Green Laser Offers
The Sightmark LoPro Mini green laser sight is a compact aiming solution designed for home defense, security, and hunting applications. It features a class IIIa green laser with a night range of up to 600 yards and a daylight range of 50 yards. The low-profile design mounts directly to Picatinny or Weaver rails, and the single-piece mount helps maintain zero after installation.
This guide covers mounting, battery installation, zeroing, and pressure pad setup using the supplied information. No assumptions about unsupported features or procedures are made.
Key Supplied Specifications
-
Sightmark LoPro Mini Green Laser Sight: Picatinny and Weaver rail compatible; recoil rated up to .308. Confirms the laser fits most common rifle and shotgun rails without adapters.
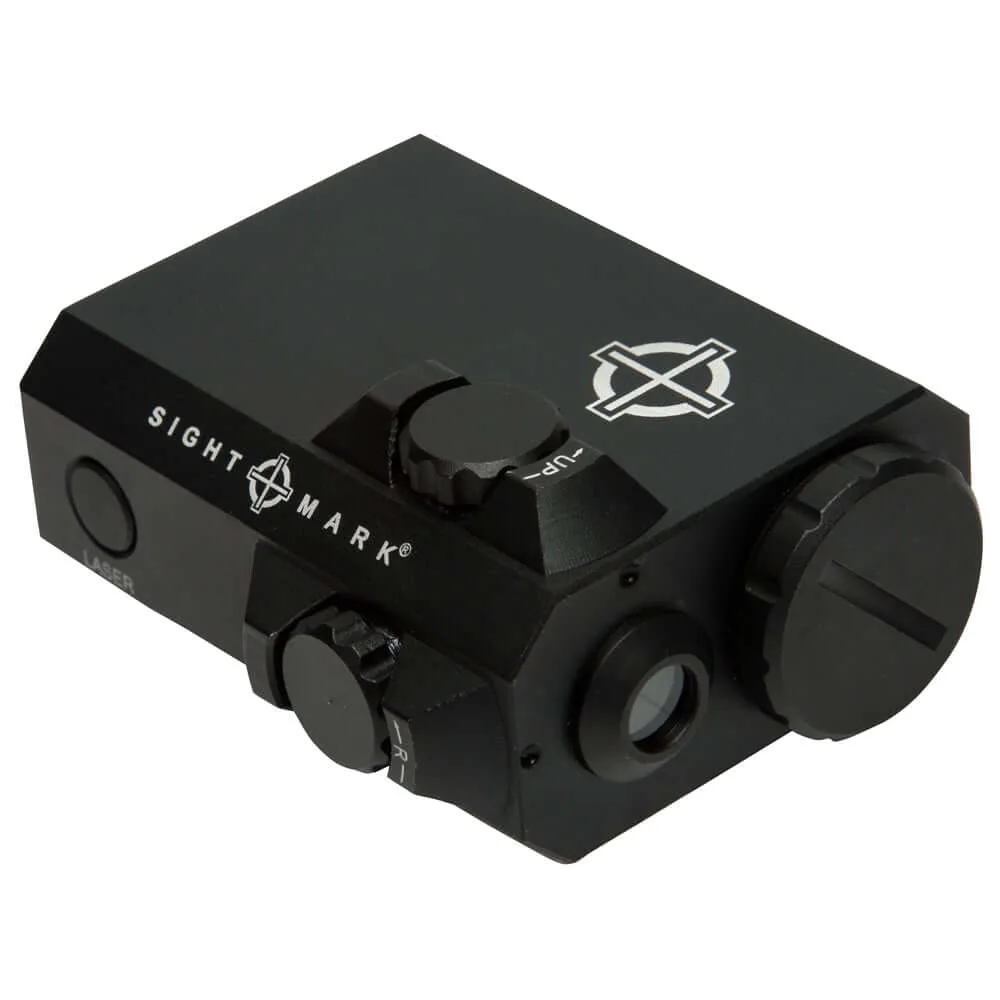
Sightmark LoPro Mini Green Laser Sight
-
Sightmark LoPro Mini Green Laser Sight: Powered by one CR123A battery; up to 18 hours of operation. Battery life is sufficient for extended use; carry a spare CR123A for field replacement.
-
Sightmark LoPro Mini Green Laser Sight: IPX5 weather-resistant and shockproof; digital switch with push-button or pressure-pad operation. Suitable for outdoor use in rain or dusty conditions; offers two activation methods.
Mounting the Laser to a Rail
The LoPro Mini uses a single-piece mount that attaches directly to Picatinny or Weaver rails. No additional adapter is required.
- 1. Prepare the rail: Ensure the rail section is clean and free of debris. The laser mount fits standard Picatinny or Weaver slots.
- 2. Position the laser: Slide the mount onto the rail from the rear or side, depending on available space. Place it at a comfortable position where your thumb or support hand can reach the push button or pressure pad.
- 3. Tighten the mount: Use the tool-less adjustment knob (supplied) to tighten the mount securely. The single-piece design helps maintain zero after tightening.
- 4. Verify stability: Check that the laser does not shift when pressure is applied. Re-tighten if needed.
Installing the Battery
The LoPro Mini uses one CR123A battery. A battery is included in the package.
- 1. Locate the battery compartment: The compartment is typically on the underside or rear of the laser housing. Refer to the included manual for exact location.
- 2. Insert the CR123A battery: Insert with the positive (+) end first, matching the polarity markings inside the compartment.
- 3. Close and secure the compartment: Ensure the cover is properly sealed to maintain IPX5 weather resistance.
Zeroing the Laser
The LoPro Mini features hand-adjustable windage and elevation for zeroing. Adjustments are tool-less.
- 1. Set up a target at your desired zero distance: A common starting distance is 25 yards for rifles or 15 yards for pistols. The laser's daylight range is 50 yards, so zero within that range for visible daytime use.
- 2. Fire a group to confirm point of impact: Use the same ammunition you plan to carry. Note where the group lands relative to the laser dot.
- 3. Adjust windage and elevation: Turn the adjustment dials in the direction indicated (usually marked with arrows) to move the laser dot toward the point of impact. Make small adjustments and recheck.
- 4. Confirm zero: Fire another group. Repeat adjustments until the laser dot matches your point of aim at the chosen distance.
Using the Pressure Pad
The LoPro Mini includes a pressure pad for remote activation, ideal for rifles where the push button may be out of reach.
- 1. Connect the pressure pad: Plug the pressure pad cable into the port on the laser housing. The connection is keyed to fit only one way.
- 2. Mount the pressure pad: Attach the pad to a convenient location on your rail or handguard using the included adhesive or zip ties (not supplied). Ensure the cable is routed to avoid snagging.
- 3. Test activation: Press the pad to verify the laser turns on. The digital switch allows both the push button and pressure pad to operate the laser simultaneously.
Important Safety and Care Notes
The Sightmark LoPro Mini is a class IIIa laser product. Avoid direct eye exposure. The housing is IPX5 weather-resistant and shockproof, but do not submerge it. Clean the lens with a soft, dry cloth. The supplied information does not include specific maintenance intervals or disassembly instructions, so refer to the manufacturer's manual for detailed care.