Start with the surface, then the layout
Every setup in this guide begins the same way: six square tiles, one smooth flat surface, and no adhesives. The square shape is the practical advantage here. Square tiles line up cleanly into paths, grids and defined play areas, so you can change the layout between a corridor path and a compact corner without gaps or awkward edges.
Before you choose a layout, decide where the tiles will live. A floor setup needs a smooth, flat surface. A table setup suits hand play and keeps the tiles out of foot traffic. Both are supported ways to use the same set, so the room decides more than the tiles do.
What the set gives you to work with
-
Square Liquid Floor Tiles, Set of 6 for Sensory Play: Square Liquid Floor Tiles come as a set of six squishy, colour-filled tiles that ripple and swirl when stepped, pressed or crawled across. Six tiles is enough for a short path, a 2x3 grid or a small defined zone, which shapes every layout below.
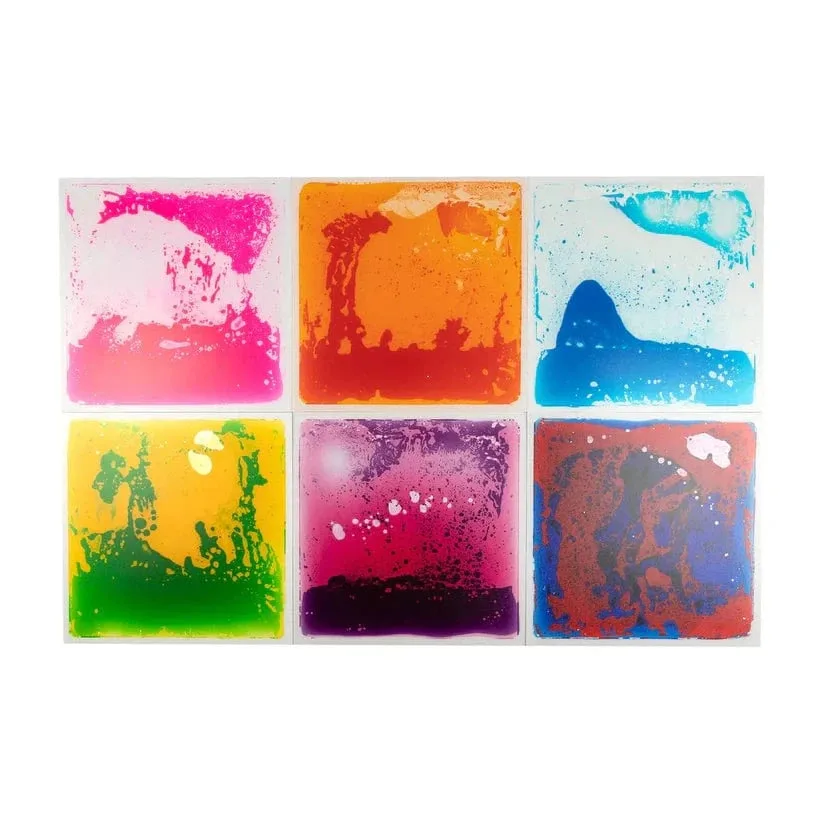
Square Liquid Floor Tiles, Set of 6 for Sensory Play
-
Square Liquid Floor Tiles, Set of 6 for Sensory Play: Pressing a tile makes the colour glide away and then slowly pool back. The slow return is what makes the tiles work for settling and repeated pressing rather than a single quick reaction.
-
Square Liquid Floor Tiles, Set of 6 for Sensory Play: The tiles need no setup or adhesives and wipe clean after use. You can rearrange a layout without fixing anything down, and clean up without dismantling it.
Six layouts to try with one set of six
Treat these as starting points. Because the tiles are not fixed down, you can rebuild any layout in a few minutes.
- 1. The straight calming path: Line all six tiles in a single row on a smooth, flat floor. A path gives a clear start and finish, which suits a child who likes to walk or crawl a route and watch the colour move under each step.
- 2. The 2x3 grid: Arrange the tiles two across and three deep. The grid creates a defined play area rather than a route, so children can move across it in any direction and compare how different tiles respond.
- 3. The calm-down corner: Place three tiles in an L shape in a quiet corner and leave the other three stored nearby. A smaller footprint keeps the corner from becoming a thoroughfare, and the slow colour movement gives busy hands something absorbing to settle into.
- 4. The movement-break station: Set the tiles as a short row beside a play area, not across a doorway. The tiles become a stop on the way to somewhere else, which suits a quick press-and-step break without turning the whole room into the activity.
- 5. Tabletop hand play: Move two or three tiles onto a table and keep the rest on the floor. On a table the tiles work as a hand-play surface: press, watch the colour glide and pool back, then press again. This is the easiest layout to pack away.
- 6. The mixed-shape sensory circuit: Combine the square tiles with the round and triangle tiles to design a fuller sensory circuit. The square tiles give you clean edges for the straight sections; the other shapes can handle the turns and changes of direction.
Checkpoints before you leave a layout in place
- Is the surface smooth and flat?: The tiles are designed to be set on any smooth, flat surface. Rugs, thresholds and uneven flooring are not part of the supported setup.
- Is the layout out of the main walkway?: A path is still a path. Keep floor layouts to the side of busy routes so the tiles stay a deliberate stop rather than a trip hazard.
- Can you rebuild it without adhesives?: No setup or adhesives are needed, so a good layout is one you can lift and rearrange. If a layout only works because something is holding it down, change the layout.
- Is the age range confirmed for your child?: The supplied product information does not state an age range. Check the product page or packaging for the listed age guidance before buying for a particular child.
What the tiles actually do for sensory play
The appeal is simple and physical. The colour reacts to every press, glides away, and slowly pools back. That slow return is the part that holds attention: it rewards a second press, then a third, without asking the child to do anything different each time.
That is also why the tiles suit calm-down moments and busy hands alike. There is no score, no timer and no correct way to press. The movement is quietly absorbing, and the gentle give underfoot adds a second sensation for children who are stepping or crawling rather than pressing with a hand.
Be realistic about what the tiles are not. They are a sensory play surface, not a mat for rough equipment or a substitute for a soft fall zone. The supplied information describes play and movement, not impact protection, so keep heavy or sharp play elsewhere.
Floor layout or table play: which suits your room
- Floor layout: Best when the goal is movement, stepping and crawling. Needs a smooth, flat surface and enough clear space to keep the tiles out of walkways. Harder to pack away, easier to share.
- Table play: Best when the goal is hand play and a quick reset. Uses fewer tiles, keeps the floor clear and packs away in seconds. Does not give the underfoot sensation.
- Mixed-shape circuit: Best when you already have round or triangle tiles and want a longer route. Uses the square tiles for straight runs and clean edges, with other shapes for turns.
Where the set fits in your sensory space
- Square Liquid Floor Tiles, Set of 6 for Sensory Play: The set is listed at USD 258.96, with a catalog comparison price of USD 349.95. Price is part of the setup decision: a six-tile set supports a full path or grid, so compare it against buying several smaller sensory items to fill the same space.
- Square Liquid Floor Tiles, Set of 6 for Sensory Play: The tiles can be combined with the round and triangle tiles to design a full sensory circuit. If you already own other shapes, the squares extend an existing circuit rather than starting a separate one.
- Square Liquid Floor Tiles, Set of 6 for Sensory Play: The tiles wipe clean after use and need no setup or adhesives. A layout you can clean and rebuild is more likely to stay in use in a busy room.
Keeping the setup working week to week
Rotate layouts rather than leaving one in place indefinitely. A path one week and a grid the next changes the way children move across the tiles without buying anything new. The square shape makes that rotation quick, because the tiles line up cleanly in either arrangement.
Wipe the tiles clean after use, and check the surface underneath before you rebuild. If a tile has been moved onto a rug or an uneven patch, put it back on a smooth, flat surface before play continues.
Finally, keep the set's limits in view. The supplied information does not list an age range, a weight limit or slip resistance, so check the product page and packaging for those details before relying on the tiles for a particular child or a public space.