Start With the Model You Actually Have
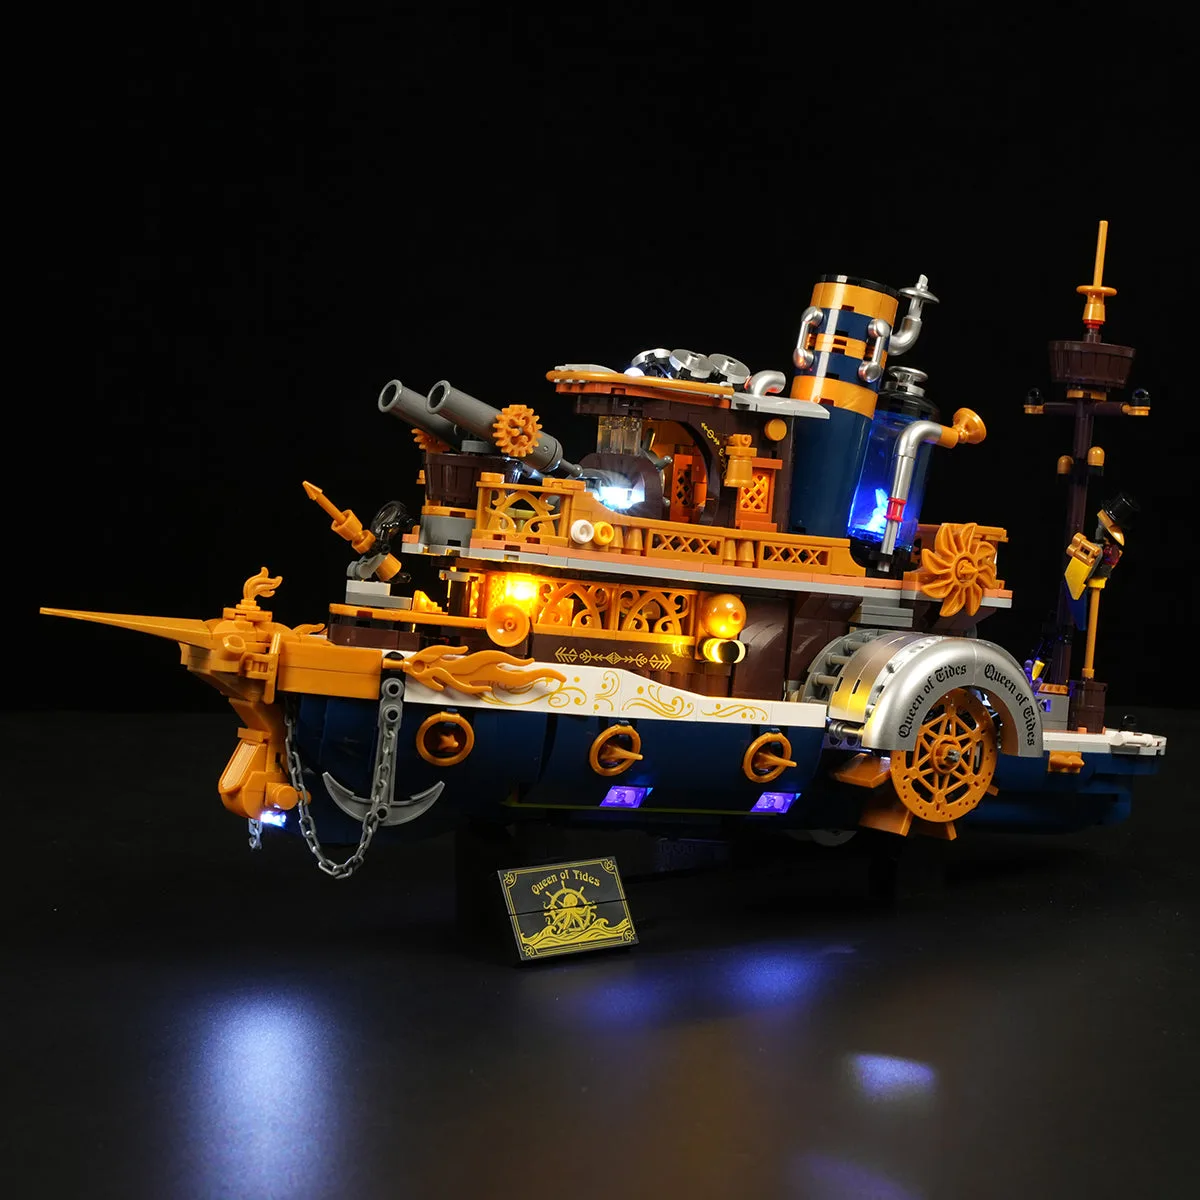
The Steamboat is a 1,792-piece build with nine brick bags, 21 LED lights and a clear assembly guide. It is designed for dynamic play, not just static display: hidden wheels roll the ship forward, the paddle wheels turn, and the chimney exhaust system pumps as it moves. That matters for display because you need a surface that lets the ship roll a short distance without falling, and enough clearance for the moving parts.
Before choosing a shelf, confirm the footprint of the assembled model from the guide. The supplied information does not list finished dimensions, so measure your planned surface after the hull and paddle wheels are complete rather than guessing from the piece count.
Display-Relevant Features of the Steamboat
-
Steamboat: 1,792 pieces, 9 brick bags, 21 LED lights and a clear assembly guide. The light count tells you how much wiring to plan for, and the bag count helps you stage the build in sections before display.
Steamboat
-
Steamboat: The upper cockpit and energy tank lift off directly for inspection of the ship's structure. You can dust or adjust interior lighting without dismantling the whole model, so leave vertical clearance above the deck.
-
Steamboat: Hidden wheels roll the ship forward; the paddle wheels turn and the chimney exhaust system pumps with movement. A display surface with a slight lip or a marked rolling zone keeps the ship from rolling off the shelf.
-
Steamboat: The propeller and steering mechanism operate synchronously during propulsion, and the bow cannons and crossbows adjust to multiple angles. Angle the cannons and rudder before the ship goes on the shelf; reaching over a lit model to adjust them later is awkward.
Set Up the Display in Four Checkpoints
Work through these in order so you are not moving a lit model repeatedly.
- 1. Choose a stable, reachable surface: Pick a shelf or table at a height where you can see the deck and reach the battery compartment. The Steamboat rolls on hidden wheels, so avoid a surface with a steep slope. A shallow tray or a strip of non-slip mat under the hull gives the wheels something to grip without hiding them.
- 2. Plan the light route before the final build steps: The set includes 21 LED lights. As you follow the assembly guide, keep the light cables running along the inside of the hull and up toward the cockpit rather than across the outer hull. This keeps the Victorian lamp glow and the blue-purple sea glow visible without loose wires crossing the paddle wheels.
- 3. Leave clearance for the quick-release decks: The upper cockpit and energy tank lift straight up. Check that your shelf above or the back of your display case leaves enough room to lift them clear. If you display the ship inside a glass case, test the lift before closing the case.
- 4. Set the pose, then check the battery access: Adjust the rudder, anchor, hatches, cannons and crossbows before the final placement. The battery compartment is under a flip-down bottom panel that also hides a treasure map easter egg. Make sure that panel faces outward or is reachable without tipping the ship.
Lighting the Steamboat for Day and Night
The Steamboat mixes warm Victorian-style lamps with a deep blue-purple glow at the sea surface. Treat those as two separate lighting zones when you place the model.
- Keep the warm lamps unobstructed: The cockpit and upper deck carry the warm lamps. Avoid placing the ship so that a shelf above casts a hard shadow over the deck; a little ambient room light lets the warm lamps read as lamps rather than as the only light source.
- Let the blue-purple glow sit low: The sea-surface glow comes from the lower hull area. A dark shelf or a matte dark base makes that glow more visible than a bright white shelf, which reflects and washes it out.
- Use the rolling feature as a display moment: Because the ship rolls and the paddle wheels turn, you can place it at the front edge of a shelf with a short runway behind it. Roll it forward slowly for guests, then return it to its resting spot.
- Keep the 21 lights on a reachable circuit: The supplied information does not specify battery type or runtime, so check the assembly guide and battery box for those details. Whatever the power source, route the switch or battery access to the side you can reach without moving the ship.
Shelf and Room Placement Tips
A steampunk build like the Steamboat reads best at eye level or slightly below, where you can see the deck details and the paddle wheels at the same time. Avoid a top shelf that puts the model above eye level; the quick-release cockpit and the chimney become hard to see and harder to lift.
If you display several steampunk sets together, give the Steamboat its own zone. Its rolling wheels and moving chimney make it a hands-on piece, and neighboring models on the same shelf may get bumped. A separate shelf, or a clear gap of a few inches on each side, keeps the paddle wheels clear of other builds.
For a simple steampunk shelf display, place the ship on a dark mat, angle it slightly toward the room so the bow cannons and helm are visible, and keep the background plain. The model already carries a lot of detail; a busy backdrop competes with the lamps and the sea glow.
What to Check Before You Call It Finished
Roll the ship forward a short distance and watch the paddle wheels and chimney. If anything catches, stop and check the light cables inside the hull. Lift the cockpit and energy tank once to confirm they clear the shelf above. Open and close the battery compartment to confirm you can reach it. Finally, turn the lights on in a dim room and check that the warm lamps and the blue-purple glow are both visible from your normal viewing angle.
The supplied information does not confirm finished dimensions, battery type, or whether the LED lights are pre-wired or require separate assembly beyond the included guide. Use the clear assembly guide for those specifics, and measure your own shelf after the build rather than relying on estimates.