Quick Answer
To build the Delta Plus MG successfully, follow the manual in order, but pay extra attention to the transformation joints and the finned binders to avoid stress marks and loose connections.
Why the Delta Plus MG Needs Careful Handling
The Delta Plus MG is a transformable mobile suit, which means it has more moving parts and locking mechanisms than a typical master grade kit. These parts are essential for the transformation but can be fragile if you force them. Taking your time during assembly and testing the movement before finalizing each joint will save you from broken pieces later.
Another point to keep in mind is the kit's color scheme. The Delta Plus uses a lot of glossy surfaces, so nub marks can be more visible. Using a glass file or sanding sponges can help you achieve a cleaner finish. If you're new to master grade kits, this build is a good challenge but not the easiest starting point.
Step-by-Step Build Process
- Prepare Your Workspace and Tools: Clear a flat surface with good lighting. Gather nippers, a hobby knife, sanding tools, and a runner organizer. Check that all runners are present by comparing them with the manual's runner list. Missing parts are rare but easier to fix before you start cutting. Check the runner list before cutting to avoid surprises.
- Cut and Clean Parts Runner by Runner: Follow the manual's order, cutting parts off the runner with a sharp nipper, leaving a small nub. Trim the nub with a hobby knife, then sand the area with fine-grit sandpaper. For the glossy parts, use a glass file to avoid scratches. Do not cut multiple parts at once; clean each part before moving to the next. Clean each part immediately to keep track and avoid losing pieces.
- Assemble the Inner Frame: Build the inner frame first, as the manual indicates. Fit joints together without forcing. If a joint is tight, gently sand the peg or use a small amount of silicone grease. Test the range of motion for arms and legs before attaching armor. This is crucial for the transformation later. Test joint movement now to avoid stress marks after armor is on.
- Attach Armor and Detail Parts: Carefully snap on the armor pieces, following the manual. For the finned binders, align the tabs precisely before pressing. If a part doesn't fit, don't force it—check for leftover nubs or misaligned pegs. Use tweezers for small parts to avoid dropping them. If a part doesn't fit, stop and inspect the connection point.
- Apply Decals and Panel Lining: After assembly, apply the included foil stickers or water-slide decals if you have them. Use a cotton swab to press them down firmly. For panel lining, use a fine-tip marker or panel line accent color, then clean up with a cotton swab and lighter fluid. Let it dry completely before handling. Decals and panel lining are optional but add depth to the kit.
- Transform and Pose the Kit: Once the kit is complete, try the transformation from mobile suit to wave rider mode. Follow the manual's transformation steps, and be gentle with the locking mechanisms. If a part feels stuck, check for obstructions. Pose the kit in both modes to display your work. Transform slowly and do not force any joint.
Product Facts
-
Delta Plus MG: The Delta Plus MG is a Standard edition model kit from the Gundam series, categorized under Other Products. This means the kit comes with the standard runners and manual, so you'll need to rely on the included instructions and your own detailing skills for a polished build.
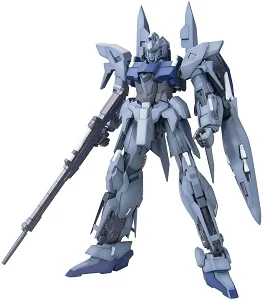
Delta Plus MG