What the Taco Pouch Bag #26 Weeds and Flowers Kit Includes
The Taco Pouch Bag #26 Weeds and Flowers kit gives you everything you need to sew a small, grab-and-go pouch. The bag is made from durable waterproof canvas printed in-house in the USA, giving it a vibrant, high-quality finish. Inside the kit, you'll find the printed canvas panel, a zipper, and a complete step-by-step video tutorial. This makes it a solid choice for anyone wanting a guided sewing experience without sourcing materials separately.
Kit Contents at a Glance
-
Taco Pouch Bag #26 - Weeds and Flowers: Made from durable waterproof canvas, each bag is designed and printed in-house in the USA. The waterproof canvas means your finished pouch can handle light spills and daily use, making it practical for cosmetics, travel items, or ditty bags.
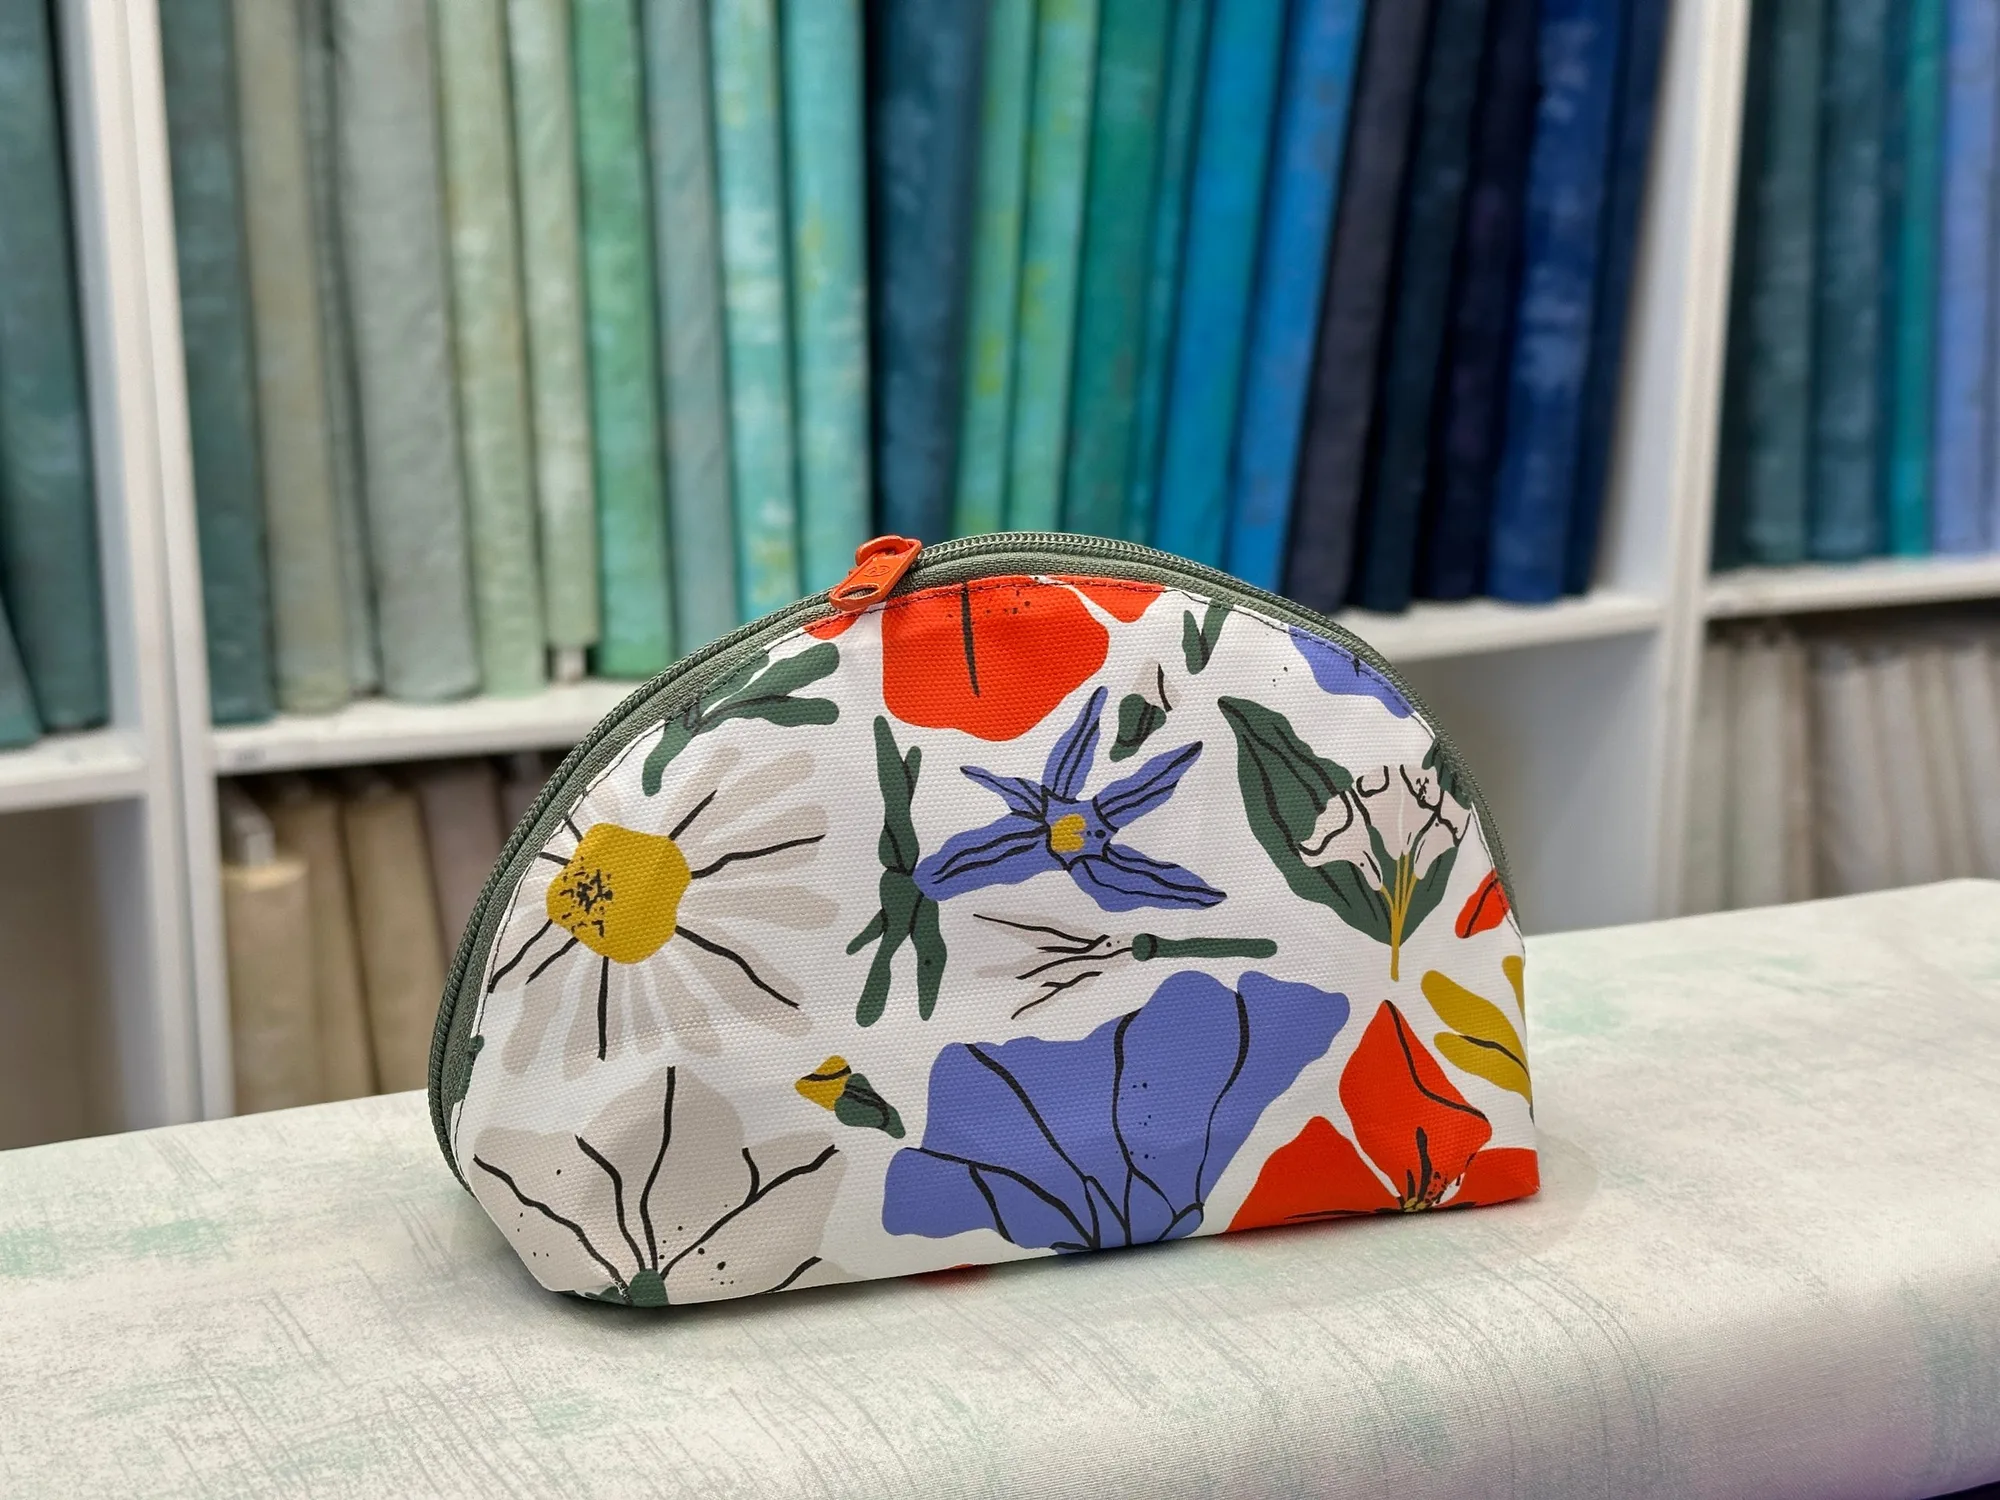
Taco Pouch Bag #26 - Weeds and Flowers
-
Taco Pouch Bag #26 - Weeds and Flowers: This kit includes a zipper and a complete step-by-step video tutorial to help you make the most of your new bag. Having the zipper included saves a trip to the store, and the video tutorial gives visual guidance for each step, which is especially helpful for beginners learning zipper pouch sewing.
How to Sew the Taco Pouch Bag #26 Weeds and Flowers
Follow these general steps to assemble your pouch. Refer to the included video tutorial for exact sequence and technique.
- Prepare the fabric and zipper: Lay out the waterproof canvas panel. Have the included zipper ready. Because the canvas is waterproof, it may feel slightly thicker than quilting cotton. Use a standard sewing machine needle suitable for medium-weight fabrics.
- Attach the zipper: Follow the video tutorial to align the zipper with the top edge of the canvas. Stitch slowly, using a zipper foot if available. The waterproof coating can cause the presser foot to stick; a walking foot or tissue paper on the fabric can help it feed evenly.
- Sew the side and bottom seams: With the zipper partially open (so you can turn the pouch later), fold the fabric right sides together and sew along the side and bottom edges. Backstitch at the start and end for security.
- Box the corners (optional): If you want a flat-bottomed pouch, pinch each bottom corner into a triangle, sew across the tip, and trim the excess. This step is shown in the video tutorial.
- Turn and finish: Turn the pouch right side out through the open zipper. Push out the corners gently with a blunt tool. Zip and unzip to check the zipper moves smoothly.
Working with Waterproof Canvas
The Taco Pouch is made from durable waterproof canvas, which behaves differently than standard quilting cotton. The coating can make the fabric less porous, so pins may leave small holes that remain visible. Use fine pins and avoid repositioning. The fabric also has less give, so clip seams carefully rather than relying on stretch. If your machine struggles to feed the canvas, try a walking foot or place a piece of tissue paper under the presser foot and tear it away after stitching.