Start with the patch's actual footprint
The Talk Shit Get Bit Patch measures 2" x 1" and has hook backing. That means it attaches to loop fastener, not directly to nylon webbing or fabric. Before you pick a spot, confirm the surface you have in mind is loop fastener and that the patch's full footprint fits there without hanging over an edge.
A patch that overhangs a curved or narrow section will lift at the corners and catch on things. Measure the loop panel on your dog's collar or harness and compare it to the patch's 2" x 1" size. If the panel is smaller in either direction, this patch is not the right fit for that spot.
What the Talk Shit Get Bit Patch gives you to work with
-
Talk Shit Get Bit Patch (2" x 1"): The patch is 2" x 1" with hook backing and can be added to any of the collars or anything that has loop fastener. The hook backing and loop-fastener requirement determine where the patch can go and how secure it will be.
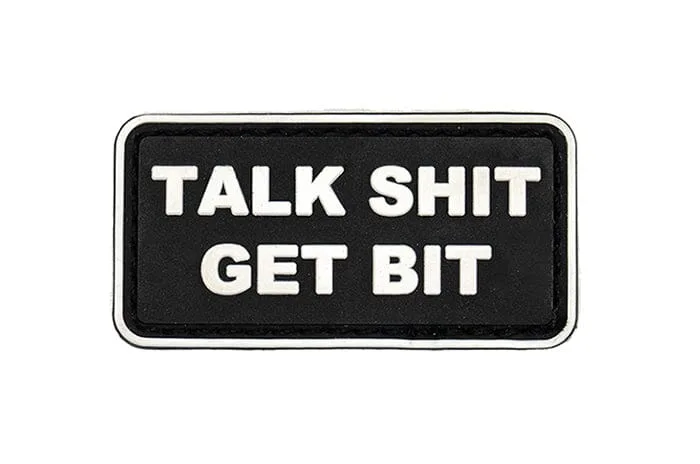
Talk Shit Get Bit Patch (2" x 1")
-
Talk Shit Get Bit Patch (2" x 1"): It is designed specifically for the over-built dog collars and combines a playful warning with a serious message, making it suitable for working dogs, K9 units, and hardworking canines. This tells you the intended setting is a collar with a loop panel, and the tone suits working-dog gear rather than formal or delicate accessories.
How to choose and set the placement
- Find the loop panel: Check the collar or harness for a section of loop fastener. The patch needs loop fastener to grip; smooth nylon or plain fabric will not hold it.
- Check the available space: Compare the loop panel's dimensions to the patch's 2" x 1" footprint. Leave a small margin so the edges sit fully on the panel.
- Pick a readable spot: Choose a position that stays visible when the collar or harness is worn and is not covered by a leash, handle, or your dog's body. Avoid areas that rub against the legs or ground.
- Press the patch firmly into place: Align the patch and press it down across its full surface. Hook-and-loop holds best when the two sides are fully engaged.
- Check the fit on your dog: Put the collar or harness on your dog and confirm the patch does not catch on anything or sit under pressure. Adjust the position if needed.
Collar vs. harness: where the patch works better
- On a collar: The patch is designed for the over-built collars, so a collar with a loop panel is the most direct fit. A collar also keeps the patch visible near the dog's neck, but check that it does not sit under the leash attachment or buckle.
- On a harness: A harness can work if it has a loop-fastener panel large enough for the 2" x 1" patch. Harness placement can be more visible on walks, but avoid spots that rub under the front legs or contact the ground when the dog lies down.
Keeping the patch readable and in place
- Keep the loop panel clean: Dirt, fur, and debris reduce hook-and-loop grip. Brush off the panel before attaching the patch, and check it periodically.
- Avoid high-flex areas: Placing the patch across a sharp bend or near a buckle can cause the edges to lift. A flatter section of the loop panel holds better.
- Re-seat after removal: If you take the patch off, press it back down firmly when you return it. Hook-and-loop needs full contact to stay put.
When the 2" x 1" size is the right call
This patch suits a collar or harness with a loop panel that fits its 2" x 1" footprint. It is a compact way to add attitude to working-dog gear without covering a large area. If your gear lacks loop fastener, or the available panel is smaller than the patch, choose a different attachment point or a different patch.
The supplied information does not include care instructions for the patch itself, so follow the care guidance for your collar or harness and avoid harsh treatment that could damage the hook backing. For cleaning the collar, check the manufacturer's instructions for that specific collar.