When the lid stops sealing, check the collar first
A trainer cup that suddenly leaks or feels loose at the rim often has a tired collar rather than a damaged cup. The collar is the ring that holds the sealing O-ring against the cup, so once it wears or the O-ring stops sitting snugly, the lid no longer seals the way it should.
Before you replace the whole cup, confirm the cup model and check the collar and O-ring. The Replacement Collars for Miracle® 360° Trainer Cups, 2pk gives you two collars with sealing O-rings, so you can restore the seal on a cup you already own.
What the 2pk replacement collar set includes
-
Replacement Collars for Miracle® 360° Trainer Cups, 2pk: Includes (2) Miracle® 360° Trainer Cup Collars with Sealing O-Rings. Two complete collar-and-O-ring sets let you refresh one cup now and keep a spare for the next wear cycle.
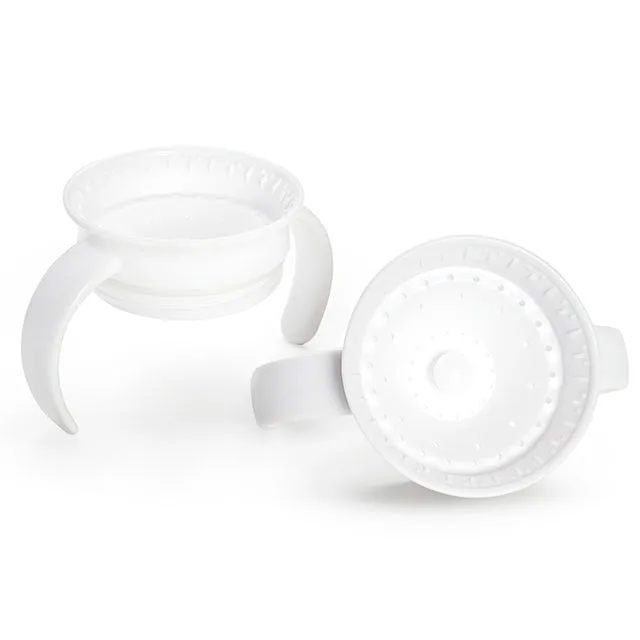
Replacement Collars for Miracle® 360° Trainer Cups, 2pk
-
Replacement Collars for Miracle® 360° Trainer Cups, 2pk: Replacement for the Miracle® 360° 7oz Trainer Cup. If your trainer cup is the 7oz Miracle 360°, this is the direct replacement part.
-
Replacement Collars for Miracle® 360° Trainer Cups, 2pk: Valves are sold separately. A worn valve is a different part; this set does not include one, so check your valve separately if the cup still leaks after a collar swap.
Check your cup size before you order
The collars are made for the 7oz Miracle® 360° Trainer Cup, and they also fit the 6oz, 9oz, 10oz and 14oz Miracle® 360° cups. That covers a lot of the Miracle 360° range, but it is not universal.
They do not fit the Miracle® 360° Insulated Sticker Sippy Cup, the Miracle® 360° Fruit Infuser Sippy Cup, or the Miracle® 360° Hydration Bottles. If you own one of those, this 2pk is not the right part, even though the cups look similar at the rim.
How to fit a replacement collar
The supplied product record confirms what the set contains and which cups it fits, but it does not include a manufacturer step-by-step fitting procedure. Use the sequence below as a careful handling routine, and check your cup's own instructions if you have them.
- Match the cup first: Confirm your cup is a 7oz, 6oz, 9oz, 10oz or 14oz Miracle® 360° cup and not one of the excluded models. Fit starts with the right part.
- Separate the old collar and O-ring: Remove the worn collar and its sealing O-ring from the lid so you can see both parts clearly. Keep the valve aside; it is a separate part and is not included in this set.
- Seat the new O-ring in the new collar: The set supplies the collar and sealing O-ring together. Make sure the O-ring sits evenly in the collar groove before you place it on the cup.
- Fit the collar to the lid and cup: Place the new collar where the old one sat, then assemble the lid onto the cup as usual. Check that the collar sits flat and the lid threads engage smoothly.
- Test the seal with water: Fill with water and check around the rim before handing the cup to your child. If it still leaks, recheck the O-ring seating and confirm the valve is in place and in good condition.
Signs the collar, not the cup, is the problem
- Leaks around the rim with the lid tightened: If water escapes at the seam where the lid meets the cup, the collar or O-ring is the first thing to inspect.
- The lid no longer sits flat: A collar that is warped, stretched or not seated evenly can keep the lid from sitting flush.
- The O-ring looks worn or will not stay in place: The set includes new sealing O-rings, so a tired ring is a reason to replace the collar set rather than keep reseating the old one.
- The cup is fine but the seal is not: If the cup body and lid are intact and only the seal has failed, a 2pk collar replacement is the lower-waste fix.
What this replacement set does not cover
The supplied information does not include a cleaning routine, sterilization guidance or a replacement schedule for the collars. It also does not confirm valve compatibility beyond noting that valves are sold separately. If your cup still leaks after a new collar and O-ring, check the valve and the cup body rather than assuming the new collar is at fault.
The collars are BPA-free, and the set is available in a Standard option. Beyond that, the record does not list materials or care limits for the collars, so follow the care guidance that came with your cup.
The part that solves the seal
- Replacement Collars for Miracle® 360° Trainer Cups, 2pk: BPA-free. A material detail many parents check when buying replacement drinkware parts.
- Replacement Collars for Miracle® 360° Trainer Cups, 2pk: Also compatible with 6oz, 9oz, 10oz and 14oz Miracle® 360° cups. One 2pk can serve several cup sizes in the same household, as long as the cup is not an excluded model.
- Replacement Collars for Miracle® 360° Trainer Cups, 2pk: Not for the Miracle® 360° Insulated Sticker Sippy Cup, Fruit Infuser Sippy Cup, or Hydration Bottles. Checking this list before ordering avoids a return and a cup that still leaks.