Why add bands to your TRX workout?
Resistance bands can complement suspension training by adding variable resistance or assisting movements. The TRX BANDIT is designed to make that combination more comfortable by providing a secure, slip-free grip that eliminates hand-to-band pinching. This guide explains how to use the TRX BANDIT with your suspension trainer, from choosing the right band to caring for the grips.
What the TRX BANDIT includes
-
TRX BANDIT®: TRX Bandit Kit contains two handles and two pairs of strength bands: two 5–15 lb bands and two 15–30 lb bands. You get two resistance levels to progress or regress exercises, and two handles allow for bilateral use or sharing.
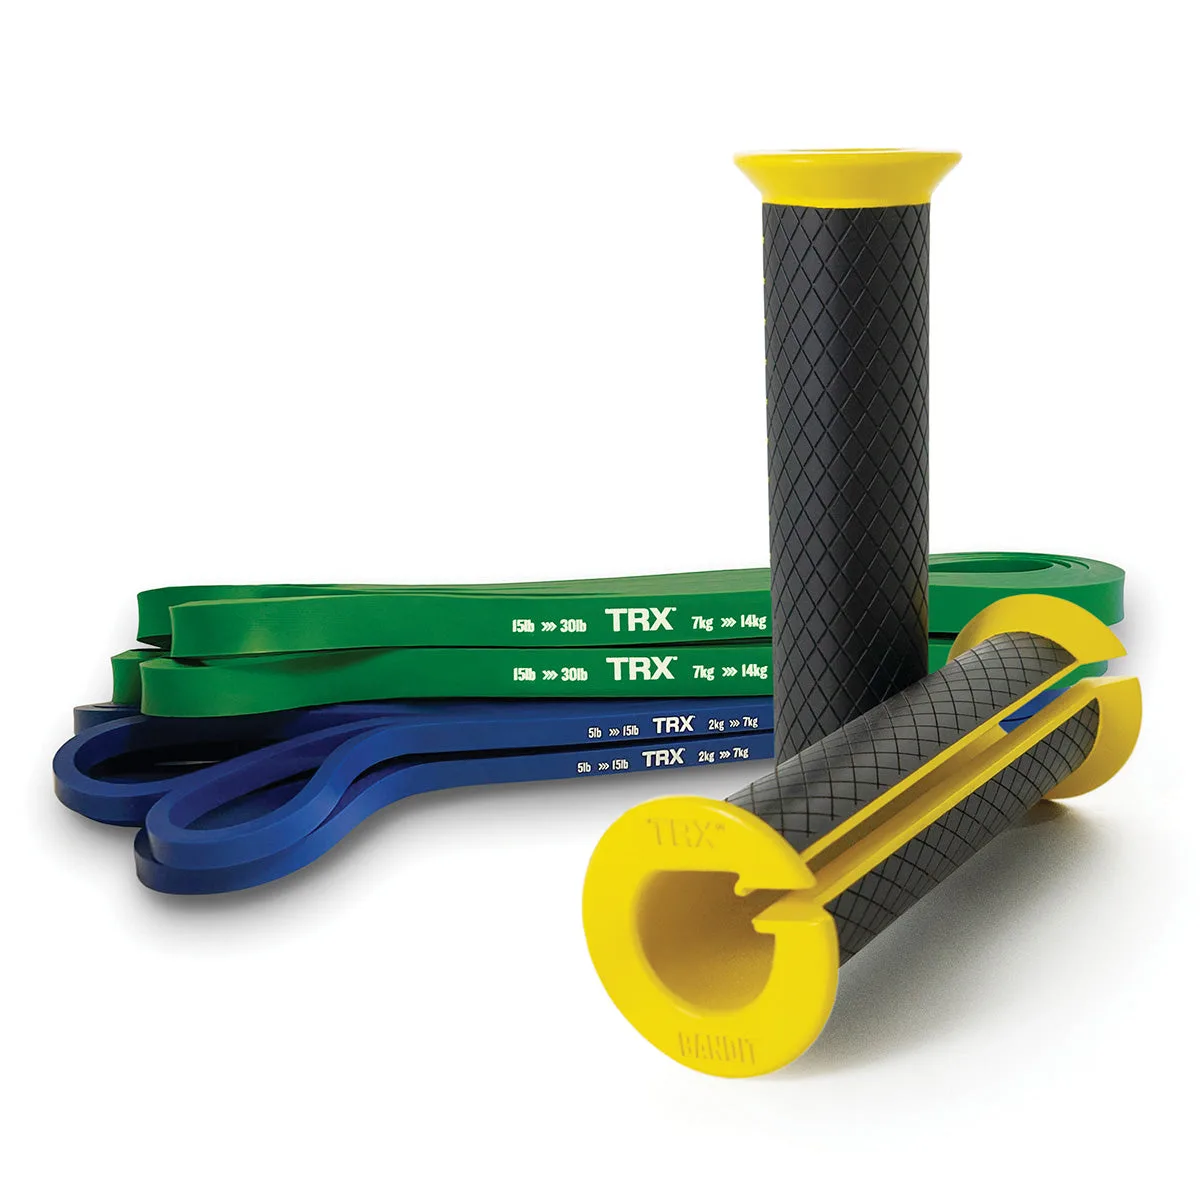
TRX BANDIT®
-
TRX BANDIT®: The handles feature a slip-free notched inner design and rubber grips made from the same premium materials as TRX Suspension Trainer handles. This design reduces pinching and irritation while providing a secure hold during resistance work.
How to set up and use the TRX BANDIT
Follow these steps to integrate the TRX BANDIT into your suspension workout. Always inspect bands and handles before use.
- Choose your band: Select the 5–15 lb band for lighter resistance or the 15–30 lb band for heavier resistance. Start with the lighter band to master form.
- Attach the band to the handle: Loop the band securely around the notched inner section of the handle. The slip-free design helps keep the band in place.
- Connect to your suspension trainer: Attach the other end of the band to a stable anchor point or to your TRX Suspension Trainer, following the trainer's instructions. Ensure the connection is secure.
- Grip and test: Hold the handle with the rubber grip. Gently pull to test the resistance and ensure the band is properly seated before beginning your exercise.
TRX BANDIT exercise ideas
These exercises pair well with the TRX BANDIT's grip design. Adjust band tension by stepping closer or farther from the anchor.
- Band-resisted squats: Stand on the band and hold the handles at shoulder height. Perform squats while keeping tension on the bands.
- Bicep curls: Anchor the band under your feet and curl the handles toward your shoulders, maintaining a neutral wrist.
- Rows: Anchor the band to a low point and pull the handles toward your torso, squeezing your shoulder blades.
- Chest press: Anchor the band behind you and press the handles forward, extending your arms while keeping your core engaged.
TRX resistance band training tips
To get the most from your TRX BANDIT, focus on controlled movements and proper alignment. Keep your wrists straight and avoid jerking the bands. Because the handles are designed to eliminate pinching, you can concentrate on smooth, full-range reps. If you feel the band slipping, check that it is properly seated in the notched inner section. Always use the band that allows you to complete reps with good form.
Caring for your TRX BANDIT
Proper care extends the life of your bands and handles. Follow these simple tips.
- Inspect before each use: Check bands for nicks, tears, or wear. Replace if damaged.
- Clean handles regularly: Wipe the rubber grips with a damp cloth after use to remove sweat and dirt. Avoid harsh chemicals.
- Store properly: Keep bands away from direct sunlight and heat. Loosely coil bands to prevent tangling or stretching.
- Avoid sharp objects: Keep bands away from sharp edges that could puncture or tear them.
Safety and compatibility notes
The TRX BANDIT is designed for resistance workouts, but always ensure your suspension trainer is securely anchored. The product carries a California Proposition 65 warning, which indicates that it can expose you to chemicals known to cause cancer, birth defects, or other reproductive harm. For more information, visit www.P65Warnings.ca.gov. If you have concerns, consult the warning before use. The catalog does not specify a maximum user weight or detailed compatibility with all TRX models, so verify with TRX if you have a non-standard setup.