Quick answer
Apply flag transfers to medieval and Dark Age shields by first cutting out the design, soaking it briefly in water, sliding it onto the shield, and gently pressing it flat. This guide covers each step and the common pitfalls to watch for.
Why transfers beat freehand painting for shields
Flag transfers give you crisp, consistent heraldry that matches historical patterns without hours of brushwork. For Dark Age and medieval armies, where shields carry unit identity, transfers keep your force looking uniform and professional. The trade-off is that you need a smooth, sealed surface for the decal to bond properly—rough plastic or bare metal will cause peeling.
Choosing the right transfer for your shield shape
Round shields (common in Dark Age and Viking forces) and heater shields (typical for high medieval knights) have different curves. A transfer designed for a flat banner may wrinkle on a domed shield. The ART(GB_ROUND)3 set is sized for round shields, while the ETR(GM)6 set works on both round and flat surfaces. Always check the image description for size and intended shape before cutting.
Step-by-step guide to applying flag transfers on shields
- Prepare the shield surface: Paint and varnish your shield with a gloss or satin finish. A smooth, sealed surface helps the transfer adhere without silvering (trapped air that looks like a white haze). Common mistake: applying transfers over matte paint—the decal will not bond evenly and may peel after handling.
- Cut out the transfer: Use a sharp hobby knife or scissors to cut as close to the design as possible. Leaving a wide clear border makes the decal harder to position and more likely to wrinkle. Common mistake: cutting too far from the design, which leaves excess film that lifts at the edges.
- Soak the transfer in water: Dip the cut transfer in room-temperature water for 10-20 seconds until the backing paper releases the design. Do not oversoak—the decal becomes too fragile to slide. Common mistake: using hot water, which softens the decal too quickly and causes tearing.
- Slide the transfer onto the shield: Slide the decal off the backing paper onto the shield surface. Use a damp brush to nudge it into position. Work from the center outward to push out air bubbles. Common mistake: trying to reposition a decal that has already started drying—it will tear or leave adhesive residue.
- Press flat and remove excess water: Gently press a soft cloth or cotton swab from the center to the edges to squeeze out water and air. Let it dry completely (at least 12 hours) before handling or applying a final matte varnish. Common mistake: rubbing too hard, which can shift the decal or leave fibers stuck to the wet surface.
Product facts
-
ART(GB_ROUND)3: All transfers come un-cut. Please view larger image to see product description. You need to cut each design individually before soaking, so keep a sharp hobby knife and steady hand ready.
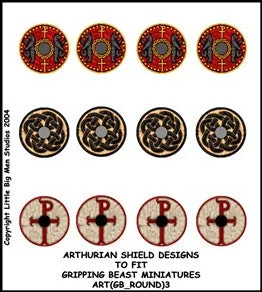
ART(GB_ROUND)3
-
ETR(GM)6: All transfers come un-cut. Please view larger image to see product description. The ETR(GM)6 set includes multiple designs—cut them out separately to avoid mixing up different heraldic patterns.
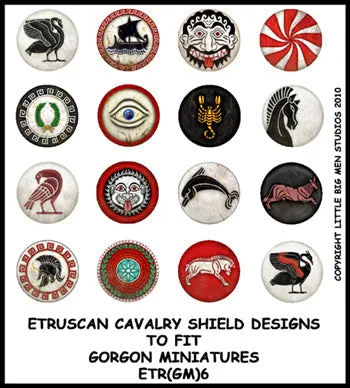
ETR(GM)6