Quick answer
Use miter clamp pliers to open miter clamps without straining your hand and a miter clamp clip to hold multiple clamps for one-handed operation, making tight miter joints faster and more consistent.
Why dedicated tools help with miter joints
Clamping miter joints often means reaching into tight corners or holding clamps open while positioning them. Without the right tool, you can end up with misaligned joints or sore hands from repeated pinching. Miter clamp pliers let you open the clamp mechanism without direct hand force, and a miter clamp clip keeps your clamps organized and ready to use.
The Collins Miter Clamp Pliers are designed specifically for this task. They eliminate the need to manually pry open miter clamps, which can be tough on your thumb and fingers over a long project. The Collins Miter Clamp Clip holds 12 or more clamps, so you can grab one with one hand while keeping your other hand free to position the workpiece.
How to use miter clamp pliers and clip for tight joints
- Step 1: Load clamps onto the clip: Slide the leg of each miter clamp against the back plate of the Collins Miter Clamp Clip until it snaps into place. Load 12 or more clamps so they are ready for one-handed removal. Check that each clamp is fully seated; a partially clipped clamp may fall off when you grab it.
- Step 2: Open the clamp with pliers: Insert the Collins Miter Clamp Pliers into the clamp's opening mechanism. Squeeze the handles to spread the clamp jaws. Keep the clamp open as you lift it off the clip with your other hand. Avoid over-squeezing—the clamp only needs to open enough to fit over the workpiece, not fully extended.
- Step 3: Position and release the clamp: While holding the clamp open with the pliers, place it over the miter joint. Release the pliers slowly to let the clamp close evenly onto the joint. Adjust the clamp position if needed before it fully tightens. Make sure the clamp pads are centered on the joint; an off-center clamp can pull the joint out of alignment.
- Step 4: Tighten and check alignment: Tighten the clamp screw by hand or with a wrench until the joint is snug. Use a square to verify the miter is 90 degrees (or your target angle). Adjust by loosening slightly and repositioning if necessary. Do not overtighten—this can cause the joint to bow or the workpiece to crack, especially with softwoods.
- Step 5: Repeat for remaining joints: Grab the next clamp from the clip with one hand while holding the pliers in the other. Open, position, and release as before. Work in sequence around the frame or assembly. If a clamp is stuck on the clip, use the pliers to open it slightly while on the clip before removing—don't yank it off.
Products that make miter clamping easier
-
Collins Miter Clamp Pliers: Collins Miter Clamp Pliers allows you to open up miter clamps and place the clamp where needed, eliminating strain on the hand and thumb doing it manually. This means you can work longer without hand fatigue and get clamps into tight spots more accurately.

Collins Miter Clamp Pliers
-
Collins Miter Clamp Clip: Holds 12+ miter clamps for easy one hand operations. Slide a leg of a clamp against the back plate to clip on, clip off. Keeps your clamps organized and within reach, so you can quickly grab one without fumbling, speeding up repetitive clamping tasks.
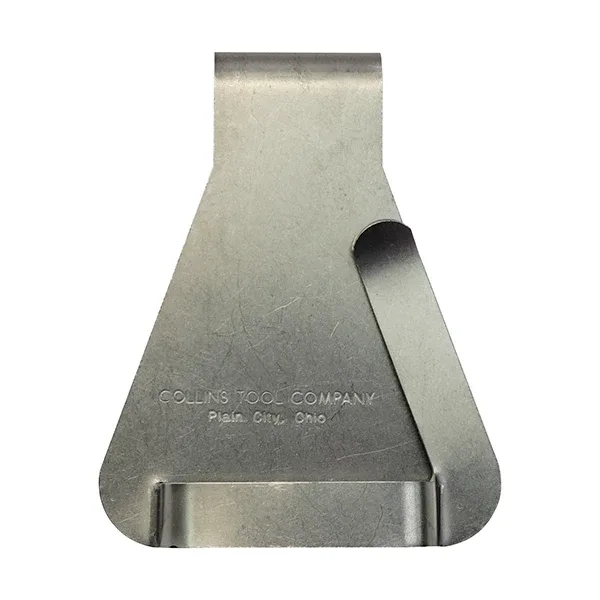
Collins Miter Clamp Clip